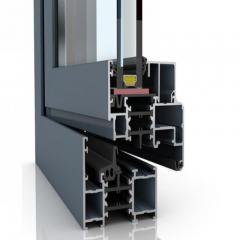
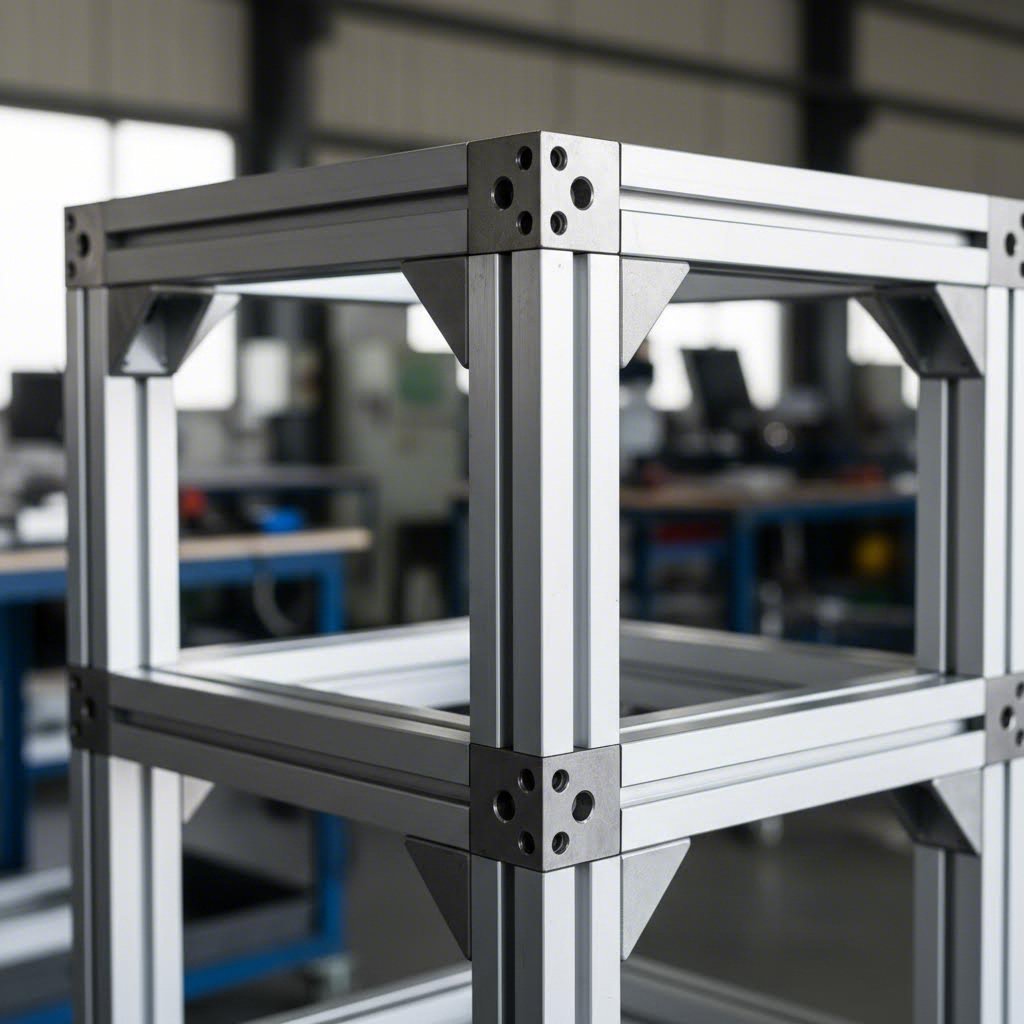
Imagine building a structure where you can attach components anywhere you want, reconfigure it whenever needs change, and never pick up a welding torch. That's exactly what aluminum extrusion profiles with T-slots make possible. These specialized extruded aluminum sections feature distinctive T-shaped channels running along their length, creating a versatile mounting system that has transformed how industries approach modular construction.
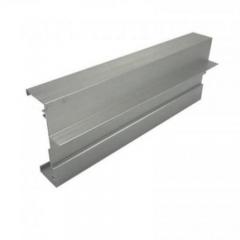
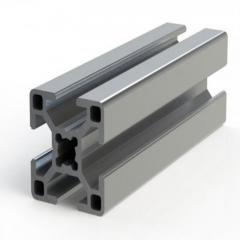
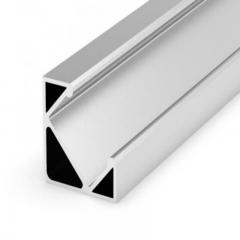
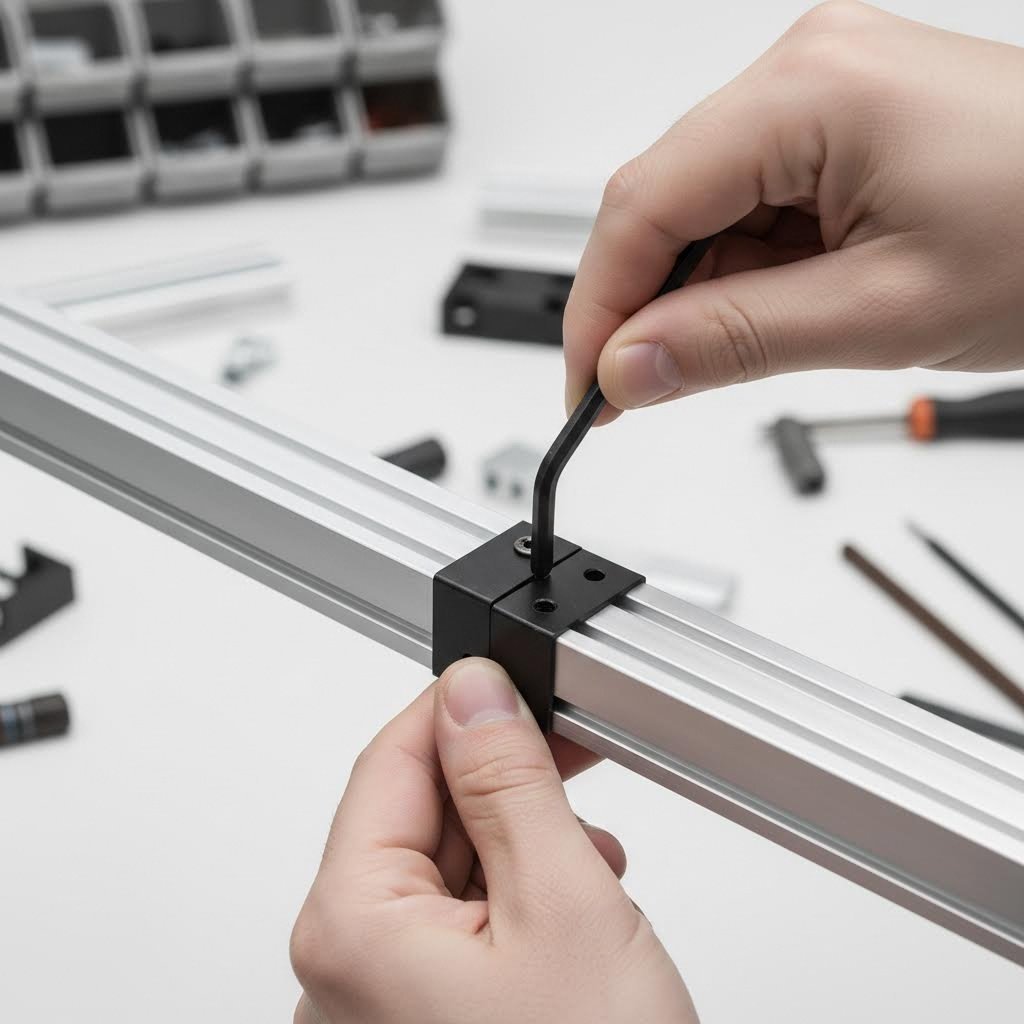
At its core, a T-slot aluminum extrusion is a precisely manufactured aluminum profile with integrated grooves shaped like the letter "T." These t slotted channels serve as secure attachment points for specialized hardware, including T-nuts, bolts, and brackets. The genius lies in the geometry: components slide into the slot and lock firmly in place when tightened, creating rock-solid mechanical connections without any drilling, cutting, or permanent modifications to the profile itself.
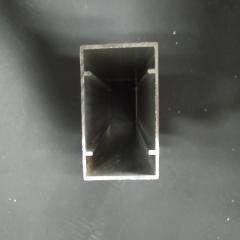
Every T-slot profile shares fundamental design elements that make the system work. The main body consists of high-strength aluminum, typically anodized for durability and corrosion resistance. Running along one or more sides, you'll find the signature T-shaped grooves. These slots feature a narrow opening at the surface that widens into a broader channel beneath, forming the characteristic "T" shape that gives the system its name.
When you insert a T-nut or specialized fastener, the wider portion of the hardware seats securely in the broader channel while the narrow opening prevents it from pulling straight out. Tightening the bolt draws everything together, creating a connection that can handle substantial loads. This is the same principle that makes 80/20 aluminum framing systems so popular across countless industries.
Before modular aluminum framing became widespread, building custom structures meant welding, drilling, and committing to permanent configurations. Need to modify something? Start over or bring in specialized equipment. T-slot technology changed everything by enabling truly flexible construction.
The key characteristics that make this system so valuable include:
Whether you're constructing machine frames, safety enclosures, or custom workstations, aluminum extrusion profiles offer a compelling alternative to traditional welded steel or aluminum angle construction. The profiles themselves are reusable and recyclable, making them both economically and environmentally sensible for projects where flexibility matters.
Understanding these fundamentals gives you the foundation needed to select the right profiles, choose appropriate hardware, and design structures that perform exactly as intended. The sections ahead will guide you through profile sizing, material selection, and practical assembly techniques that transform this knowledge into real-world results.
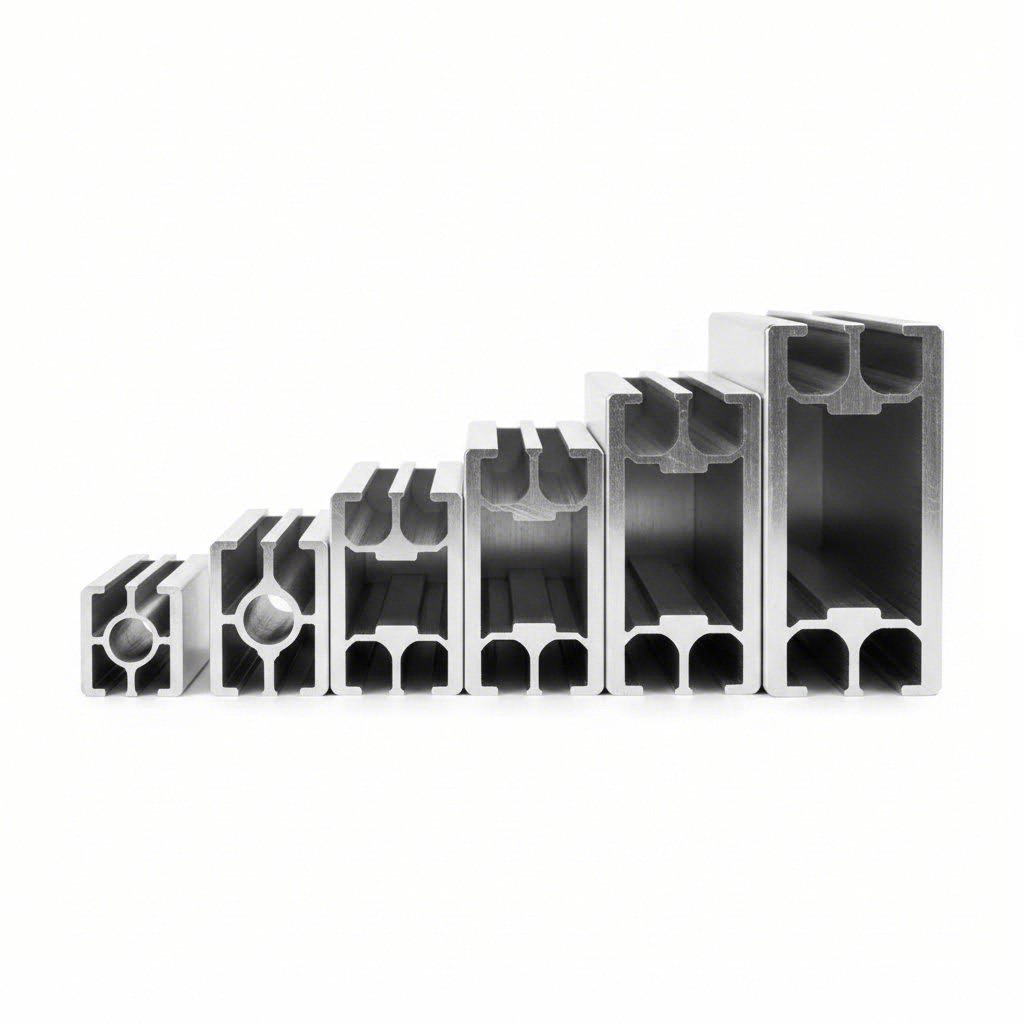
Ever looked at an aluminum extrusion profile catalog and felt overwhelmed by numbers like 2020, 4040, or 80 Series? You're not alone. These designations follow a logical system, but without understanding the underlying conventions, selecting the right extruded aluminum profiles can feel like decoding a foreign language. Let's break down the sizing systems so you can confidently match profiles to your project requirements.
When manufacturers label profiles with series numbers like 10, 15, 20, 30, 40, 45, or 80, they're typically referring to the cross-sectional dimensions in millimeters. A 20 Series profile, for instance, generally features a 20mm x 20mm square cross-section. Similarly, a 4040 profile measures 40mm x 40mm, making it a common choice for medium-duty structural applications.
Here's where it gets interesting: the series number often does double duty. It indicates not just the profile's physical size but also the slot width and compatible hardware. A 40 Series profile typically features an 8mm slot width, while a 20 Series profile usually has a 5mm or 6mm slot. This relationship between aluminum extrusion sizes and slot dimensions directly affects which fasteners, brackets, and accessories work with your chosen profile.
The naming convention from major suppliers like 80 20 aluminum follows a predictable pattern: [Series Number]-[Profile Size]x[Profile Size/Shape]-[Additional Features]. So when you see something labeled 10-2020, you're looking at a 10 Series profile with a 20mm x 20mm cross-section. A 1010 aluminum extrusion would indicate a 10mm x 10mm profile, typically the smallest commonly available size suitable for light-duty fixtures and small enclosures.
Geographic markets have influenced how extruded aluminum sizes are specified, creating two distinct systems that don't mix well.
Metric profiles dominate European and Asian markets, using millimeter-based dimensions. You'll encounter sizes like 20x20mm, 30x30mm, 40x40mm, and 45x45mm. These profile extrusions feature slot widths, hardware threads, and accessory dimensions all specified in metric units. The consistency makes sourcing straightforward when staying within the metric ecosystem.
Fractional inch profiles, often called fractional series, prevail in North America. These extruded aluminum profiles use inch-based measurements, with common sizes including 1" x 1", 1.5" x 1.5", and 2" x 2". The hardware, including T-nuts, bolts, and brackets, uses imperial thread sizes and dimensions.
Here's the critical point: metric and inch-based systems are fundamentally incompatible. The slot geometries differ, fastener threads don't match, and accessories won't interchange. Attempting to mix these systems results in poor fits, weak connections, and frustration. Choose one system at project start and stick with it throughout.
| Series Name | Cross-Section Dimensions | Slot Width | Typical Applications |
|---|---|---|---|
| 10 Series (1010) | 10mm x 10mm | 3-4mm | Small fixtures, display frames, light enclosures |
| 15 Series | 15mm x 15mm | 5mm | Electronics enclosures, 3D printer frames, hobby projects |
| 20 Series | 20mm x 20mm | 5-6mm | Light-duty frames, guarding, prototyping fixtures |
| 30 Series | 30mm x 30mm | 8mm | Workstations, medium guards, automation frameworks |
| 40 Series (4040) | 40mm x 40mm | 8mm | Machine frames, heavy workbenches, conveyor supports |
| 45 Series | 45mm x 45mm | 10mm | Industrial machinery, heavy-load structures, robotic cells |
| 80 Series | 80mm x 80mm | 10mm | Heavy-duty machine bases, high-load applications |
Notice how slot width increases with profile size? This isn't arbitrary. Larger slots accommodate beefier hardware capable of handling greater loads. An 8mm slot accepts M8 bolts and corresponding T-nuts, providing significantly more clamping force than the M5 hardware used in 5mm slots.
When selecting an aluminum extrusion profile for your project, consider the trade-offs carefully. Larger profiles offer substantially greater load capacity and rigidity, but they come with increased weight and cost. Doubling from a 20mm to a 40mm profile increases the moment of inertia (stiffness) by more than tenfold, making the larger option dramatically more resistant to bending. However, you'll also pay more per meter and add weight that may matter in motion applications or portable equipment.
For most projects, starting with load and rigidity requirements, then selecting the smallest profile series that meets those needs with appropriate safety margin, delivers the best balance of performance and economy. Understanding these sizing fundamentals positions you to evaluate specific alloys and material properties that further define how your chosen profiles will perform.
You've selected your profile size and understand the slot system. But here's a question that trips up many buyers: what's actually inside that extruded aluminium profile? The alloy composition determines everything from how much weight your frame can support to whether it'll withstand outdoor conditions for decades. Let's dig into the material science that separates adequate frames from exceptional ones.
When you browse aluminium extrusion profiles, you'll encounter two alloy grades dominating the market: 6063 and 6061. Both belong to the 6000 series of aluminum alloys, characterized by higher levels of magnesium and silicon than other aluminum families. But the similarities end there.
Aluminum 6063 is the workhorse of the T-slot world. According to PSI Extrusions, this alloy contains approximately 98.9% aluminum with 0.7% magnesium and 0.4% silicon, plus trace amounts of copper, iron, and chromium. Why does this matter? The simpler composition makes 6063 exceptionally easy to extrude into complex shapes, including the intricate T-slot geometries you need. It also produces superior surface finishes straight from the die, which is why many refer to anodized 6063 simply as "architectural aluminum."
Aluminum 6061 packs more punch for demanding applications. Its composition includes approximately 97.9% aluminum with 1.0% magnesium, 0.6% silicon, 0.28% copper, and 0.2% chromium. That additional copper and chromium significantly boost mechanical strength, making 6061 the go-to choice when your aluminium extrusion profile must handle heavy loads or withstand harsh operating conditions. Think machine bases, structural braces, and aerospace components.
You'll also encounter aluminum tubing and specialized profiles made from these same alloys, extending the modular system beyond standard T-slot shapes when your design requires it.
Sounds straightforward so far? Here's where the decision gets nuanced. Choosing between 6063 and 6061 involves trade-offs that directly impact your project's success.
Strength and hardness favor 6061. With a Brinell hardness value of 95 compared to 6063's 73, structures built from 6061 aluminium extrusion resist deformation under heavier loads. If you're building a machine frame that must maintain tight tolerances under dynamic forces, 6061 earns serious consideration.
Corrosion resistance tips toward 6063. The lower copper content means 6063 weathers outdoor exposure more gracefully. For exterior applications or environments with moisture, this advantage matters.
Workability is where 6063 truly shines. It welds more easily, forms into complex shapes without cracking, and produces those crisp T-slot geometries essential for proper hardware fit. For intricate aluminum extrusion dimensions requiring tight tolerances, 6063 typically delivers better results.
| Characteristic | Aluminum 6063 | Aluminum 6061 |
|---|---|---|
| Yield Strength (T6) | ~31,000 psi (214 MPa) | ~40,000 psi (276 MPa) |
| Brinell Hardness | 73 | 95 |
| Corrosion Resistance | Superior | Good |
| Weldability | Excellent | Good (requires precautions) |
| Extrudability | Excellent (complex shapes) | Good (simpler shapes) |
| Surface Finish Quality | Superior | Good |
| Best Applications | Architectural, general framing | Structural, high-load systems |
Notice those temper designations like T5 and T6? These indicate heat treatment states that dramatically affect mechanical properties. T5 means the profile was cooled from an elevated temperature during shaping, then artificially aged. T6 goes further with solution heat treatment by artificial aging, producing the highest strength levels. Most demanding structural applications specify T6 temper for maximum performance.
Raw aluminum develops a natural oxide layer that provides some protection, but most aluminium extrusion profiles receive additional surface treatments to enhance durability and appearance.
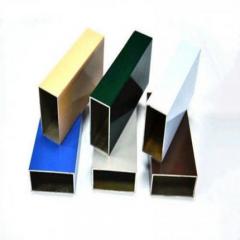
Anodizing electrochemically thickens that protective oxide layer, dramatically improving corrosion and wear resistance. Clear anodizing maintains aluminum's natural silver appearance. Black aluminum extrusion achieves its distinctive look through black anodizing, which also hides fingerprints and minor handling marks. Colored anodizing offers bronze, gold, and custom hues for architectural applications where aesthetics matter.
Powder coating applies dry paint particles electrostatically, then cures them into a durable finish. This process offers virtually unlimited color options and excellent outdoor durability, making it popular for equipment exposed to the elements.
Mill finish leaves the profile as-extruded with only basic cleaning. While economical, mill finish offers minimal protection and is best suited for indoor applications or situations where profiles will receive custom finishing later.
Armed with this material knowledge, you can specify aluminium extrusion profiles that match your structural requirements, environmental conditions, and aesthetic preferences. The next critical decision? Selecting the right connectors and hardware to join those profiles into rock-solid assemblies.
You've selected the perfect profile size and alloy for your project. Now comes the question that makes or breaks your build: how do you actually connect everything together? The hardware you choose determines whether your frame stands rock-solid for years or gradually loosens into a wobbly disappointment. Let's explore the connector ecosystem that transforms individual profiles into functional structures.
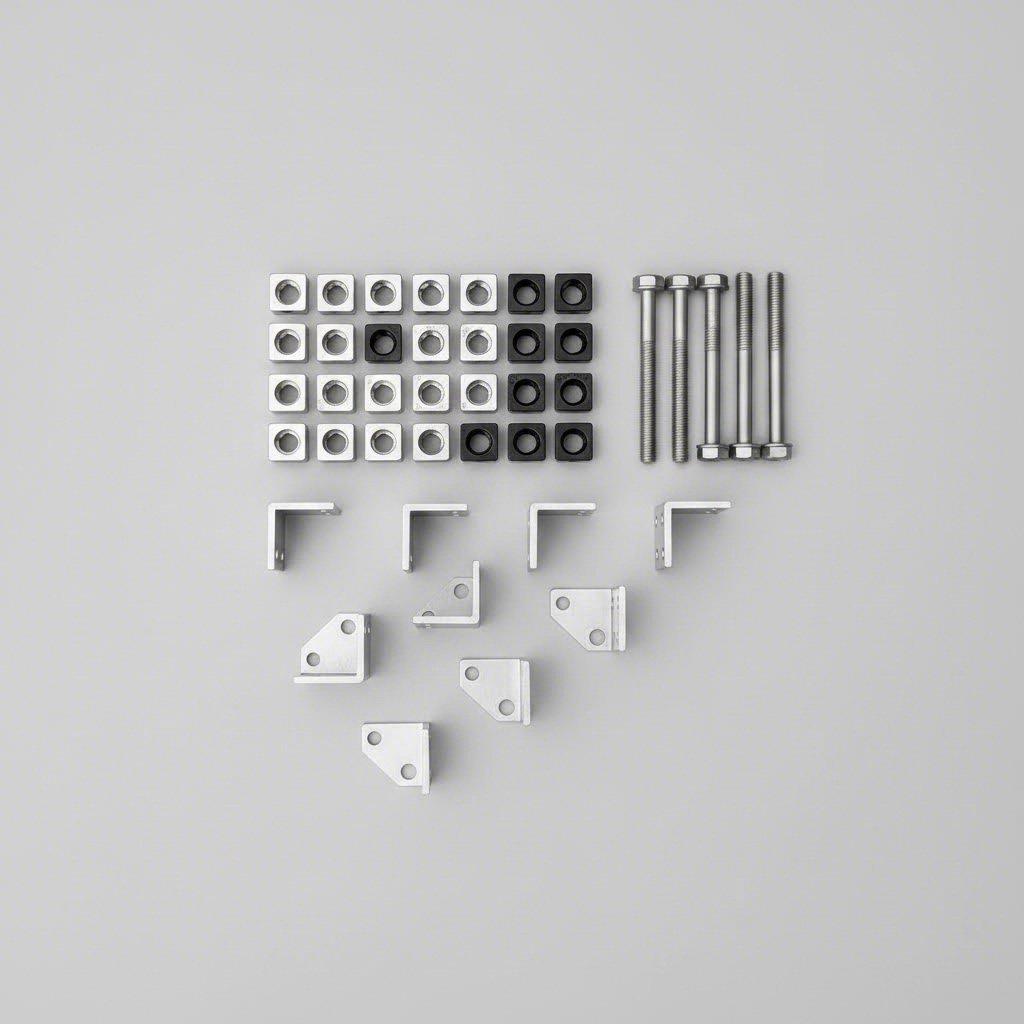
Think of T-slot hardware as falling into distinct functional categories. Understanding what each component does—and when to use it—separates confident builders from frustrated ones.
Every connection in a tslots system starts with T-nuts. These cleverly shaped fasteners slide into the t slot rail and provide threaded anchor points for bolts. But not all T-nuts work the same way, and choosing incorrectly creates assembly headaches.
Slide-in T-nuts insert from the end of the profile before assembly. You slide them in, position them where needed, then secure them with bolts. They're the most economical option and provide excellent holding strength. The catch? You must plan ahead. Once the frame is assembled, adding more slide-in nuts requires partial disassembly.
Drop-in T-nuts solve the pre-planning problem. These feature a spring-loaded ball or tab that allows you to insert them anywhere along an already-assembled t slotted rail. Simply drop the nut into the slot at an angle, rotate it 90 degrees, and the spring mechanism holds it in position while you drive the bolt. Drop-in nuts cost more than slide-in versions but offer invaluable flexibility for modifications and additions.
Roll-in T-nuts take convenience further with self-aligning designs. They feature spring-loaded mechanisms that let you insert them from anywhere along the slot, then automatically align with the bolt as you tighten. Perfect for awkward positions where you can't easily see inside the slot.
According to 80/20's hardware catalog, common T-nut thread sizes include 1/4-20, 5/16-18, M4, M5, M6, and M8, corresponding to different profile series and load requirements.
T-nuts provide anchor points, but brackets create the actual joints between profiles. The variety available addresses virtually any connection angle or configuration you'll encounter.
Inside corner brackets mount within the interior angle of a 90-degree joint, keeping the exterior clean. These l shaped brackets work beautifully for workstation frames, enclosures, and anywhere appearance matters. They typically use two or more bolts per side for maximum rigidity.
Outside corner brackets wrap around the exterior of a joint, providing maximum strength for heavy-duty applications. While more visible than inside brackets, they offer superior load capacity and resistance to racking forces.
Pivot brackets enable adjustable-angle connections. Need a diagonal brace at 45 degrees? A tilting work surface? Pivot brackets lock securely at your chosen angle while still allowing future adjustment.
Gussets reinforce corner joints against twisting and racking forces. These triangular plates dramatically stiffen frame corners, particularly important for tall structures or applications involving dynamic loads.
Joining plates connect profiles end-to-end or side-by-side. When you need to extend a run beyond standard profile lengths, joining plates maintain structural continuity. They're also essential for creating flush panel surfaces across multiple profile sections.
Sometimes you need threaded bolt inserts directly in the profile ends. End-tap inserts thread into pre-drilled holes in the profile ends, accepting bolts for hidden or clean connections. These work particularly well with internal corner connectors that create sleek, minimalist joints.
When planning your bill of materials, categorizing hardware by function helps ensure you don't overlook critical components.
Structural Connections:
Panel Mounting:
Linear Motion:
Accessories:
Selecting appropriate fasteners goes beyond grabbing whatever fits. Load requirements, accessibility, and future modification needs all influence the right choice.
Matching bolt size to your profile series ensures proper engagement with T-nuts and adequate clamping force. For 40 Series profiles with 8mm slots, M6 or M8 hardware provides appropriate strength. Smaller 20 Series profiles typically use M5 fasteners. Using undersized hardware in larger profiles wastes the slot's load capacity, while oversized hardware simply won't fit.
Socket head cap screws (SHCS) dominate T-slot assembly because their compact heads fit neatly within slots and the hex socket drive allows precise torque control. Flanged hex head bolts offer faster assembly where appearance doesn't matter. Button head screws provide the lowest profile for panel mounting applications.
Proper torque matters more than many builders realize. Under-tightened connections work loose under vibration. Over-tightened connections strip T-nut threads or crack brackets. Most T-slot hardware manufacturers specify torque values between 4-12 Nm depending on fastener size. When in doubt, snug the fastener firmly plus a quarter turn rather than cranking with all your strength.
This principle bears repeating: slot width dictates hardware compatibility. A 10mm slot T-nut won't work in an 8mm slot, regardless of how perfect it seems for your application. Before ordering hardware, verify the slot width of your chosen profiles and ensure every T-nut, bracket, and accessory matches that specification.
Mixing metric and inch-based systems compounds this problem. While similar in size, metric M6 hardware and imperial 1/4-20 hardware aren't interchangeable. Cross-threading damages both the T-nut and bolt. Commit to one system throughout your project.
How many fasteners does each joint need? The answer depends on applied loads and connection geometry. A simple guideline: each T-nut and bolt combination in a 40 Series system can safely support approximately 200-400 pounds of shear load when properly torqued. Dividing your expected load by this capacity, then adding a safety factor, gives a starting point.
For critical applications, consider these factors:
Unlike screws for metal studs or bolts for 4x4 posts in wood construction, T-slot fasteners derive their strength from the clamping action against the slot walls. Proper seating of T-nuts and correct torque matter as much as fastener quantity. Even 4x4 post brackets rely on similar principles of distributed clamping force rather than thread engagement alone.
With your hardware knowledge established, you're ready to tackle the engineering side: understanding load requirements and selecting profiles that match your application's actual demands.
You've got profiles, hardware, and a vision for your project. But here's the question that separates frames that perform flawlessly from those that sag, wobble, or fail: how do you know your chosen aluminum extrusion frame can actually handle the loads you'll throw at it? This is where most resources leave you hanging. Let's fix that with practical guidance for matching aluminum structural framing to real-world demands.
Before calculating anything, you need to understand how forces affect your structure. Not all loads behave the same way, and designing for the wrong type leads to either over-built (expensive) or under-built (dangerous) results.
Static loads remain constant over time. Think of a workbench holding tools or a machine guard enclosing equipment. The weight doesn't change, shock forces don't occur, and the structure simply needs to support a predictable, steady burden.
Dynamic loads tell a different story. These involve movement, vibration, or sudden force changes. A robot arm cycling at high speed, a conveyor moving products, or even personnel leaning against a railing all create dynamic conditions. Structural aluminum extrusions handling dynamic loads require significantly higher safety factors—often 3-4x the expected force—because peak stresses during acceleration, deceleration, or impact can far exceed steady-state values.
Where force applies matters as much as how much force applies. A point load concentrates all weight at a single location—imagine mounting a heavy motor at the center of a horizontal beam. This creates maximum bending stress at that exact point.
Distributed loads spread weight across the profile's length. A shelf holding evenly stacked materials applies force more uniformly, resulting in lower peak stresses for the same total weight. When designing your extruded aluminum framing, converting point loads to distributed loads (by adding support brackets or spreading contact areas) often allows using smaller, lighter profiles.
Here's where many builders miscalculate. A moment arm is the distance between where force applies and where the structure is supported. Double the distance, double the stress—regardless of the actual weight involved.
Consider a cantilever: a horizontal beam extending unsupported from a vertical post. According to Vention's engineering documentation, a 45x45mm profile supporting 1500N at 500mm from the support point experiences 104 MPa of bending stress. That same profile with the same load at 1000mm would experience roughly double the stress. Understanding this relationship prevents undersizing profiles for applications with significant reach or overhang.
Your aluminum frame extrusion might technically support the load without breaking, but will it deflect so much that it becomes unusable? Deflection—how much a profile bends under load—often governs design more than raw strength.
For precision applications like CNC router frames or measurement fixtures, maximum deflection might need to stay under 0.1mm. General workstations and machine guards typically tolerate 1-3mm of deflection. Less critical structures might accept even more. Define your deflection limit before selecting profiles, then verify your choices meet that requirement.
Safety factors provide margin for uncertainty. They account for calculation approximations, material variations, unexpected overloads, and the consequences of failure. As noted by AngleLock's design guide, even welded steel users overengineer by 3-4x to ensure safety. For T-slot aluminum extrusion frames:
When calculating safety factors, base them on your weakest assumption: the least accurate calculation, the most severe operating condition, or the worst consequence of failure.
Now for practical guidance. The table below provides general load capacity ranges for common profile series, helping you narrow choices before detailed calculations. These values represent typical working capacities with standard aluminum alloys and assume proper connection methods.
| Profile Series | Area Moment of Inertia (mm⁴) | Weight per Meter (kg) | Cantilever Capacity at 500mm* | Simply Supported Capacity at 1000mm** |
|---|---|---|---|---|
| 20x20mm | ~7,000-9,000 | 0.4-0.5 | ~15-25 kg | ~40-60 kg |
| 30x30mm | ~25,000-35,000 | 0.7-0.9 | ~40-60 kg | ~100-150 kg |
| 40x40mm | ~70,000-110,000 | 1.2-1.6 | ~80-120 kg | ~200-300 kg |
| 45x45mm | ~100,000-165,000 | 1.5-2.1 | ~100-170 kg | ~280-400 kg |
| 45x90mm | ~280,000-1,110,000*** | 2.5-3.3 | ~180-400 kg | ~500-900 kg |
| 90x90mm | ~1,800,000-1,900,000 | 4.5-5.1 | ~350-500 kg | ~900-1200 kg |
*Cantilever: Profile fixed at one end, load applied at free end, limiting deflection to ~5mm
**Simply supported: Profile resting on supports at both ends, center load, limiting deflection to ~3mm
***Orientation-dependent; higher values apply when loaded against the 90mm dimension
These figures provide starting points, not guarantees. Profile designs vary between manufacturers—the same 45x45mm dimensions can yield different moment of inertia values depending on internal wall thickness and geometry. Always verify specific values from your chosen supplier's data sheets.
Follow this sequence when matching profiles to requirements:
Here's a truth many overlook: even the beefiest profiles underperform if connections can't transmit loads effectively. The stiffness of your overall aluminum extrusion frame depends heavily on how corners and joints behave under stress.
According to Vention's design documentation, friction-based joints (where profiles are held together solely by bolt clamping force) offer significantly lower strength than reaction force-based joints (where profiles physically rest on each other). Whenever possible, position horizontal profiles on top of vertical ones rather than side-mounting them. This transmits load directly through material contact rather than relying on fastener friction alone.
Gussets and corner brackets dramatically improve joint rigidity. Adding triangular gussets to corners resists racking—the diagonal distortion that turns rectangles into parallelograms under lateral force. For frames subject to vibration or movement, this reinforcement prevents gradual loosening that eventually leads to structural failure.
High-precision assembly plates with self-aligning features eliminate the angular play inherent in standard brackets. These cost more but deliver connections approaching the rigidity of welded steel—critical for applications where accuracy matters.
Not every project requires professional engineering analysis. Simple workbenches, display frames, and light-duty enclosures often succeed with conservative profile selection and common-sense design. But certain conditions demand more rigorous evaluation:
Most T-slot manufacturers provide calculation tools, software, or engineering support for their products. These resources account for their specific profile properties and connection systems, delivering more accurate results than generic formulas. For critical applications, investing in proper analysis costs far less than rebuilding a failed structure.
Understanding stud spacing principles from construction—where standard stud spacing of 16 or 24 inches on center provides predictable load distribution—offers useful conceptual parallels. Just as builders consult a screw dimensions chart to match fasteners to framing loads, T-slot designers must match profile specifications to actual demands. The goal isn't perfection in every calculation but confidence that your chosen profiles and connections will perform safely throughout the structure's service life.
With load requirements understood and profiles properly sized, you're ready to explore how different industries leverage these systems to solve real-world challenges.
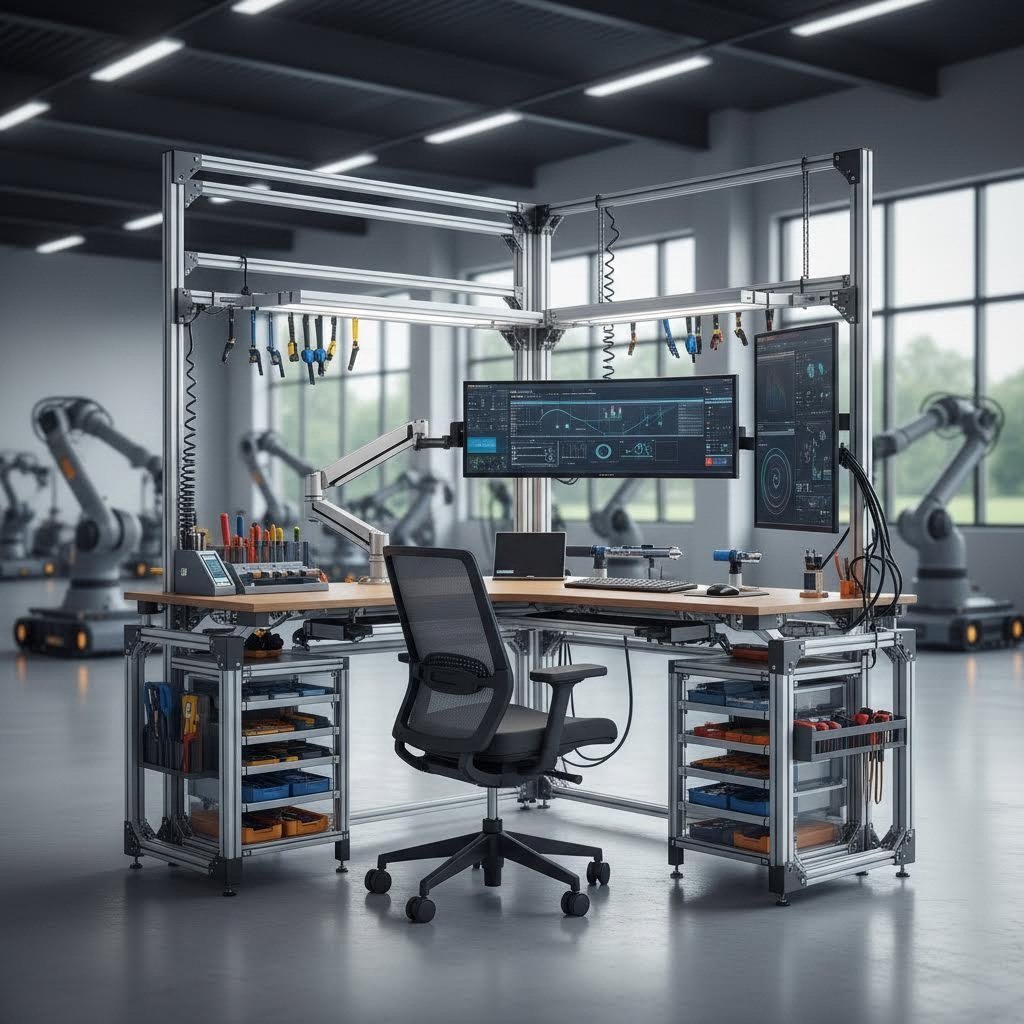
You understand profiles, hardware, and load calculations. But how does all this translate into real-world solutions? The best way to envision what aluminum extrusions can do for your project is seeing how industries already leverage them daily. From factory floors to laboratories, T-slot systems solve challenges that traditional construction methods simply can't match.
Walk through any modern manufacturing facility, and you'll spot T-slot aluminum framing everywhere. Why has it become so ubiquitous? According to mk North America, the answer lies in adaptability—production lines constantly evolve, and T-slot systems evolve with them.
Heavy machinery needs stable foundations that absorb vibration without transmitting it throughout the facility. Aluminum t track systems excel here because they offer precise leveling adjustment, easy equipment mounting, and straightforward modification when production requirements change.
Common machine frame applications include:
Unlike welded steel frames that become permanent fixtures, extruded aluminum channel construction lets manufacturers relocate, expand, or completely reconfigure equipment without scrapping existing structures. When that new product line arrives next quarter, the frame adapts rather than gets replaced.
Manufacturing and assembly processes demand workstations tailored to specific tasks and operators. As mk North America notes, T-slot aluminum enables engineers to design adjustable-height workbenches, tool racks, and conveyor-supported stations customized for operator needs.
The ergonomic advantages are substantial. Workstations can incorporate:
When process engineers identify improvement opportunities, modifications happen in hours rather than weeks. No waiting for fabrication shops, no welding fumes disrupting production, no permanent commitments to layouts that might change next month.
Worker safety drives significant T-slot adoption. Industrial pipe shelving and traditional steel stud framing once dominated safety enclosure construction, but aluminum square tube systems now offer compelling advantages for protective applications.
Ensuring worker safety remains a top priority in industrial settings. T-slot aluminum framing constructs machine guarding, safety enclosures, and protective barriers that prevent accidental contact with moving parts or hazardous equipment. Unlike rigid metal stud construction that requires significant rework for modifications, T-slot guards adapt as equipment changes.
Modern safety enclosures typically feature:
The lightweight nature of aluminum allows for quick modifications or reconfiguration as safety requirements change. When regulations update or new equipment arrives with different protection needs, guards adapt rather than require complete replacement. Understanding metal stud dimensions becomes irrelevant when your framing system accepts modifications at any point.
Efficient material flow optimizes production and reduces bottlenecks. Aluminum framing constructs conveyor support structures, roller stands, and transfer stations facilitating smooth product movement throughout facilities.
T-slot construction allows easy integration of:
When production volumes increase or product dimensions change, conveyor systems expand or reconfigure without starting from scratch. The same profiles and hardware simply get repositioned to accommodate new requirements.
As automation transforms manufacturing, engineers require robust structures supporting robotic arms, pick-and-place systems, and automated assembly lines. T-slot aluminum provides lightweight yet sturdy frameworks for these demanding applications.
According to A-Line Automation, robotic work cells benefit particularly from modular construction because different payloads and movement ranges require different configurations. The ability to easily adjust or expand frameworks ensures automation systems remain agile and responsive to changing production needs.
Development environments demand even more flexibility than production floors. Prototyping fixtures often exist for weeks before requirements change completely. Traditional fabrication can't keep pace with rapid iteration cycles.
T-slot excels for prototyping because:
Not all applications tolerate standard aluminum finishes or hardware. Cleanroom and food-grade environments impose additional requirements that T-slot systems can address with proper specification.
For cleanroom applications, smooth anodized surfaces minimize particle generation and simplify cleaning protocols. Avoiding threaded holes on exposed surfaces prevents contamination traps. Selecting hardware with sealed mechanisms prevents lubricant outgassing that could compromise sensitive processes.
Food-grade applications require FDA-compliant materials and finishes resistant to aggressive cleaning chemicals. Stainless steel hardware replaces standard zinc-plated components. Profile designs eliminate horizontal surfaces where debris accumulates. Anodized finishes provide cleanable surfaces that don't harbor bacteria.
The modular nature of T-slot construction offers unique advantages in these demanding environments. When contamination incidents require equipment teardown for deep cleaning, structures disassemble completely for access that welded frames simply can't provide. When regulations change or processes evolve, adaptation happens without specialized contractors or extended downtime.
Understanding these diverse applications helps you envision solutions for your specific needs. But knowing what's possible differs from knowing how to execute. The next section covers assembly methods and techniques that transform knowledge into functional structures.
You've selected profiles, specified hardware, and designed your structure. Now comes the moment of truth: actually building it. This is where theoretical knowledge transforms into a physical frame—and where many projects go sideways. Poor assembly technique undermines even the best-specified components, leaving you with wobbly structures, misaligned connections, and frustrating rework. Let's walk through the methods that separate professional-quality builds from amateur frustrations.
According to AngleLock's assembly research, a standard 24"x24"x24" T-slot framing cube takes approximately 59 minutes to complete properly—far longer than most first-timers expect. Understanding each phase prevents rushing through critical steps.
Your cutting method directly affects assembly quality. The options include:
Whichever method you choose, measure twice and cut once. A profile 2mm too short won't reach its intended connection point, while 2mm too long creates gaps elsewhere in the assembly.
Raw cut ends need attention before assembly. Deburring removes the sharp edges and aluminum shavings that interfere with T-nut insertion and create handling hazards. A simple deburring tool or fine file accomplishes this in seconds per end.
If your design uses end-tap connections, this is when you'll drill and tap the profile ends. As AngleLock notes, tapping takes up to 2 minutes per hole for simple applications like leveling feet, and significantly longer when replacing corner brackets with tapped connections. For your sanity, avoid tapping whenever possible by using T-nut-based connections instead.
Follow this sequence for efficient, accurate t-slot framing assembly:
This sequence applies whether you're building a simple workbench or a complex automation frame. Skipping steps—especially the alignment phase—creates problems that compound as the build progresses.
Here's what separates frustrating builds from satisfying ones: attention to squareness during assembly. According to assembly research, adjusting one component in T-slot framing often forces another part out of place, adding 1-2 minutes per connection during the alignment phase. These techniques minimize that frustration.
Don't start without these:
Consider building a simple jig from scrap profiles to hold pieces in alignment while tightening. This eliminates the need for an extra pair of hands and produces more consistent results. Some builders use a drill bit as a temporary alignment pin through matching holes to prevent shifting during fastening.
These errors plague beginners and experienced builders alike:
Over-tightening fasteners strips T-nut threads, cracks brackets, and actually reduces connection strength. Once the fastener seats firmly, another quarter-turn typically suffices. If you find yourself straining, you've gone too far.
Misaligning T-nuts before tightening creates crooked joints that are nearly impossible to correct later. Verify each nut sits squarely in its slot before driving the bolt home.
Forgetting drop-in hardware means partial disassembly later. Before closing off any slot section, mentally walk through all the T-nuts, clips, and accessories that need to occupy that space.
Ignoring diagonal measurements produces frames that look square but rack under load. Measure corner-to-corner diagonals and adjust until both measurements match exactly.
Rushing the alignment phase creates cascading problems. As A-Line Automation emphasizes, proper assembly of t-slot framing keeps connections in alignment longer—saving significant maintenance time down the road.
Installing panels and accessories requires planning during frame assembly, not after. Panels that slide into framing extrusion slots must be positioned before completing the enclosing structure—there's no way to insert them once the frame closes.
For panel installation:
Accessories like cable channels, hinges, and latches mount at any time using drop-in T-nuts. Position them for easy operator access and consider maintenance requirements—mounting a latch where it's barely reachable guarantees frustration.
Sometimes standard profiles need modification. Router bit profiles designed for aluminum can create custom slots, chamfers, or recesses when mounted in a milling machine or router table. However, modifying extruded aluminum profiles requires proper fixturing and appropriate cutting speeds to prevent grabbing or material deformation.
For most applications, selecting appropriate standard profiles and accessories eliminates modification needs entirely. Custom machining makes sense for high-volume production or unique requirements but adds cost and lead time that simpler designs avoid.
Before calling your assembly complete:
As assembly experts recommend, verify torque readings fall within the 160-180 inch-pound range for standard connections. This guarantees your assembly meets specifications and all pieces will stay in place under load.
With assembly fundamentals mastered, you're equipped to build professional-quality frames. But where do you source the profiles and hardware that make these builds possible? The next section covers evaluating suppliers and finding manufacturing partners who deliver quality components with the support you need.
You've mastered profile selection, hardware specification, and assembly techniques. Now comes a question that determines whether your project succeeds or stalls: where to buy aluminum extrusion that meets your quality requirements without breaking your budget? The supplier you choose affects everything from dimensional accuracy to lead times to long-term support. Let's explore how to evaluate manufacturing partners and find the right fit for your needs.
Not all aluminum extrude suppliers operate the same way. Some stock standard profiles for quick shipment. Others specialize in custom extrusions with full engineering support. Understanding these distinctions helps you match supplier capabilities to project requirements.
According to Ya Ji Aluminum's supplier selection guide, qualified suppliers offer much more than extruded profiles—they provide engineering collaboration, quality assurance, and integrated production capabilities that align with your business goals. This perspective shifts the conversation from simple price comparisons to evaluating total value delivered.
Standard profile distributors maintain inventory of common series sizes ready for immediate shipment. If your project uses conventional 20, 40, or 45 series profiles without modifications, these suppliers offer speed and convenience. Names like tslots by bonnell aluminum and misumi extruded aluminum have built reputations on reliable stock programs and fast delivery.
Custom al extrusion suppliers take a different approach. They develop proprietary dies, optimize cross-sections for specific applications, and integrate secondary operations like machining and finishing. Custom work requires longer lead times but delivers profiles precisely matched to your requirements—potentially reducing assembly complexity and total project cost.
Many projects benefit from hybrid sourcing: standard profiles for straightforward structural members combined with custom extrusions for specialized components. This approach balances aluminum extrusion cost efficiency with application-specific optimization.
When evaluating potential suppliers, systematic assessment prevents costly mistakes. Use these criteria to compare options objectively:
Working with manufacturers who control the entire production chain—from die development through finishing—delivers advantages that distributed sourcing can't match. When a single partner handles extrusion, machining, and surface treatment, accountability stays clear. Quality issues get resolved faster. Tolerances compound less across fewer handoffs.
Consider what comprehensive capability looks like in practice. Shengxin Aluminium exemplifies this integrated approach with over 30 years of industry experience. Their facility houses 35 advanced extrusion presses ranging from 600T to 5500T, covering everything from small precision profiles to large structural sections. State-of-the-art CNC machining centers handle precise cutting, drilling, and bending to exact specifications—eliminating the coordination headaches of separate fabrication vendors.
Surface treatment capabilities prove equally important. Shengxin offers extensive finishing options including anodizing in custom colors like Champagne and Rose Gold, powder coating for durability, PVDF for weather resistance, and micro-arc oxidation for superior hardness. This range means your profiles arrive ready for assembly rather than requiring additional processing steps.
For standard profiles, distributors provide convenient access without minimum orders or custom tooling charges. But custom projects benefit enormously from direct manufacturer relationships.
Factory-direct sourcing offers several advantages:
When seeking cheap aluminum extrusion options, remember that lowest unit price rarely equals lowest total cost. Factor in quality consistency, delivery reliability, technical support, and rework avoidance when comparing suppliers. A slightly higher per-meter price from a capable manufacturer often delivers better overall value than rock-bottom quotes from suppliers who cut corners.
Before committing to a supplier relationship:
Building relationships with capable suppliers like Shengxin Aluminium—who provide end-to-end support from die development through mass production—positions your projects for success from the start. Their technical team collaboration and factory-direct pricing model demonstrates what comprehensive manufacturing partnerships can deliver.
With reliable sourcing established, you're equipped to execute projects confidently. But even well-planned builds encounter challenges. The next section addresses common problems and their solutions, helping you troubleshoot issues that arise during assembly and operation.
You've assembled your t slotted aluminum frame, but something's not quite right. Maybe the corners don't meet cleanly, connections have started loosening, or that T-nut absolutely refuses to slide where you need it. Don't worry—these challenges plague everyone from first-time builders to experienced fabricators. The difference between frustration and success lies in understanding what causes each problem and knowing exactly how to fix it.
Most t-slotted framing issues fall into predictable categories. Recognizing the root cause saves hours of trial-and-error troubleshooting and prevents the same problems from recurring in future builds.
Nothing undermines a build faster than discovering your "square" frame actually forms a parallelogram. This happens more often than experienced builders like to admit—and the causes are usually preventable.
The primary culprits include rushing the alignment phase, tightening connections in random order, and neglecting diagonal measurements. According to 80/20's assembly guidance, proper technique involves keeping connections loose during positioning, then systematically tightening once everything aligns. When you fully torque one corner before positioning others, that rigid joint prevents the minor adjustments needed for true squareness.
Accumulated tolerance also compounds across multiple joints. Each connection introduces slight angular variation, and across a large frame, these tiny errors add up to noticeable skew.
Your frame felt rock-solid during initial assembly. Six months later, it wobbles. What happened? Vibration, thermal cycling, and inadequate initial torque conspire against long-term connection integrity.
Vibrating equipment gradually works fasteners loose through a process called self-loosening. Each vibration cycle slightly rotates the bolt, progressively reducing clamping force. Temperature swings create similar problems: aluminum expands and contracts with temperature changes, and if fasteners can't maintain clamping pressure through these cycles, they eventually back out.
Few things frustrate builders more than a t slot slider that refuses to slide. You're trying to position a T-nut, but it jams, catches, or simply won't move where needed.
Common causes include debris in the slot, burrs from cutting operations, mismatched hardware, and attempting to insert slide-in nuts after assembly blocks access. Even a small aluminum shaving lodged in the channel creates enough friction to stop a T-nut cold.
Beautiful anodized finishes arrive from the supplier—then get marred during assembly. Scratches don't affect structural performance, but they undermine the professional appearance that makes t-slotted aluminum attractive for visible applications.
Scratching typically occurs during handling, cutting, and connection tightening. Stacking profiles without protective material between them, sliding components across exposed surfaces, and using damaged tools all leave their marks.
Understanding problems is half the battle. Here's how to solve them:
| Problem | Likely Cause | Solution |
|---|---|---|
| Frame out of square | Tightening connections before final alignment; accumulated tolerance across joints | Loosen all connections, measure diagonals (equal = square), adjust corners until measurements match, retighten systematically from one corner outward |
| Connections loosening over time | Vibration-induced self-loosening; thermal cycling; insufficient initial torque | Apply thread-locking compound (medium strength); use torque wrench to verify 160-180 inch-pounds; add lock washers for high-vibration environments; schedule periodic retorquing |
| T-nuts won't slide into position | Debris in slot; cutting burrs; wrong hardware series; blocked slot access | Clean slots with compressed air or brush; deburr cut ends thoroughly; verify hardware matches slot width; use drop-in nuts for post-assembly insertion |
| Profile scratches during assembly | Metal-to-metal contact during handling; debris on work surface; rough fastener edges | Use protective film or blankets during handling; keep work area clean; inspect fasteners for burrs before installation; use plastic-faced clamps |
| Inadequate load capacity | Undersized profiles; insufficient fasteners; poor connection rigidity; friction-only joints | Upgrade to larger profile series; add fasteners at load points; install gussets at corners; ensure profiles bear directly on each other rather than relying solely on bracket friction |
| Difficult T-nut alignment | Inserting nuts without attached bolts; improper nut orientation | Always attach bolts loosely to T-nuts before insertion; ensure the wider portion of the nut enters the slot first; use roll-in nuts for awkward positions |
| Uneven frame surfaces | Profile length variations; unlevel mounting surface; inconsistent bracket positioning | Verify all profile lengths match specifications; use leveling feet to compensate for floor variations; measure bracket positions from common reference points |
Even perfectly assembled t slotted framing requires ongoing attention. Proactive maintenance prevents small issues from becoming structural failures.
Schedule regular torque verification, especially for frames supporting dynamic loads or exposed to vibration. Quarterly checks suffice for static applications; monthly verification makes sense for equipment with moving components. Focus attention on connections experiencing the highest loads—typically corners, cantilevered sections, and mounting points for heavy equipment.
Create a simple checklist documenting each connection point. During inspections, systematically verify torque using the same wrench and technique applied during initial assembly. Connections that repeatedly loosen may need thread-locking compound or upgraded hardware.
Dust and debris accumulating in T-slots eventually interfere with adding or repositioning hardware. A t slot plate used for workholding or fixturing requires especially clean slots for reliable clamping.
For routine cleaning:
In harsh environments, consider protective covers for unused slot sections. Rubber or plastic slot covers prevent debris accumulation while maintaining the option for future hardware additions.
One of t-slotted aluminum's greatest advantages is adaptability. When requirements change, frames evolve rather than get scrapped.
Expanding existing structures starts with identifying available slot access points. Drop-in T-nuts insert anywhere along exposed slots, enabling new brackets, accessories, or extension profiles without disassembly.
When adding structural members:
Major reconfigurations require methodical disassembly and reassembly. Document the existing structure with photos and measurements before loosening anything—this reference proves invaluable when questions arise during reconstruction.
Loosen connections systematically rather than removing everything at once. This maintains partial structure stability while allowing repositioning. Label profiles and hardware during disassembly to speed reassembly.
Inspect all components during reconfiguration:
Reconfiguration also presents opportunity for improvement. Address any issues discovered during original use—add gussets where corners flexed, upgrade undersized profiles, or reposition components for better ergonomics.
With these troubleshooting techniques and maintenance practices mastered, you're equipped to build frames that perform reliably and adapt as needs evolve. The final section brings everything together with actionable guidance for launching your own T-slot project successfully.
You've journeyed from understanding basic t-slot aluminum concepts through profile selection, hardware specification, assembly techniques, and troubleshooting strategies. That's substantial ground to cover. Now it's time to synthesize everything into actionable guidance that transforms knowledge into your next successful build. Whether you're planning a simple workbench or a complex automation cell, these key takeaways and next steps will keep your project on track.
Every successful aluminum extrusion t slot project comes down to four critical decision points. Master these, and you'll avoid the costly mistakes that plague unprepared builders.
Don't guess at profile size—calculate it. Start by defining your actual loads (static and dynamic), mapping support conditions and span lengths, and establishing acceptable deflection limits. Then apply appropriate safety factors before selecting the smallest profile series that meets those requirements with margin to spare.
Remember: doubling profile size increases stiffness by more than tenfold but also increases weight and cost proportionally. The goal isn't the biggest profile available—it's the right profile for your specific application.
For most t slot aluminum framing applications, 6063-T5 or T6 aluminum delivers excellent performance at reasonable cost. Reserve 6061 alloy for demanding structural applications requiring maximum strength. Match surface treatments to operating conditions: anodizing for general durability, powder coating for outdoor exposure, and specialized finishes for cleanroom or food-grade requirements.
Your hardware choices determine long-term connection integrity. Match T-nut and fastener sizes to your profile series slot width—mixing incompatible hardware creates weak joints. Use drop-in T-nuts for flexibility, gussets for corner rigidity, and appropriate torque values for reliable clamping. Plan hardware requirements during design, not during assembly.
The cheapest per-meter price rarely delivers the lowest total project cost. Evaluate suppliers on manufacturing capability, quality certifications, secondary processing options, and technical support. For custom projects, factory-direct relationships with integrated manufacturers provide advantages that distributed sourcing cannot match.
The most important principle in T-slot design: match profile specifications to actual application requirements rather than over-engineering or under-specifying. Over-built frames waste money and add unnecessary weight. Under-specified frames fail, creating safety hazards and costly rework. Accurate requirements definition at project start prevents both extremes.
Ready to move from planning to execution? Follow this sequence to launch your aluminum t slot project successfully.
Before contacting suppliers or ordering aluminum extrusion frame kits, create a clear requirements document covering:
This documentation guides every subsequent decision and provides clear specifications when requesting supplier quotations.
Complex projects benefit enormously from technical collaboration with capable manufacturing partners. Working with experienced manufacturers like Shengxin Aluminium provides end-to-end support from die development through mass production. Their technical team can advise on profile optimization, material selection, and finishing options that align with your specific requirements—expertise that prevents costly design iterations.
Whether you need standard aluminum t channel profiles or custom extruded t slot sections, establishing supplier relationships before finalizing designs allows for valuable input during the specification phase rather than after commitment to potentially suboptimal choices.
If you're new to T-slot construction, resist the temptation to tackle your most complex project first. Build a simple workbench or equipment stand to develop assembly skills and validate your hardware selection. The lessons learned on straightforward builds inform better decisions on demanding projects.
For experienced builders taking on new applications, prototyping critical subassemblies before committing to full production quantities reveals issues early when changes cost least.
T-slot systems continue advancing with new accessories, integration options, and complementary technologies. Manufacturers regularly introduce specialized brackets, motion components, and automation accessories that expand what's possible with modular aluminum framing. Sensor mounting systems, cable management solutions, and quick-change fixtures exemplify ongoing innovation in this space.
Staying connected with capable suppliers keeps you informed about new capabilities that might benefit current or future projects. The aluminum t slot platform you build today can integrate tomorrow's accessories—that's the enduring value of modular construction.
You now possess the knowledge to move confidently from confused buyer to capable builder. You understand profile sizing, material properties, hardware selection, assembly techniques, and troubleshooting strategies. You know how to evaluate suppliers and what to expect from quality manufacturing partners.
The next step is yours: define your requirements, select your components, and start building. The modular nature of T-slot construction means your first project won't be your last—components recover completely for reuse, and skills transfer directly to future builds. Every frame you assemble adds experience that makes the next one faster and better.
Whether you're constructing industrial automation equipment, laboratory fixtures, or custom workstations, aluminum extrusion profiles with T-slots provide the foundation for structures that perform reliably, adapt readily, and represent your investment wisely for years to come.
T-slot aluminum framing consists of extruded aluminum profiles with distinctive T-shaped channels running along their length. These channels accept specialized hardware like T-nuts and bolts, allowing components to connect at any point without drilling. When you insert a T-nut into the slot and tighten the bolt, the hardware seats securely in the broader channel while the narrow opening prevents pull-out, creating rock-solid mechanical connections that remain fully reconfigurable.
T-slot profiles come in various series designated by numbers like 20, 30, 40, 45, and 80, which typically refer to cross-sectional dimensions in millimeters. Common sizes include 20x20mm for light-duty applications, 40x40mm for medium-duty frames and workbenches, and 45x45mm or larger for heavy industrial machinery. Slot widths increase with profile size—20 Series uses 5-6mm slots while 40 Series features 8mm slots—affecting hardware compatibility and load capacity.
The two dominant alloys are 6063 and 6061 aluminum. 6063-T6 is the most common choice for general T-slot applications due to its excellent extrudability, superior surface finish, and good corrosion resistance. 6061-T6 offers approximately 30% higher yield strength, making it ideal for demanding structural applications requiring maximum load capacity. Both alloys accept anodizing and powder coating for enhanced durability and appearance.
Start by defining your actual loads (static and dynamic), mapping support conditions and span lengths, then establishing acceptable deflection limits. Apply safety factors of 2-4x depending on risk level. A 40x40mm profile typically handles 80-120kg cantilever loads at 500mm, while 45x45mm profiles manage 100-170kg under similar conditions. Select the smallest profile series that meets your requirements with margin to spare, balancing performance against weight and cost.
Quality T-slot profiles are available from specialized distributors and direct manufacturers. For standard profiles, distributors offer quick shipment from stock inventory. For custom projects requiring specific dimensions or integrated machining, working with integrated manufacturers like Shengxin Aluminium provides advantages including technical collaboration, die development support, CNC machining capabilities, and comprehensive surface treatment options from anodizing to powder coating—all under one roof.


 Servicio en línea
 0086 136 3563 2360
 sales@sxalu.com
 +86 136 3563 2360
 español
 English
 français
 Deutsch
 русский
 português
 العربية
 ไทย
ไทย Việt
Việt Українська