Have you ever picked up a beautiful piece of aluminum extrusion, only to ruin it with a rough, burr-laden cut? You're not alone. Cutting aluminum extrusion cleanly requires more than just grabbing the nearest saw and hoping for the best. Whether you're building a custom 3D printer frame, assembling modular furniture, or tackling a professional fabrication project, understanding how to cut aluminum extrusion properly makes the difference between frustration and flawless results.
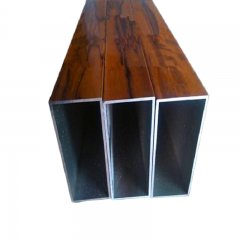
Unlike solid bar stock or simple sheet metal, extruded aluminum profiles present unique challenges. These components are created by forcing heated aluminum through specially shaped dies, resulting in profiles that feature hollow sections, varying wall thicknesses, and intricate channel designs. The best way to cut aluminum depends entirely on understanding these characteristics before you make your first cut.
When you're cutting aluminum in sheet form, you're dealing with a uniform thickness throughout. Extrusions are a different story entirely. T-slot and V-slot configurations—the workhorses of DIY robotics, CNC machines, and modular construction—feature complex cross-sections with internal channels and grooves running their entire length.
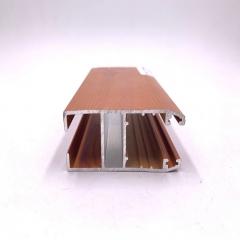
T-slot profiles contain those distinctive T-shaped channels that accept specialized nuts and hardware, while V-slot extrusions feature precision V-shaped grooves designed for integrated linear motion systems. Both types demand cutting approaches that account for their hollow interiors and thin walls. A technique that works perfectly for solid aluminum bar might cause a hollow profile to deform, vibrate excessively, or produce jagged edges.
Understanding how to cut aluminium correctly isn't just about aesthetics—though clean cuts certainly look more professional. Poor cutting techniques can compromise the structural integrity of your assembly, prevent proper hardware insertion into slots, and create safety hazards from sharp burrs. For precision applications like aluminum miter joints in frame construction, even small deviations from square can cascade into significant alignment problems.
Before selecting your cutting method, evaluate these key factors:
In the sections ahead, you'll discover four proven methods for achieving burr-free cuts—from power saws that deliver speed and precision to hand tools that offer accessibility and control. Each approach has its place, and knowing when to use which will transform your aluminum fabrication results.
With so many tools capable of slicing through aluminum, how do you choose the right saw to cut aluminum for your specific project? The answer depends on balancing precision requirements, available equipment, budget constraints, and your comfort level with different tools. Let's break down every viable option so you can make an informed decision before your blade ever touches metal.
| Method | Best For | Precision Level | Speed | Cost | Skill Required |
|---|---|---|---|---|---|
| Miter Saw | Angled cuts, frame building, repetitive cuts | High (±0.5mm) | Fast | Medium-High | Beginner-Intermediate |
| Circular Saw | Long straight cuts, portable jobsite work | Medium (±1mm) | Fast | Medium | Intermediate |
| Chop Saw | Heavy-duty production, thick profiles | High (±0.5mm) | Very Fast | High | Intermediate |
| Band Saw | Curved cuts, thick stock, quiet operation | Medium-High (±0.75mm) | Medium | Medium-High | Intermediate |
| Hacksaw | Small projects, tight spaces, budget work | Low-Medium (±2mm) | Slow | Very Low | Beginner |
| Jigsaw | Curved cuts, notches, irregular shapes | Low-Medium (±1.5mm) | Medium | Low-Medium | Beginner-Intermediate |
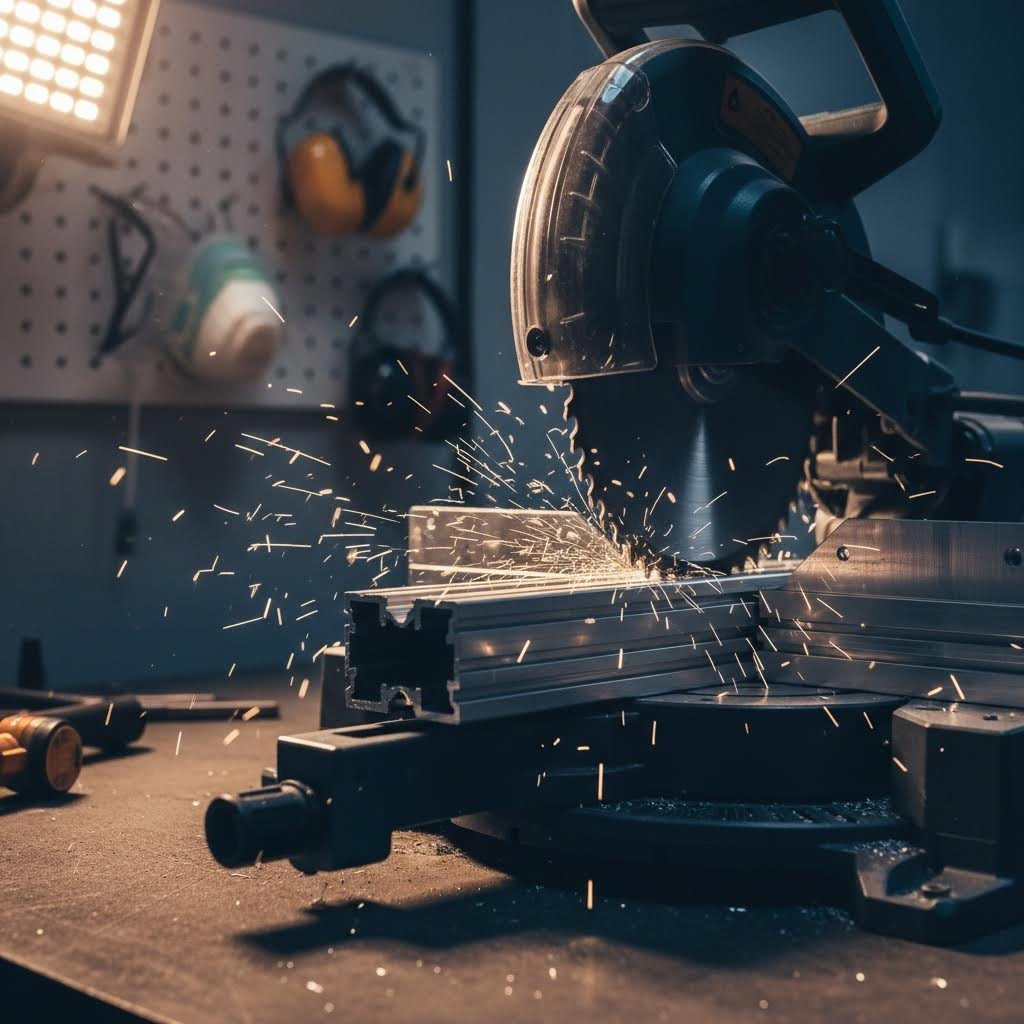
When time matters and you're cutting aluminum with miter saw or similar power equipment, the results can be remarkably clean—provided you've selected the appropriate blade. Cutting aluminum with circular saw setups offers excellent portability for jobsite work, while dedicated aluminum cutting saws deliver the consistency needed for production environments.
For miter saws and chop saws, blade selection proves critical. A carbide-tipped blade with 60 to 100 teeth works exceptionally well, as industry guidelines suggest that this tooth count delivers the cleanest, burr-free cuts on aluminum. Cutting aluminum with chop saw equipment excels for repetitive cuts on heavier profiles, where the tool's stability and power handle thicker material without hesitation.
The band saw cut aluminum approach deserves special mention for those working with unusually thick extrusions or needing curved cuts. Unlike abrasive wheels, band saw blades produce minimal heat buildup, reducing the risk of aluminum binding to the blade. This makes them ideal for extended cutting sessions where heat management becomes a concern.
When selecting the best saw for cutting aluminum, consider these power tool advantages:
Not every project justifies firing up a power tool. Sometimes you need just one or two cuts, or you're working in a space where noise restrictions apply. This is where hand methods shine—and yes, you can hacksaw cut aluminum with excellent results when technique trumps speed.
A quality hacksaw fitted with a blade featuring 18 to 24 teeth per inch handles most aluminum extrusion profiles effectively. The key lies in maintaining consistent pressure and letting the blade do the work rather than forcing it through the material. For curved or complex shapes, a jigsaw equipped with metal-cutting blades designed for non-ferrous metals gives you maneuverability that no straight-cutting tool can match.
The jigsaw deserves particular attention for its versatility. When you need to cut notches, create openings, or follow irregular patterns, this tool becomes indispensable. Select blades specifically rated for aluminum or non-ferrous metals—typically featuring finer teeth and specialized tooth geometry that prevents the grabbing common with wood-cutting blades.
Understanding which cutting approach matches your project prevents frustration and wasted material. With this comparison as your guide, the next step involves mastering the specific techniques that make each method deliver clean, professional results.
Can I cut aluminum with a miter saw? Absolutely—and when done correctly, a miter saw delivers some of the cleanest cuts you'll ever achieve on aluminum extrusions. These power tools combine speed, precision, and repeatability in ways that make them favorites among fabricators and DIY builders alike. However, success depends entirely on proper setup, blade selection, and technique. Get these elements wrong, and you'll face grabbing, rough edges, or worse—a dangerous kickback situation.
The same principles apply when cutting aluminum on chop saw equipment. While chop saws typically handle heavier stock and production volumes, both tools share fundamental requirements for achieving burr-free results. Let's walk through exactly what you need to know.
Before your blade ever touches aluminum, proper preparation determines whether you'll produce professional-quality cuts or frustrating rejects. An aluminium cutting mitre saw setup involves more than just mounting the right blade—it requires attention to every element that affects cut quality and safety.
Follow this step-by-step setup process for optimal results:
Squareness issues plague many aluminum cutting projects, but they're almost always traceable to setup problems rather than tool limitations. When your cut aluminum with miter saw results show consistent angular deviation, recheck your blade alignment and fence position before adjusting your technique.
Choosing the right miter saw blade to cut aluminum makes the difference between effortless slicing and dangerous blade grabbing. Standard wood-cutting blades—even carbide-tipped versions—often feature aggressive tooth geometry that bites into aluminum too aggressively, causing the material to climb the blade or kick back toward the operator.
For cutting aluminum on miter saw equipment, prioritize these blade characteristics:
Can I cut aluminum with a chop saw using the same blade considerations? The principles remain identical, though aluminum chop saw applications may benefit from even higher tooth counts—100 teeth or more—given the typically heavier profiles these machines handle.
Feed rate matters as much as blade selection. Pushing too fast generates excessive heat, causes premature blade wear, and produces rougher cuts. Allow the blade to cut at its own pace, applying steady downward pressure without forcing the material. You should see clean aluminum chips flying away from the cut rather than dust or discolored material—indicators of proper feed speed and blade engagement.
With your saw properly configured and the right blade installed, you're positioned to achieve the kind of precision cuts that eliminate post-processing work. But what about situations requiring portable cutting or table-mounted approaches? The next section covers circular saw and table saw methods for those specific scenarios.
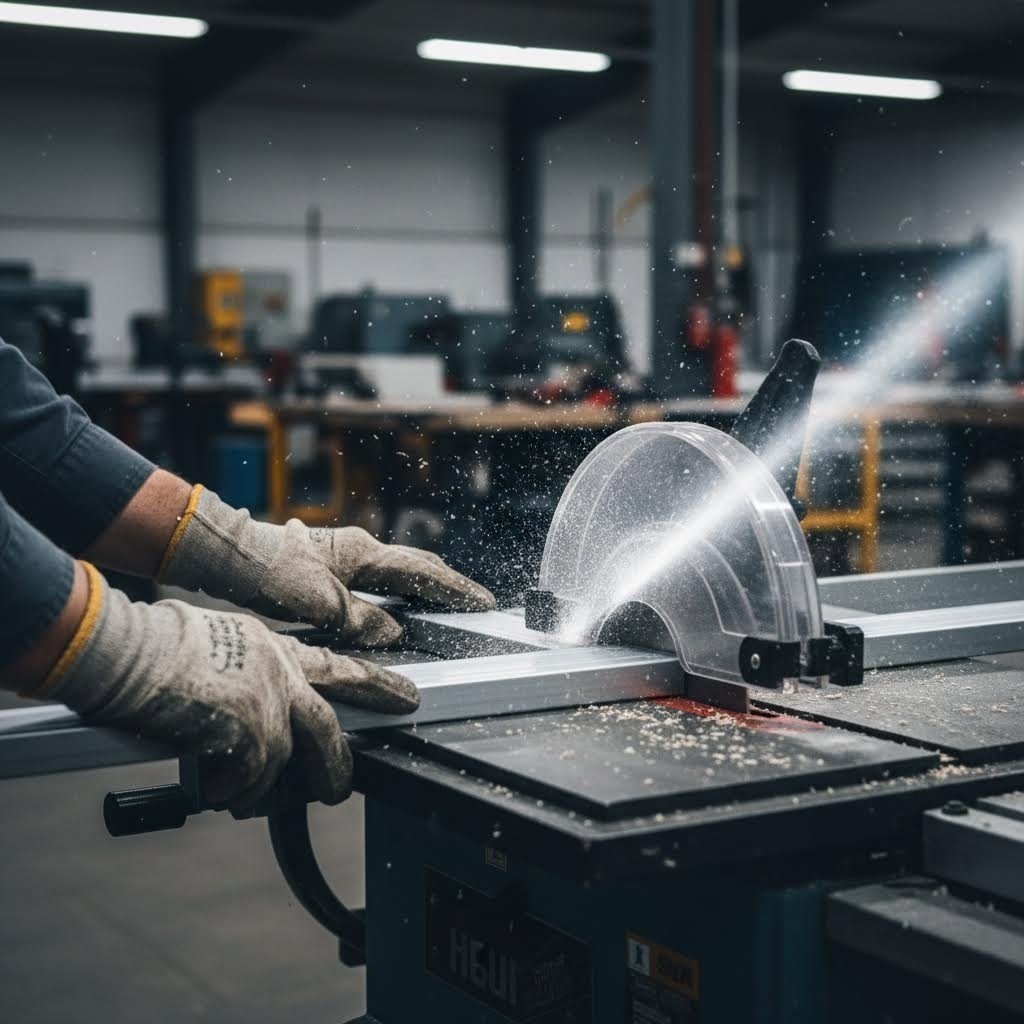
When you're working with longer aluminum extrusions or already have a well-equipped workshop, circular saws and table saws offer compelling advantages. These tools excel at handling larger profiles and delivering the straight, consistent cuts that frame-building and structural projects demand. Whether you're cutting aluminum with table saw equipment for repeatable precision or grabbing a handheld circular saw for portable flexibility, understanding the distinct techniques for each tool ensures clean results every time.
Cutting aluminium with circular saw setups gives you freedom to work wherever the project takes you—from the garage to the jobsite. Unlike stationary tools, a handheld circular saw brings the cutting action directly to your material, making it ideal for trimming long extrusions that would be awkward to maneuver onto a fixed saw table.
The key to success when cutting aluminum with skill saw equipment lies in selecting the right circular saw blade to cut aluminum. According to industry best practices, metal cutting blades or carbide-tipped blades designed for non-ferrous metals deliver the cleanest results. These blades feature fine tooth counts that slice cleanly without the grabbing or material deformation common with wood-cutting blades.
Blade orientation and feed direction require careful attention with handheld saws. When the circular saw blade cut aluminum, the teeth should enter the material from above and exit below, pushing chips downward and away from your line of sight. Feed the saw steadily into the workpiece—rushing generates excessive heat while moving too slowly allows the blade to dwell and create rough edges.
Securing your workpiece becomes especially critical with portable cutting. Unlike table saws where the material rests on a stable surface, handheld saw cutting aluminum requires external support:
For optimal feed rates, let the saw's motor sound guide you. A steady hum indicates proper cutting speed, while a strained, slowing motor signals you're pushing too hard. Conversely, a high-pitched whine with minimal resistance suggests you can increase feed speed slightly.
When your project demands identical cuts across multiple extrusion pieces, cutting aluminium on table saw equipment delivers unmatched consistency. The fixed blade position and adjustable fence system allow you to cut aluminum with table saw precision that handheld tools simply cannot match.
Cutting aluminum with table saw setups requires specific adaptations from standard woodworking practices. First, ensure you're using a circular saw blade to cut aluminum—the same carbide-tipped, high-tooth-count blades recommended for miter saws work excellently here. As cutting guidelines emphasize, tungsten carbide-tipped blades offer durability and efficiency that reduces maintenance frequency while enhancing cutting precision.
Feed direction on a table saw follows a critical rule: always feed the material against the blade's rotation. For standard blade configurations, this means pushing the extrusion from the front of the saw toward the back. Feeding with the blade's rotation causes the teeth to grab the material and potentially throw it back toward you.
Saw cutting aluminum on table saw equipment benefits from these specific techniques:
Always wear safety glasses, hearing protection, and avoid loose clothing when operating table saws. Aluminum chips are razor-sharp and can cause serious cuts if they contact bare skin.
Speed settings matter significantly when cutting aluminum on these stationary tools. Unlike wood, aluminum benefits from slower blade speeds that reduce heat buildup and prevent the material from welding to blade teeth. If your table saw offers variable speed control, reduce RPM when switching from wood to aluminum work. Without speed adjustment, compensate by using blades with higher tooth counts and applying cutting lubricant to manage heat.
Both circular saws and table saws handle aluminum extrusions effectively when properly configured. However, not every project requires power tools—and sometimes hand-cutting methods offer advantages that power equipment cannot match. The next section explores hacksaw and jigsaw techniques for situations where precision, quiet operation, or budget constraints favor manual approaches.
What if you only need a few cuts, work in a noise-sensitive environment, or simply don't own a power saw? Hand tools remain perfectly viable for cutting aluminum extrusions—and in some situations, they're actually the smarter choice. Whether you're learning how to cut aluminum tubing for a weekend project or trimming extrusions in a shared workshop where power tool noise isn't welcome, manual methods deliver solid results when paired with proper technique.
Hand cutting offers several distinct advantages that power tools cannot match:
When you need to cut aluminum with hacksaw, blade selection determines your success more than any other factor. According to cutting guides from industry experts, hacksaw blades come in different teeth per inch (TPI) options—typically 14, 18, 24, and 32—and choosing correctly prevents frustration before you make your first stroke.
For most aluminum extrusion profiles, blades with 14 to 18 TPI work excellently. These coarser teeth cut through aluminum quickly while clearing chips efficiently. If you're working with thinner-walled tubing or need smoother edges, step up to 24 or 32 TPI blades. The finer teeth produce cleaner cuts, though they require more strokes to complete the job.
Cutting aluminium with hacksaw success depends on proper technique as much as blade choice:
For achieving straight cuts without power tools, start by scribing a clear line around the entire perimeter of your extrusion using a square and sharp marker. This reference line lets you monitor cut accuracy from multiple angles as you progress. If your cut begins wandering, stop and gently angle the blade back toward your line rather than forcing a correction that creates a visible jog in the cut edge.
Understanding how to cut aluminium tube cleanly requires attention to the hollow interior. Support the tube walls during cutting to prevent deformation—a simple wooden dowel inserted into round tubing provides internal support that keeps the profile round throughout the cut.
When your project demands curved cuts, notches, or irregular shapes, cutting aluminum with a jigsaw becomes the logical choice. This versatile tool bridges the gap between manual hacksaws and dedicated power saws, offering the maneuverability that straight-cutting tools lack.
Selecting the right jig saw blades for metal makes all the difference. As metalworking specialists explain, metal cutting jigsaw blades are typically made from bi-metal or tungsten carbide with tooth designs optimized for aluminum. The TPI count matters here too—higher TPI produces smoother cuts at slower speeds, while lower TPI cuts faster but leaves rougher edges.
For aluminum specifically, blades with lower TPI work better than you might expect. Since aluminum is softer than steel, it can clog fine-toothed blades designed for harder metals. A blade with moderate tooth spacing allows easier chip removal and prevents the material buildup that causes binding and rough cuts.
When using a jigsaw to cut aluminum, follow these guidelines for optimal results:
For curved and intricate patterns, select a blade with a narrower profile that can navigate tighter radii. Cut slowly at first to establish your path, then increase speed gradually while following your guide lines carefully. The jigsaw's ability to plunge-cut also lets you create internal cutouts—start with a drilled pilot hole, insert the blade, and cut outward to your marked shape.
According to cutting thickness guidelines, jigsaws can handle aluminum up to 30mm thick with the right blade—more than sufficient for virtually any extrusion profile you'll encounter in DIY or light fabrication work.
Hand cutting methods prove that professional results don't always require professional-grade power tools. However, different extrusion profiles and precision requirements introduce additional considerations that affect your cutting approach regardless of which tool you choose.
Ever noticed how the same cutting technique that works flawlessly on solid square aluminum extrusion produces disappointing results on hollow tubing? Profile geometry dramatically influences every aspect of your cutting approach—from clamping strategies to blade engagement and final cut quality. Understanding these differences transforms your results from acceptable to exceptional, regardless of which cutting method you've chosen.
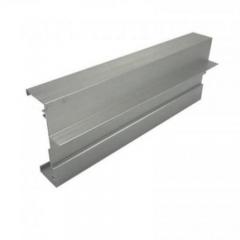
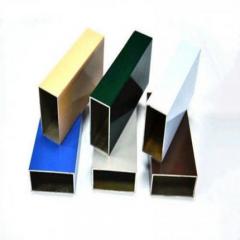
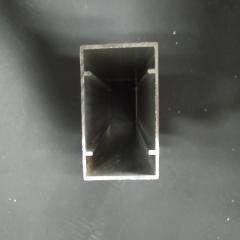
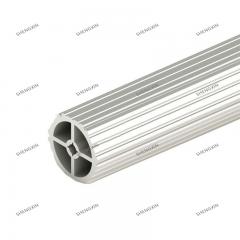
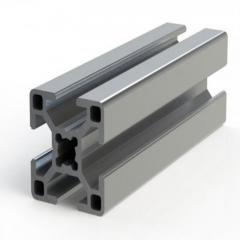
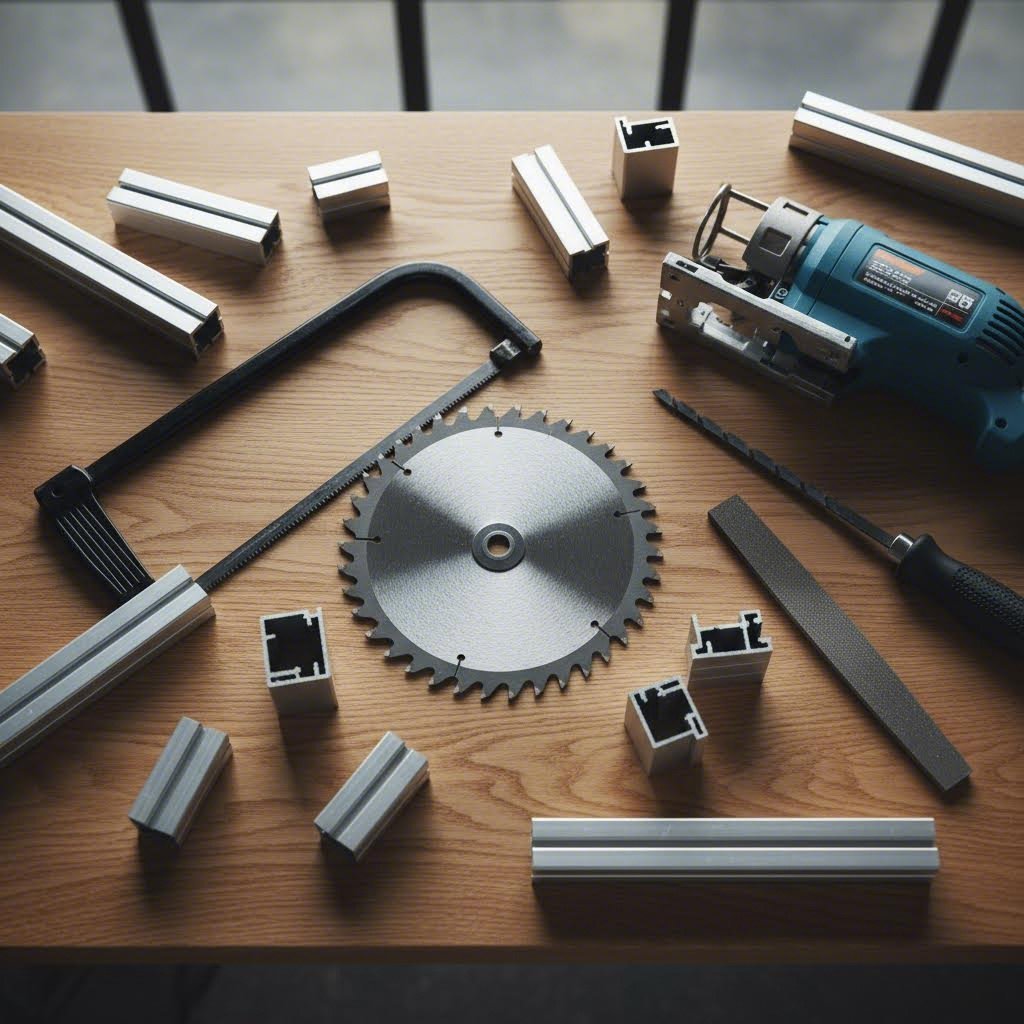
Aluminum extrusions come in countless configurations, but most fall into several common categories: solid bars, square aluminum extrusion profiles, aluminum L extrusion angles, T-slot and V-slot rails, hollow rectangular tubes, and round tubing. Each presents unique challenges that demand tailored solutions. Even small aluminum extrusions can prove tricky when their thin walls or intricate channels aren't properly supported during cutting.
T-slot and V-slot extrusions—the building blocks of countless DIY CNC machines, 3D printer frames, and modular workstations—feature complex cross-sections with multiple internal channels. These channels create thin walls and unsupported spans that can vibrate, deform, or produce ragged edges if you approach them carelessly.
The key to cutting aluminium extrusion with T-slot or V-slot profiles cleanly lies in proper support and clamping. Unlike solid bar stock that resists deformation naturally, these profiles need external reinforcement at the cut zone. Position your clamps as close to the cut line as practical without interfering with blade travel. This minimizes the unsupported span that vibrates during cutting.
For T-slot profiles specifically, consider these techniques:
V-slot extrusions require similar care, with particular attention to the precision V-groove that functions as a linear bearing surface. Any deformation here compromises the profile's primary function. Clamp V-slot material with the groove facing away from your clamping pressure to prevent distortion.
L shaped aluminum extrusion presents different challenges. These angle profiles tend to twist during cutting if only one leg is secured. Always clamp both legs firmly, or position the profile so the blade cuts through both legs simultaneously rather than sequentially. When the blade engages only one leg at a time, uneven cutting forces can torque the profile and produce an angled cut face.
Hollow rectangular and round tubes demand internal support for clean cuts. For aluminum transition strips and other hollow profiles, insert a snug-fitting wooden dowel, piece of scrap aluminum, or foam plug into the tube at the cut location. This prevents wall collapse and maintains the profile's cross-sectional shape as blade pressure is applied.
Not every project demands surgical precision, but some absolutely require it. Understanding what tolerance your application actually needs prevents both over-engineering simple projects and under-delivering on critical assemblies. The following table outlines typical tolerance requirements across common applications:
| Application Type | Acceptable Tolerance | Critical Considerations | Verification Method |
|---|---|---|---|
| Hobbyist projects, general DIY | ±1mm (±0.040") | Visual appearance, basic fit | Steel rule, visual inspection |
| Furniture, display frames | ±0.5mm (±0.020") | Joint gaps, aesthetic alignment | Combination square, gap gauges |
| Machine frames, CNC builds | ±0.25mm (±0.010") | Linear motion accuracy, squareness | Digital calipers, precision squares |
| Precision assemblies, instrumentation | ±0.1mm (±0.004") or tighter | Critical dimensions, interchangeability | Micrometers, CMM verification |
Achieving tight tolerances starts before you make any cut. Mark your cut line precisely using a sharp scribe rather than a felt marker—scribed lines provide a finer reference that doesn't add thickness to your measurement. Use a machinist's square rather than a carpenter's square when marking perpendicular lines, as these precision tools maintain accuracy that general-purpose squares cannot match.
Squareness verification after cutting catches problems before they compound in your assembly. Place the cut end against a precision square and check for light gaps along the entire edge. According to industry tolerance standards, the allowable deviation from square for cut ends is typically 1 degree—tighter than it sounds when translated to actual gap measurements on larger profiles.
For critical assemblies, implement these measurement and verification practices:
When cut quality falls short of requirements, identify whether the problem stems from technique or tooling. Consistent angular deviation usually indicates saw setup issues—misaligned blades or fences. Random variation suggests technique problems like inconsistent clamping pressure or feed rate changes during the cut. Rough edges with burrs typically point to blade wear or inappropriate blade selection for the profile type being cut.
Temperature affects aluminum dimensions more than many users realize. If you're working to tolerances tighter than ±0.25mm, allow your material to stabilize at room temperature before marking and cutting. Extrusions brought in from cold storage or hot delivery trucks can change length measurably as they reach ambient temperature.
With profile-specific techniques and precision requirements understood, one critical topic remains before you start cutting: keeping yourself safe. The following section covers essential safety precautions and protective equipment that every aluminum fabricator should employ.
You've selected your cutting method, chosen the right blade, and secured your workpiece. But have you protected yourself? Aluminum cutting generates hazards that catch many DIYers off guard—razor-sharp chips flying at high velocity, fine dust particles suspended in the air, and the ever-present risk of blade grabbing that can turn a routine cut into a trip to the emergency room. Understanding how to cut aluminum safely matters just as much as knowing how to cut it cleanly.
According to industry safety guidelines, wearing appropriate personal protective equipment serves as your first line of defense when operating any aluminium cutter. The hazards are real: aluminum chips are sharp enough to slice skin instantly, power saws generate noise levels that cause permanent hearing damage, and fine aluminum dust can irritate respiratory systems with prolonged exposure.
Before you power up any saw for cutting aluminum or pick up a hacksaw, ensure you have the following protective equipment in place:
The glove situation deserves special attention. While cut-resistant gloves protect your hands when handling sharp-edged aluminum pieces, they become dangerous when operating certain power tools. The fabric can catch on spinning blades and pull your hand into the cutting zone faster than you can react. Use gloves for material handling and cleanup—remove them when actively operating a saw for cutting aluminum.
Beyond personal protective equipment, your workspace setup significantly impacts how safely you can cut aluminum. A cluttered, poorly lit work area multiplies hazards that proper preparation eliminates entirely.
Never reach over or across a spinning blade to clear chips or adjust material position. Wait for the blade to stop completely before making any adjustments—blade grabbing incidents happen in fractions of a second.
According to standard operating procedures for aluminium cutters, potential hazards include noise exposure, electrical risks, sharp edges, and exposure to hazardous fumes. Addressing these systematically creates a safe working environment:
Blade grabbing represents one of the most dangerous hazards specific to aluminum cutting. This occurs when the workpiece pinches the blade or lifts off the table, causing sudden kickback. Proper clamping, appropriate blade selection (negative hook angle blades resist grabbing), and steady feed rates minimize this risk. If you feel the material starting to bind, release feed pressure immediately rather than forcing through.
How can I cut aluminum safely in a home workshop? The same principles apply whether you're in a professional facility or a garage shop. Adequate ventilation becomes especially important in enclosed spaces—aluminum dust accumulates quickly and fine particles remain airborne longer than you might expect. Position a fan to move air away from your breathing zone, or consider a dust collection system for frequent cutting work.
With proper safety measures in place, you can focus on the cutting task itself rather than worrying about preventable injuries. However, even with the best precautions and techniques, some projects benefit from professional cutting services—particularly when precision requirements, volume demands, or equipment limitations make DIY approaches impractical.
You've invested hours perfecting your technique, selected the right aluminum extrusion saw, and achieved respectable results on your test pieces. But as project complexity grows or volume requirements increase, a nagging question emerges: when does it make more sense to let professionals handle the cutting instead? Understanding how to cut extruded aluminum yourself is valuable—but recognizing when outsourcing delivers better overall results separates experienced fabricators from beginners who insist on doing everything themselves.
The decision between DIY cutting and professional services isn't about skill level or pride. It's a practical calculation involving time, precision requirements, equipment costs, and project economics. Sometimes the best way to cut aluminium is to let someone else do it entirely.
Imagine you need 200 identical cuts at ±0.1mm tolerance for a production run. Now imagine achieving that with your miter saw, measuring and verifying each piece individually. The math quickly reveals why professional cutting services exist—and why even skilled hobbyists outsource specific projects.
Use this decision framework to evaluate whether DIY or professional aluminum cut services match your situation:
Consider the hidden costs of DIY cutting that rarely appear in initial calculations: blade wear and replacement, electricity, workspace cleanup time, and the value of pieces ruined during the learning process. When these factors stack up against professional pricing, the cost gap often narrows considerably—or reverses entirely.
As one experienced fabricator noted in community discussions, the time spent achieving shop-quality results on a complex project could have funded professional cutting twice over. The "free" labor of DIY work carries real opportunity costs.
Not all professional cutting services deliver equal value. When evaluating providers for your aluminum cutting needs, prioritize these factors:
For projects requiring professional-grade precision or substantial volumes, manufacturers like Shengxin Aluminium offer comprehensive aluminum extrusion and deep processing services. Their facility houses advanced CNC machining centers capable of precise cutting, drilling, and bending to exact specifications—the kind of precision that eliminates the trial-and-error common in DIY approaches. With over 30 years of industry experience and 35 extrusion presses ranging from 600T to 5500T, they provide end-to-end support from die development through mass production.
Factory-direct pricing from established manufacturers often surprises DIYers who assume professional services cost prohibitively more than doing it themselves. Request quotes before assuming—the numbers may change your approach entirely.
Whether you choose DIY cutting or professional services, the goal remains identical: clean, precise aluminum cuts that enable successful project completion. Sometimes achieving that goal means mastering your miter saw technique. Other times, it means recognizing that the best use of your time and money involves letting specialists handle the cutting while you focus on assembly, design, or simply enjoying the finished result.
Regardless of which path you choose, achieving professional-quality edges requires attention to finishing details and systematic troubleshooting when problems arise.
You've made the cut—now what? Even with perfect technique and the right blade, most saw cut aluminum edges require some finishing work before they're truly project-ready. The difference between amateur and professional results often comes down to what happens after the blade stops spinning. Whether you're learning how to cut aluminium extrusion for the first time or refining skills you've practiced for years, mastering edge finishing transforms acceptable cuts into impressive ones.
Understanding how to cut aluminum extrusions is only half the equation. Post-cut finishing, quality verification, and systematic troubleshooting complete the picture. These final steps ensure your cuts meet specifications and your assembled projects look as professional as factory-finished components.
That freshly cut aluminum edge might look clean from a distance, but run your finger along it (carefully!) and you'll likely feel the burrs, ridges, and rough spots that power saws leave behind. According to metal finishing experts, proper deburring extends beyond aesthetics—unremoved burrs can cause assembly problems, create safety hazards, and lead to premature wear in mechanical systems.
Deburring aluminum extrusions requires different approaches depending on profile complexity and your precision requirements. For simple straight cuts on solid or standard profiles, a deburring tool with a swivel blade removes edge burrs quickly and consistently. These handheld tools feature carbide blades that shave away raised material as you draw them along the cut edge.
When finishing how to cut aluminium angle pieces or complex T-slot profiles, you'll need additional techniques:
For alu cut edges requiring a polished appearance, extend your sandpaper progression through 600, 800, and 1000-grit papers. Apply light machine oil during final sanding to prevent aluminum particles from scratching the developing surface. The result approaches anodized-quality smoothness without specialized equipment.
Quality verification catches problems before they become assembly failures. After deburring, check each cut piece against your specifications using appropriate measuring tools. For cutting aluminium with mitre saw projects requiring tight tolerances, verify both length and squareness—a cut can measure perfectly for length while being significantly out of square.
When cuts don't meet expectations, systematic troubleshooting identifies root causes faster than random adjustments. According to precision cutting specialists, most quality issues trace back to specific, correctable causes. Here are the most common problems and their solutions:
For persistent quality issues that resist troubleshooting, the problem may lie with your equipment's fundamental capabilities rather than technique or setup. Home-grade tools have inherent limitations that no amount of adjustment overcomes. When project requirements exceed your equipment's precision envelope, professional services become the practical solution.
For those seeking factory-finished quality without the post-cut finishing work, Shengxin Aluminium's deep processing services offer an alternative worth considering. Their CNC machining centers deliver precise cuts to exact specifications, with surface treatments including anodizing in custom colors, powder coating, and PVDF finishes. This end-to-end approach—from die development through mass production—eliminates the deburring, finishing, and quality verification steps entirely. For high-volume projects or applications demanding tolerances tighter than workshop equipment can achieve, factory-direct services often prove more economical than investing in specialized tooling and spending hours on manual finishing work.
You now possess the knowledge to cut aluminum extrusions cleanly using multiple methods, select appropriate tools and blades for your specific profiles, achieve the precision your projects demand, and finish edges to professional standards. The techniques covered—from miter saws and circular saws to hacksaws and jigsaws—each have their place depending on your project requirements, available equipment, and precision needs.
Start with your next project by selecting the cutting method that matches your situation. Apply the blade selection principles, setup procedures, and safety precautions discussed throughout this guide. Measure carefully, cut deliberately, and finish thoroughly. With practice, the clean, burr-free cuts that once seemed like professional magic will become your standard result.
A miter saw with a carbide-tipped blade featuring 80+ teeth delivers the best results for most aluminum extrusion projects. The miter saw offers precise angle cuts, built-in measurement systems, and clean edges with minimal burrs. For hand tool alternatives, a hacksaw with 18-24 TPI blades works well for smaller projects. Band saws excel for thicker stock or curved cuts, while chop saws handle heavy-duty production volumes. Your choice depends on precision needs, volume requirements, and available equipment.
Achieving clean cuts requires proper blade selection, secure clamping, and correct feed rates. Use carbide-tipped blades with high tooth counts (80-100 teeth) and negative hook angles to prevent grabbing. Always clamp the extrusion firmly against both the table and fence. Apply cutting lubricant like wax or cutting fluid to reduce friction and heat buildup. Feed the material steadily without forcing—let the blade work at its own pace. After cutting, deburr edges using a deburring tool, fine files, or progressive sandpaper grits.
Yes, miter saws work excellently for cutting aluminum extrusions when properly configured. Install a carbide-tipped blade with 80+ teeth and triple-chip grind geometry designed for non-ferrous metals. Verify blade alignment is perpendicular to the fence, clamp workpieces securely, and apply cutting lubricant. Use steady downward pressure without forcing the cut. Safety equipment including safety glasses, hearing protection, and a dust mask is essential. Many fabricators consider miter saws the ideal tool for frame building and repetitive aluminum cuts.
Select carbide-tipped blades with 60-100 teeth for aluminum extrusion cutting. Look for triple-chip grind (TCG) tooth geometry rather than alternate top bevel (ATB) designs made for wood. Blades with zero or negative hook angles prevent the aggressive bite that causes aluminum grabbing and kickback. Popular options include Diablo, Freud, and DeWalt 80-tooth blades specifically designed for non-ferrous metals. Higher tooth counts produce finer cuts with less vibration and reduced burr formation.
Consider professional cutting services when your project requires tolerances tighter than ±0.25mm, involves high volumes (dozens or hundreds of pieces), needs complex angles or compound miters, or when equipment investment exceeds the outsourcing cost. Professional CNC machining centers maintain precision that hand-fed saws cannot match. Services like Shengxin Aluminium offer factory-direct pricing with state-of-the-art equipment capable of precise cutting to exact specifications, often proving more economical than purchasing specialized tools for one-time projects.


 Servicio en línea
 0086 136 3563 2360
 sales@sxalu.com
 +86 136 3563 2360
 español
 English
 français
 Deutsch
 русский
 português
 العربية
 ไทย
ไทย Việt
Việt Українська