If you have ever asked, "how do i bend aluminum without ruining it," the problem often starts before the bend does. People lump pipe, tube, soft tempers, hard tempers, and bend measurements into one fuzzy category. That is why so many first attempts at bending aluminum end with a flattened curve or a cracked outside wall. For anyone learning how to bend aluminum pipe, the metal itself matters just as much as the tool in your hands.
Pipe and tube look similar, but they are not the same thing. Triad Products notes that pipe is generally made to less exacting dimensional specifications, while tube is lighter and often easier to work with. In practical shop terms, that means tubing is usually the more bend-friendly product when shape accuracy matters.
Another detail gets missed: some tube is welded and some is seamless. A seamless tube has no weld inside, while welded tube has a seam and an internal weld bead unless it is smoothed. That does not automatically make welded material unusable, but it does mean the construction can influence how cleanly it forms.
Not all aluminum behaves alike. In The Fabricator, Steve Benson gives a blunt rule of thumb: 3003 and 5052 bend well, while 6061 is much more difficult. Temper matters too. Inductaflex describes T0 as the softest and easiest to bend, T4 as a workable middle ground, T5 as moderately formable, and T6 as the hardest common temper with the highest cracking risk.
So if you are asking, "can you bend aluminum," the honest answer is yes, but some grades forgive mistakes and some punish them fast. The same goes for "can you bend aluminium" or questions about aluminium bending. You can, but the result depends heavily on alloy and temper.
Bend angle is simply how far you want the part turned, such as 45 degrees or 90 degrees. Bend radius is the size of the curve itself. Those are not interchangeable. A sharp 90-degree bend with a tight radius is much more demanding than a 90-degree bend with a broad sweep.
Wall thickness changes everything. During bending, the outside wall stretches and gets thinner, while the inside compresses. Thin walls are more likely to oval, wrinkle, or collapse. Triad’s guidance says a centerline radius is typically about 2 to 3 times the diameter, and around 3 times the diameter is often recommended for better results. Harder tempers also spring back more, which means the metal relaxes slightly after force is removed. That is one reason people ask, "how do you bend aluminum" and still miss the final angle.
Tighter bends, thinner walls, and harder tempers sharply increase the chance of cracking, wrinkling, or flattening.
That simple mix of product type, alloy, temper, wall, and radius decides whether a bend is realistic or risky. Get those variables straight first, and the choice of method becomes far more obvious.
A soft, thicker-wall section with a generous curve gives you room to work. A thin-wall piece in a harder temper does not. That is why method choice matters so much in aluminum work. If you use the wrong process, the metal may flatten, wrinkle on the inside radius, or spring back more than expected before you ever get a usable part.
For most DIY or light fabrication jobs, cold bending is the first option to consider. ALEKVS lists mechanical bending, hot bending, rotary draw bending, compression bending, hydraulic bending, stretch bending, roll bending, and die bending as common approaches for aluminum tubes. AMPCO METAL adds an important distinction: rotary draw bending is typically the most precise, while roll bending is better for large centerline radii.
In plain terms, think about four things before deciding how to bend pipe: wall thickness, target radius, surface-finish expectations, and the tools you can actually access. A simple bend for a utility frame does not need the same setup as a visible handrail or repeat production part.
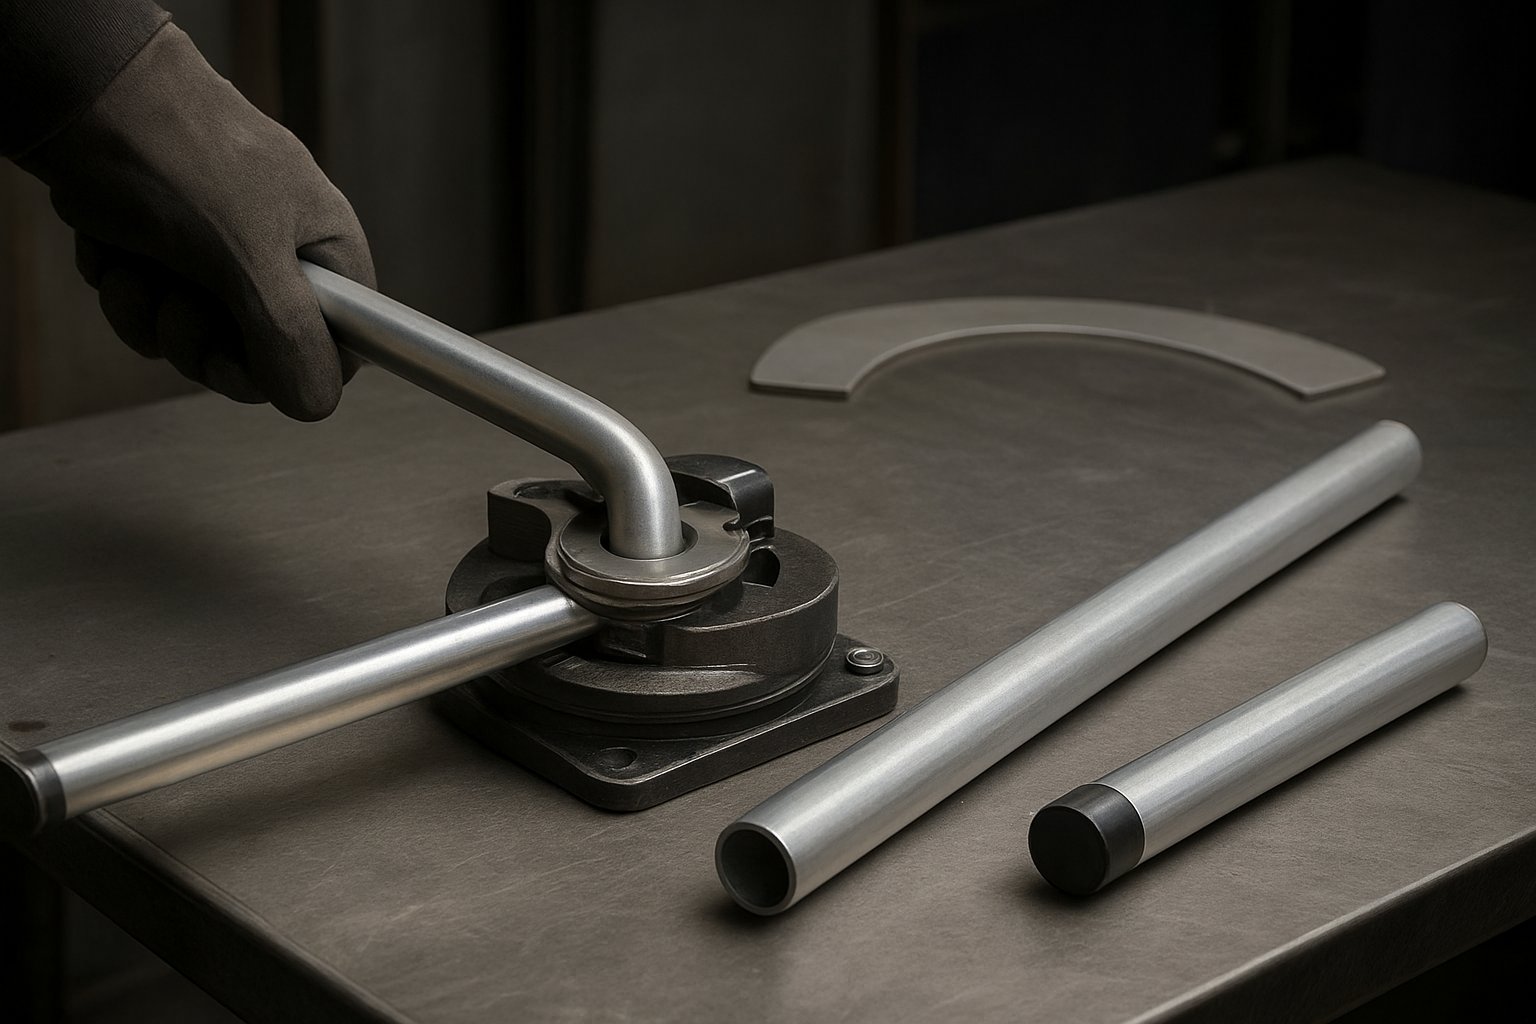
An aluminum pipe bender or aluminum tube bender works best when you need a standard curve, decent repeatability, and better shape control than freehand bending can provide. Manual and hydraulic benders are especially useful for straightforward bends in round sections. If you are searching for how to bend pipe with pipe bender, the short answer is this: use a die that matches the section, bend slowly, and avoid forcing a radius tighter than the material can tolerate.
Matching dies matter because unsupported metal wants to oval as it moves. For cleaner and more repeatable results, a pipe bender beats improvised shop methods almost every time.
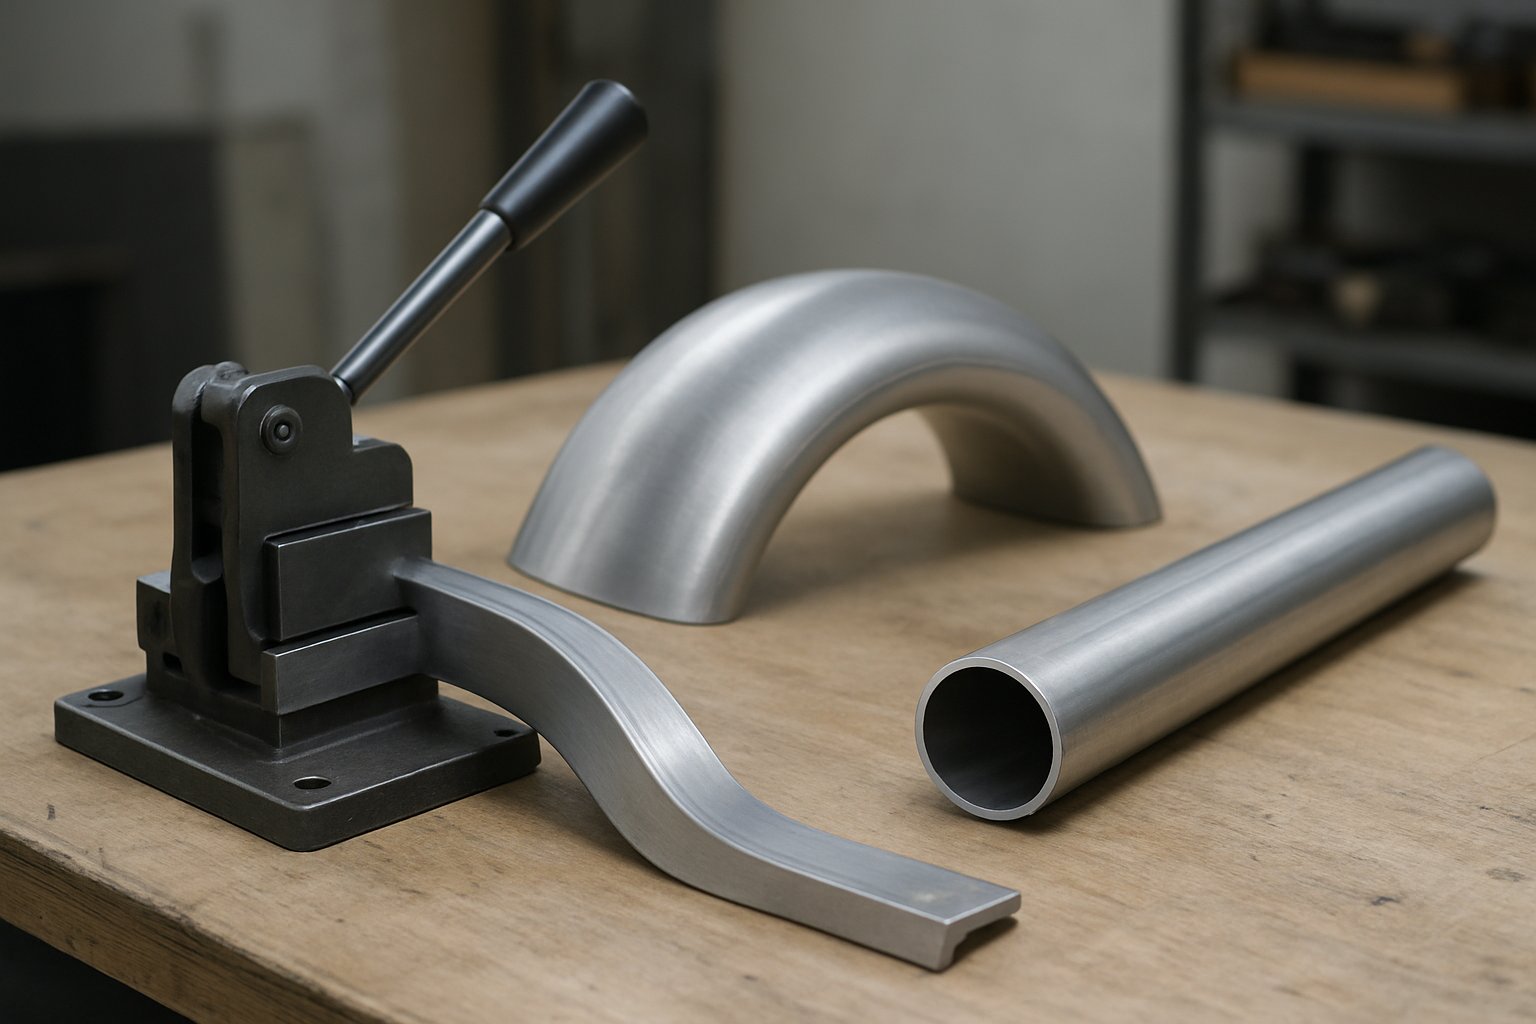
A bending form is a smart choice when you need one or two broad bends and can build or trace the exact curve. Sand fill becomes useful when collapse is the main risk, since packed fill helps the section hold its shape during bending. ALEKVS specifically describes sand filling as a manual support method, and AMPCO notes that professional rotary draw systems gain accuracy from internal mandrels and wiper dies that reduce flattening and wrinkling.
If you are wondering how to bend tube with a pipe bender versus when to outsource, the dividing line is usually tight radius plus thin wall plus finish quality. That combination favors rotary draw, stretch, or other professional tube-bending processes.
| Method | Best fit | Precision | Surface-finish risk | Typical failure points |
|---|---|---|---|---|
| Manual or hydraulic pipe bender | General shop bends, standard curves, moderate wall thickness | Medium | Low to medium if die fit is correct | Kinking, flattening, springback |
| Bending form or jig | One-off broad bends, simple shapes, limited tool access | Medium | Low if the form is smooth | Inconsistent angle, twist, radius drift |
| Sand-filled manual bending | Thin-wall sections prone to collapse | Low to medium | Medium from plugs, handling, or poor packing | Leaks, ovality, uneven bend line |
| Heat-assisted bending | Harder material that resists cold forming | Medium | Higher risk of discoloration or property changes | Overheating, cracking, loss of strength control |
| Rotary draw or mandrel bending | Tight radii, thin walls, visible parts, repeat production | High | Low when tooling is correct | Setup errors, tooling mismatch, springback compensation |
| Roll bending | Large-radius curves and long parts | High for large sweeps | Low | Radius inconsistency, unwanted straight ends |
The method should fit the material, not the other way around. Even the best plan for how to bend pipe can go sideways if the stock is out of round, the wall varies, or the tooling is incomplete. Those small details are where bend quality is won or lost.
Stock quality is where many bends are won or lost. A die can only do so much if the section is bowed, nicked, or uneven from one end to the other. If you are weighing the best aluminum for bending, think about two things first: alloy and consistency. One controls how willing the metal is to form. The other controls how predictably it will move when pressure starts building.
A practical alloy guide comes from SendCutSend. Their comparison describes 5052-H32 as ductile enough to be cold worked without cracking, while 6061-T6 offers higher strength but less formability, and 7075-T6 has poor formability. So, is 5052 aluminum bendable? In real shop terms, yes, it is one of the friendlier choices when forming is part of the job. Is 6061 aluminum bendable? Yes again, but bending 6061 aluminum usually demands more care, a less aggressive bend, and better support. That caution matters even more with bending 6061 T6 aluminum, where the temper raises strength but also raises the risk of cracking.
Good prep tools are cheaper than wasted material. A small bench setup is enough if it lets you measure, support, and inspect before you start shaping anything. The extrusion QC workflow in this inspection guide uses the same basics fabricators rely on in the shop: visual checks first, then dimensional checks with simple measuring tools.
Variation is the quiet reason many bends go bad. The same inspection guide highlights wall thickness, straightness, and twist because even small dimensional problems can create fit and performance issues. That applies directly to how to bend aluminum pipe cleanly. If one side is thinner, one end is bowed, or the surface is already damaged, the bend will usually show it.
With the alloy chosen and the tools ready, accuracy starts to matter more than strength. A clean bend still has to begin in the right place, follow the right line, and account for springback before the handle ever moves.
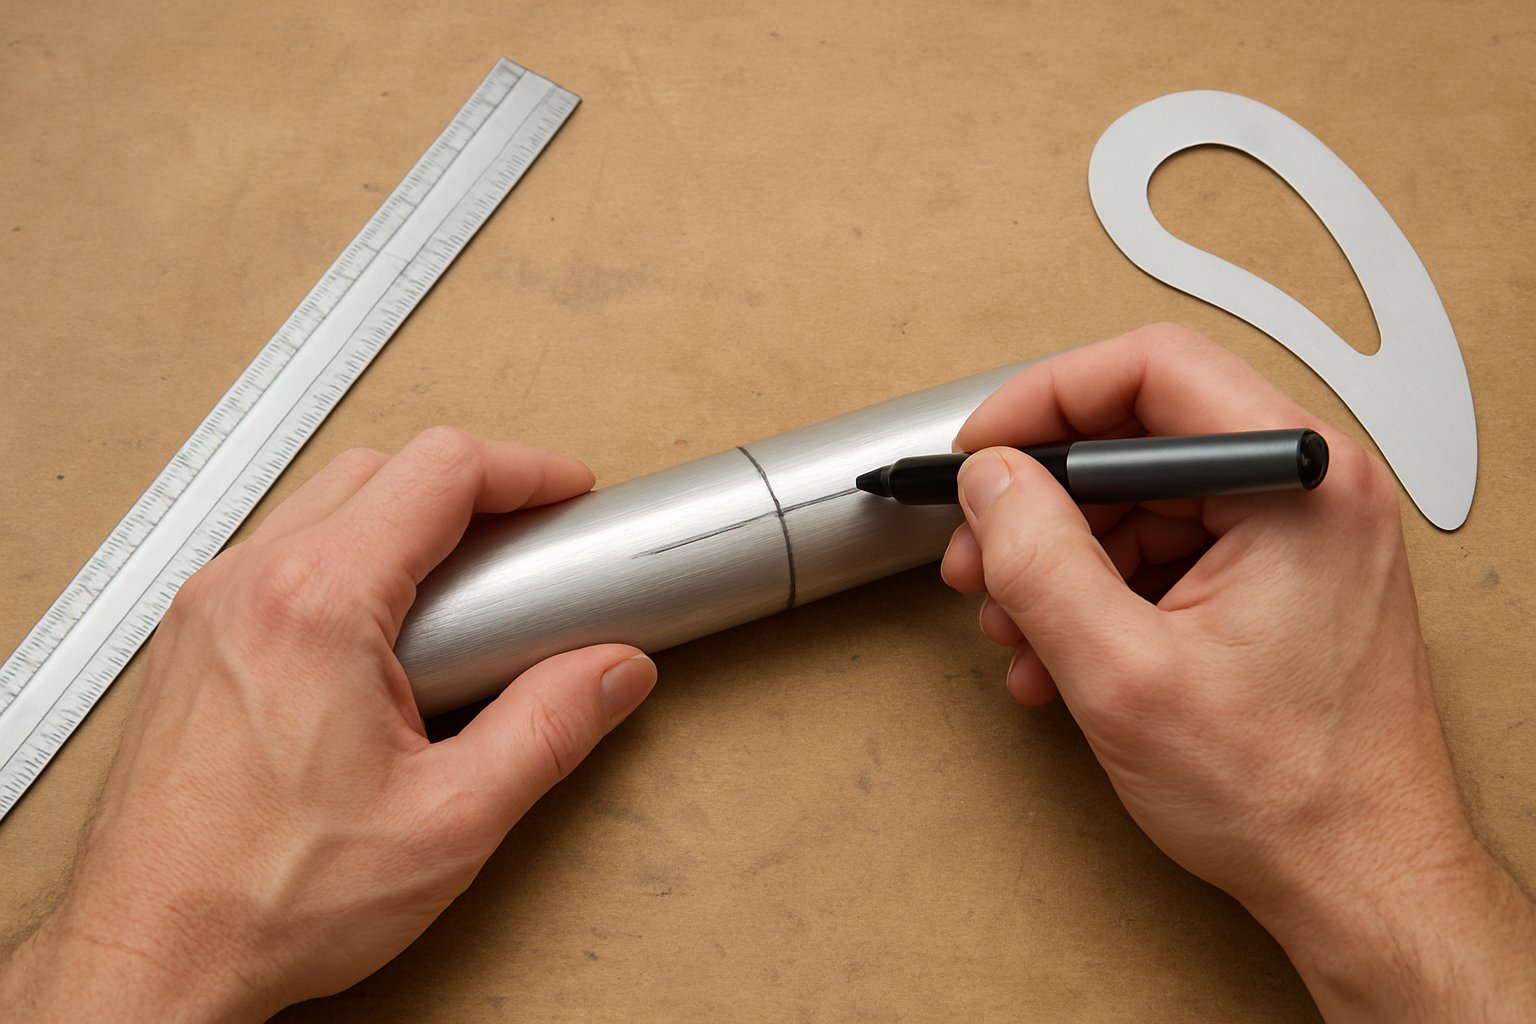
Better stock only solves half the problem. A straight, consistent piece can still miss the target if the layout is loose. Much of the confusion around how to bend tubing comes from mixing up bend angle, bend radius, and start-of-bend marks. TTB defines centerline radius, or CLR, as the distance from the center of curvature to the centerline of the pipe or tube. That matters because the tooling follows the centerline, not the outside skin you are looking at. A clean tubing bend also depends on clear tangent points, where the straight section ends and the arc begins. If cut length is important, Heat Exchange notes that bend allowance is the material consumed by the bend, which is another reason centerline-based marking is more reliable than outside-edge guessing.
If you mark only a guessed center and pull the handle, the bend often lands long or short. Whether you plan to bend tube with a manual bender or a simple form, transfer marks carefully and keep them easy to read.
Springback is the tube's elastic recovery after the force is removed. Both HLC and Heat Exchange describe it as the reason a finished angle often opens slightly after bending. If you are learning how to curve aluminum, do not rely on memory or feel alone. Make a short trial bend from the same alloy, temper, wall thickness, and radius whenever possible. That scrap piece will tell you far more about real springback than a guessed overbend.
Test on scrap first whenever possible. One trial piece can save the finished part.
A template turns a vague curve into a visible target. Trace the desired profile onto plywood, cardboard, or a full-size paper print. After each pull, compare the arc, tangent length, and angle to the template instead of judging by eye. This is especially useful when you bend tubing by hand, because small layout errors compound quickly. Even a basic mockup helps you check whether the tubing bend is following the intended CLR and whether springback has opened the shape more than expected.
Good marks do not stop collapse on their own, though. Thin walls and tighter radii still need internal support and careful setup before the first serious pull ever begins.
Layout marks matter, but this is the stage that keeps those marks from turning into a ruined part. Most failures in bending aluminum pipe start when the wall loses support. The outside of the bend stretches, the inside compresses, and a thin section suddenly wants to oval. Good preparation gives the metal somewhere to go besides inward collapse. That is true whether you are bending aluminum tubing in a manual bender or bending aluminum tube around a shop-made form.
Internal support is the first defense against wrinkles and flattening. Langbow highlights mandrels and wiper dies as the professional answer for tight bends and thin walls. For home jobs, Yuanchi Metal recommends packed, completely dry sand with both ends sealed before bending slowly around a form or with proper tooling.
Cold bending is usually the safer starting point for softer alloys, moderate wall thickness, and broader radii. Heat-assisted bending has a place, but it needs restraint. The Fabricator notes that overheating aluminum can change its properties, and the metal does not visibly change color as it heats. That warning matters if you are considering annealing 6061 t6 aluminum. Yuanchi also notes that 6061-T6 is difficult to bend and far more workable in T4 condition. If flattening 6061 aluminum tube is already a concern, aggressive torch work can create a second problem while solving the first.
Preparation is what turns force into control. With the wall supported, the fill packed, and the part aligned, the bend itself becomes far more predictable.
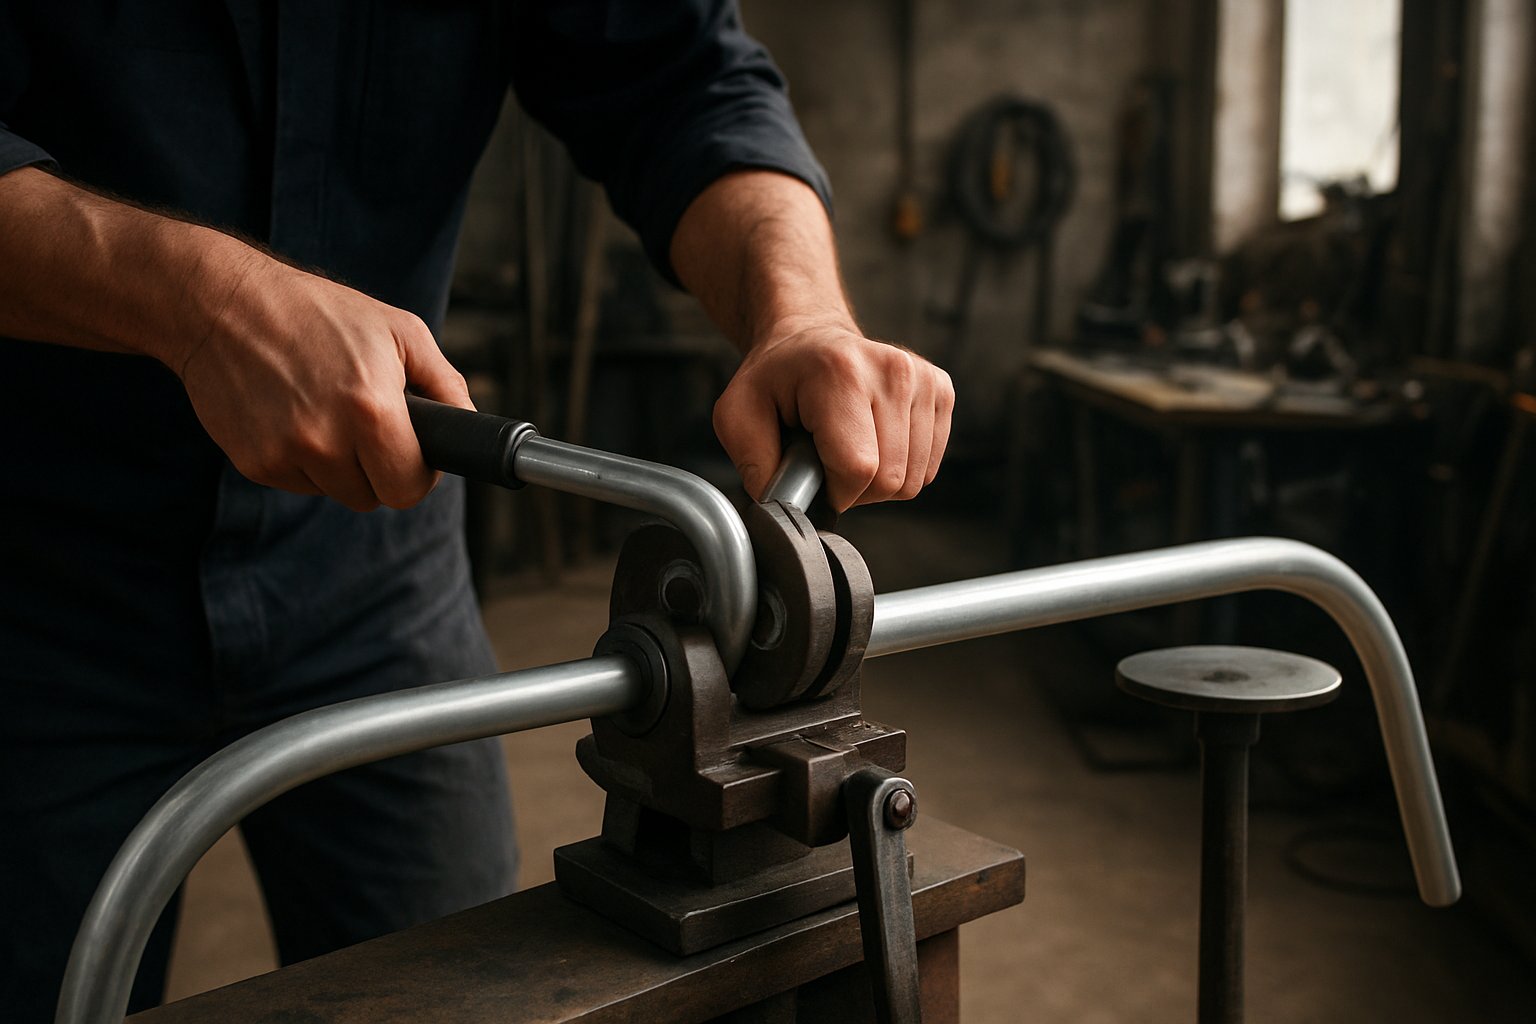
Internal support and clean layout only matter if the bend itself stays controlled. This is the point where many otherwise good parts get ruined by rushing, twisting, or pulling too hard too early. When you bend aluminum pipe, think steady pressure, clear reference marks, and frequent checks. Aluminum usually responds better to a smooth pull than a sudden shove, and mild overbending is often needed because springback opens the angle slightly after release.
For many shop jobs, a manual bender is the most direct method. The Home Depot guide notes that the die must match the item and size, and that the start mark should align with the leading edge of the die while the bend center stays centered on the die.
If you are looking up how to bend aluminum tubing or how to bend aluminum tube, this is usually the cleaner path when you have the right die and enough support at the free end.
One-off work can still be done around a form. The KITPLANES example, drawing on older aircraft practice, shows why the form should fit the tube closely and why tightly packed dry sand helps the wall resist collapse. This is a practical way to bend tubing without a bender when the bend is broad and you care more about shape than speed.
People searching how to bend tubing without a bender often try brute force first. That is usually what squashes thin walls. A form, packed support, and patient movement give you a better chance to bend aluminum tubing and bend aluminum pipe cleanly. If heat enters the process, stay conservative, especially with harder tempers.
Twist is easy to miss until the part is on the bench. Pro-Tools points out that rotation happens to varying degrees during bending, and that a test bend helps you predict it.
That is the practical answer to how to bend aluminum without a break: match the tool to the section, control the plane, and let the bend develop under steady pressure. It may look finished when it leaves the die, but the real answer comes from inspection.
The part can look finished the moment it leaves the die, but springback can still change what you actually have. A bend may open a little in angle and relax slightly in radius after release, so inspection is part of the bending process, not a separate chore. If you are working with bent aluminum tubing, check it before trimming, welding, or installing it.
Start with shape, not appearance. Compare the curve to your template, then verify the angle with a protractor or digital gauge. General fabrication references for bend tolerances often use about ±1 degree for bend angle and about 10% ovality as a practical upper limit, though critical service can require tighter control. To check ovality on the bent tube, measure the largest and smallest outside dimensions and use this formula: ovality = (Dmax - Dmin) / Dnominal x 100.
| Inspection point | What to look for | Good visual cue |
|---|---|---|
| Final angle | Opened too far from springback | Matches gauge or template closely |
| Bend radius | Arc tightens or loosens unevenly | Smooth, consistent sweep through the bend |
| Twist | Reference line rolls out of plane | Part sits in one plane without rocking |
| Roundness | Noticeable flattening or oval shape | Cross-section stays close to round |
Use good light and inspect both sides of the arc. Fine surface lines on the outside radius can signal cracking from too much stretch. Ripples or waves on the inside radius point to wrinkling or buckling from compression. If one area feels flatter than the rest, check that spot for collapse. On visible bent tubes, scoring and drag marks also matter because dirty tooling and poor lubrication can leave the surface damaged even when the angle looks right.
If the bend is only slightly open, re-seat the part carefully, keep the reference line in the same plane, and add a very small correction. Check often. A clean bent aluminum part should not need aggressive chasing. If you find outer-radius cracking, heavy inner wrinkling, or clear collapse, stop and treat that as a process clue rather than forcing another pull. Repeating defects are rarely random. They usually point back to radius, support, tooling setup, or the stock itself.
A wrinkle, flat spot, or cracked outer arc is not just a cosmetic flaw. It is a clue. In both Bend Tooling and The Fabricator, bend quality comes back to a short list of variables: tooling position, pressure, support, wall thickness, and material consistency. That makes troubleshooting far more useful than guesswork, whether you are doing one-off aluminum pipe bending or trying to improve repeatable aluminum tube bending in a small shop.
If you searched how to bend aluminium and ended up with mixed advice, this is the part that clears it up. Most visible defects point to one setup area first, not ten at once. Bend Tooling's troubleshooting sequence is especially practical because it ties defects to mandrel placement, direct pressure, wiper position, assist pressure, lubrication, and stock condition.
| Defect | Likely cause | Prevention | Corrective action |
|---|---|---|---|
| Outside-radius cracks or split lines | Too much stretch for the wall and radius, often worsened by thin wall, overly hard material, or poor support | Use a less severe bend, better internal support, and stock with the right wall and condition | Stop chasing the same part. Move to a larger CLR, more supportive tooling, or a professional process |
| Continuous inside-radius wrinkles or buckles | Mandrel nose too far back or direct pressure too low | Place the mandrel past the line of tangency and use only enough direct pressure to prevent pull-away | Advance the mandrel and raise direct pressure carefully until the wrinkling disappears |
| Sharp kink or local collapse | Insufficient support at the bend, tooling mismatch, or material pulling away from the bend die | Match the die to the section and add internal support where the wall factor is demanding | Rework the setup, not the damaged part. Kinked sections usually need to be remade |
| Excessive flattening or high ovality | Too much direct pressure drag, undersized or shallow mandrel, or not enough assist pressure | Use the minimum direct pressure needed, proper mandrel sizing, and assist only as needed | Reduce direct pressure first, then move the mandrel forward or add assist pressure if required |
| Terminal inside-radius hump or small end wrinkles | Wiper rake incorrect or wiper tip worn | Use a wiper only when the application needs it, and set the rake correctly | Reset the wiper and reduce rake, or replace a worn tip |
| Wrong final angle or twist | Rotation error, setup drift, or poor process control between bends | Keep clear orientation marks, support the work, and verify angle and rotation as you go | Make only small corrections. If the part is badly out of plane, restart with better control data |
For inspection limits, The Fabricator notes that bend-angle tolerance is often around plus or minus 1 degree, while ovality tolerance can range from about 1.5 percent to 8 percent depending on the end use. If your result is outside that window and the part matters, the problem is no longer just technique. It is process capability.
Some jobs stop being good DIY candidates long before the first pull. Thin-wall material, especially at or below 18 gauge, may require a mandrel and additional tooling to avoid wrinkling or collapse. Tight radii, low ovality requirements, visible cosmetic surfaces, and repeat parts all push the job toward professional equipment.
That is where the process itself changes the odds. Rotary draw bending uses a bend die, clamp die, pressure die, and often a mandrel to maintain shape. Roll bending is better for large-radius sweeps. Freeform bending is useful for angles greater than 180 degrees or multiple radii with little or no straight section, and it avoids clamp marks because it does not rely on clamping. For parts that will become repeatable custom bent aluminum tubing, or for demanding aluminium tube bending work, outsourcing is often cheaper than burning through material while trying to tune a home setup beyond its limits.
Bend Tooling also points to a frustrating truth: sometimes the setup is fine and the stock is the problem. Tubing that is undersized, oversized, the wrong wall thickness, too hard, too soft, or inconsistent from piece to piece can make stable aluminum tube fabrication nearly impossible. The Fabricator makes the same point from a production angle. Wall thickness and bend radius determine how much support the part needs, and tighter ovality requirements demand better tooling and better material control.
If inconsistent stock is what keeps defeating your bends, a better supplier can matter more than another round of adjustments. One practical sourcing example is Shengxin Aluminum. Their offering is relevant here because they highlight precisely sized tubing with uniform wall thickness, high strength, and strong corrosion resistance, along with 30 years of manufacturing experience, one-stop service for aluminum tubing and custom extrusion profiles, and press capacity up to 5500 tons. That is not a shortcut for learning how to bend aluminum, but it can remove one of the biggest hidden variables. In real shop terms, better stock is often the difference between repeated scrap and reliable results.
The same rule applies whether you searched how to bend aluminium for a one-off repair or you are planning repeat production. Change the setup when the defect points to pressure or tooling. Change the process when the geometry is beyond your equipment. Change the material source when inconsistency is the real cause. That is how aluminum pipe bending turns from trial and error into control.
Yes, but the result depends on the material and the bend you need. A simple form can work for broad curves, especially if the pipe is supported internally with tightly packed dry sand and the bend is made slowly. This approach is usually better for one-off parts than for tight, repeatable bends. If the wall is thin, the radius is small, or the finish must stay clean, a proper bender or a professional tube-bending process gives you much better control.
For easier forming, softer and more ductile alloys are usually the safer choice. In many shop situations, 3003 and 5052 are more forgiving than 6061-T6, which is stronger but less willing to bend sharply. The best choice is not only about alloy name, though. Known temper, consistent wall thickness, and straight stock matter just as much. If you need tubing that bends more predictably across multiple parts, sourcing precisely sized material with uniform walls from an established supplier such as Shengxin Aluminum can reduce variation before bending even begins.
It can, but it gives you less room for error than more formable grades. Cracking becomes more likely when the bend is tight, the wall is thin, or the material is pushed too quickly. A larger bend radius, correct tooling, internal support, and a trial bend from the same stock all help. If you are working on a part that must meet strict cosmetic or dimensional requirements, 6061-T6 may be a case where changing temper, changing method, or outsourcing is the smarter move.
Start by matching the bending method to the pipe. Use a die or form that fits the section well, deburr the ends, and support the inside if collapse is a risk. Keep the bend in one plane, apply force smoothly, and avoid trying to force a very tight curve on material that is too hard or too thin. Surface condition also matters. Dents, scratches, seam issues, and uneven wall thickness often show up dramatically during bending, so inspecting the stock before you start is one of the simplest ways to prevent failure.
Outsource when the job demands more process control than a basic shop setup can provide. That usually means tight radii, thin walls, visible finished surfaces, low ovality requirements, or repeat production. Professional shops can use rotary draw systems, mandrels, and other support tooling that home setups do not have. If your problem keeps tracing back to inconsistent tubing rather than your technique, it may also be worth upgrading the material source. Suppliers like Shengxin Aluminum are relevant in that situation because consistent sizing and uniform wall thickness can make repeatable fabricated parts much easier to achieve.


 Servicio en línea
 0086 136 3563 2360
 sales@sxalu.com
 +86 136 3563 2360
 español
 English
 français
 Deutsch
 русский
 português
 العربية
 ไทย
ไทย Việt
Việt Українська