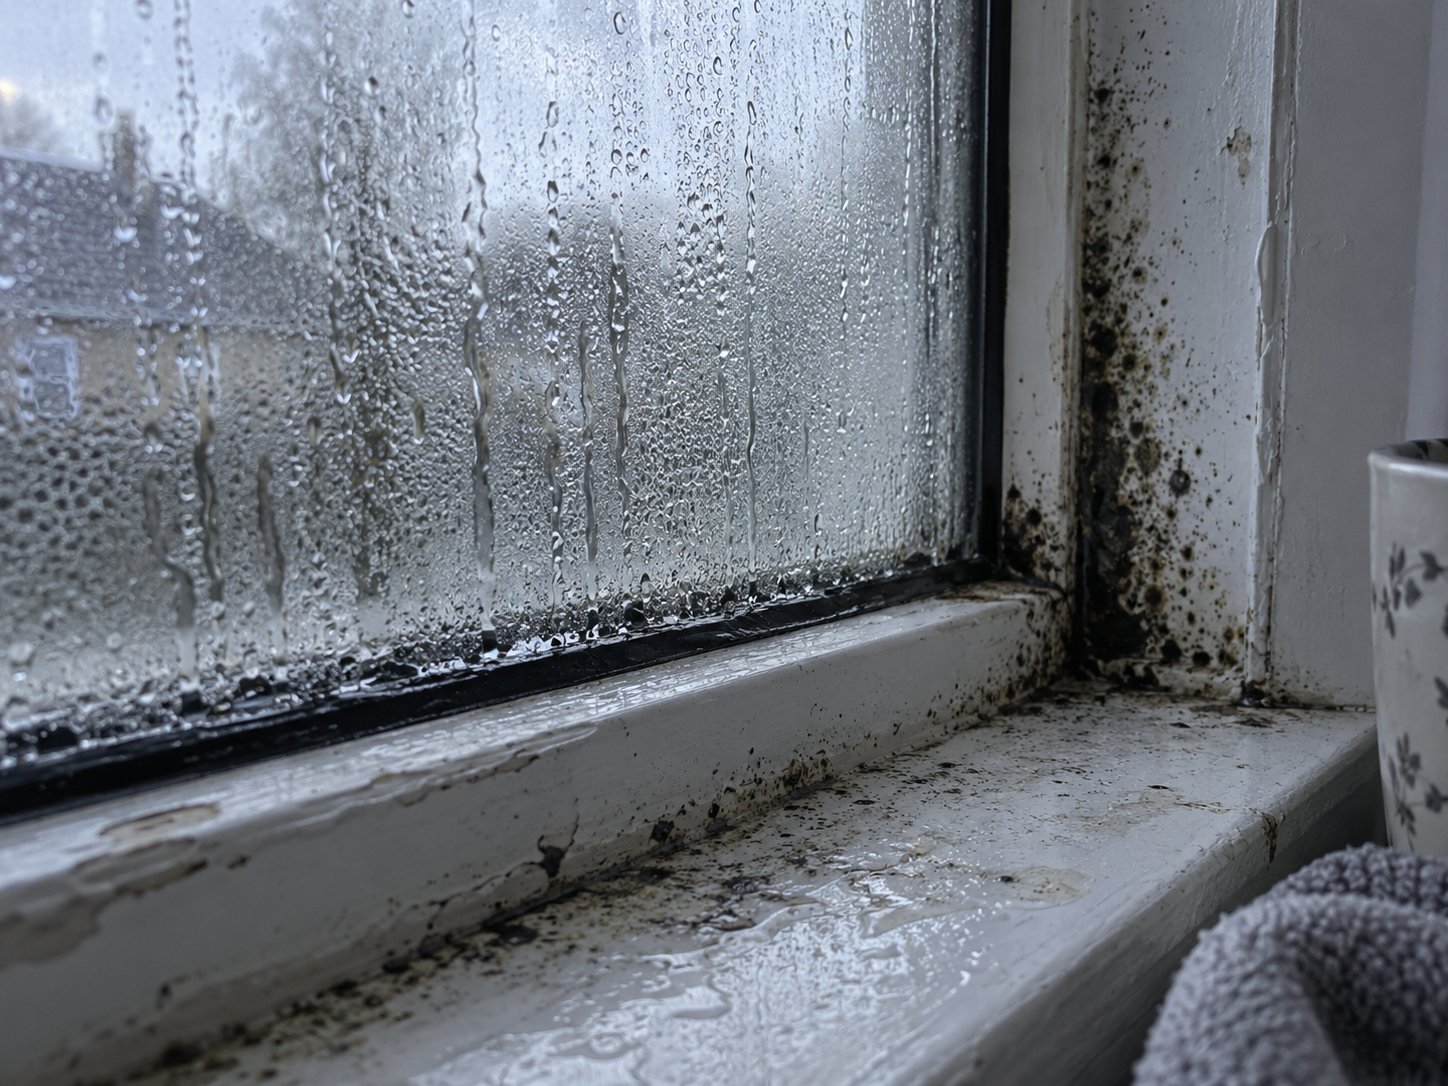
Imagine pulling back the curtains on a cold morning and noticing something unsettling: dark, blotchy patches creeping along the window sill and into the corners of the frame. It might look like dirt at first glance, but the texture is wrong — slightly fuzzy, maybe even a little slimy. If this scene sounds familiar, you're likely dealing with mould on windows, and you're far from alone. It is one of the most common household issues in homes with poor airflow or high humidity, and correctly identifying it is the essential first step before you reach for any cleaning product.
Not every dark mark on a window is mould, though. Grime buildup, mineral deposits, and even paint damage can mimic the appearance of fungal growth. Before you invest time in a full removal plan, let's make sure you know exactly what you're looking at — and whether it's mould, mildew, or something else entirely.
People often use these two words interchangeably, but the distinction matters when you're standing in front of mouldy windows trying to decide what to do next. Mildew is technically an early-stage form of mould. The EPA classifies mildew as a subtype that tends to grow flat on surfaces, and it's generally easier to deal with than its more aggressive relative.
Here's how to tell them apart on your windows:
Why does this difference matter in practice? Surface mildew is the easier fix, but it can also be a warning sign. If you see powdery mildew on your window sills, there may be deeper mould growth hiding underneath the paint or within the seal. When comparing black mold vs mildew on window sills, the key giveaway is texture and depth: if you wipe the surface and the discolouration returns within days, you're almost certainly dealing with established mould rather than superficial mildew. Mould requires more aggressive intervention — specific cleaning agents, longer dwell times, and a plan to address the underlying moisture source.
Mould isn't the only thing that leaves unsightly marks on windows. Several common look-alikes can cause unnecessary alarm — or, worse, lead you to treat the wrong problem. Before you commit to a mould removal routine, rule out these imposters:
Not sure which one you're dealing with? There's a quick test you can do right now. Dab the suspicious spot with a small amount of diluted household bleach on a cotton swab or cloth. If it's mould, the area will begin to lighten noticeably within a minute or two as the bleach kills the fungal growth. Dirt, mineral deposits, tannin bleed, and oxidation marks will show little to no change in colour. This simple bleach test can save you from hours of unnecessary scrubbing — or alert you that you've got a genuine mould problem demanding a proper solution.
Of course, confirming that you do have mould is only half the picture. The dark patches on your window could be any one of several fungal species, each with different characteristics, different levels of stubbornness, and different implications for your health.
Not all window mould is created equal. Most homeowners lump every dark patch under the label "black mould" and react accordingly — either panicking or shrugging it off. The reality is more nuanced. Several distinct fungal species thrive in the damp micro-climate around windows, and each one behaves differently, looks different, and carries a different level of concern. Understanding what's actually growing on your frames and sills helps you choose the right removal approach and decide how urgently you need to act.
When you spot black mold on windows or coloured patches on frames and sills, you could be looking at any one of these four common culprits:
The table below provides a quick-reference comparison so you can match what you see on your windows to a likely species:
| Species | Appearance | Common Location on Windows | Moisture Requirement | Health Concern Level |
|---|---|---|---|---|
| Cladosporium | Olive-green to dark brown, suede-like | Seals, painted frames, sill edges | Low to moderate | Moderate — allergenic |
| Aspergillus niger | Black, powdery | Sills, damp corners | Moderate | Moderate to high — allergenic, potential for infection in immunocompromised individuals |
| Penicillium | Blue-green, fuzzy | Timber frames and sills | Moderate to high | Moderate — allergenic |
| Stachybotrys chartarum | Dark black, slimy | Water-damaged reveals and frames | High — requires prolonged saturation | High — produces mycotoxins |
Keep in mind that visual identification alone is never definitive. Colours can overlap, and multiple species sometimes colonise the same window simultaneously. Still, this framework gives you a far more informed starting point than simply calling everything "black mould" and hoping for the best.
Is mold on window sill dangerous? The honest answer: it depends. The species involved, how long you've been exposed, and your individual health all play a role. For a healthy adult, a small patch of Cladosporium on a bathroom window seal is unlikely to cause serious harm. For a child with asthma sleeping next to a black mold window sill every night, the stakes are significantly higher.
Prolonged exposure to indoor mould is linked to a range of respiratory symptoms — sneezing, coughing, nasal congestion, and eye irritation are among the most common. Cleveland Clinic notes that mould spores can trigger allergic reactions when the immune system becomes hypersensitive, releasing histamine and other inflammatory chemicals that affect the nose, eyes, and lungs. In people with existing asthma, mould exposure can worsen symptoms including wheezing, chest tightness, and shortness of breath. In rare but serious cases — particularly in individuals with compromised immune systems — mould exposure can lead to fungal infections.
Certain groups face greater vulnerability and should treat any signs of black mold on window sills as an urgent priority:
The bottom line? You don't need a laboratory test to justify taking action. Whether you're looking at black mold on window sill surfaces or a faint green haze along a seal, persistent fungal growth in your living space warrants a proper response. Identifying the species helps you understand the urgency — but the real question is what's feeding it in the first place. And that brings us to the root cause most people underestimate: where the moisture is coming from and why it won't stop.

Mould doesn't appear randomly. Every patch of fungal growth on your window frames, sills, or glass is telling you something specific about what's happening inside your home — and often inside your walls. Cleaning it away without understanding why it appeared in the first place is like mopping a floor while the tap is still running. The mess will come right back.
The key to solving the problem permanently is tracing the mould back to its moisture source. And in the vast majority of cases, that source follows a predictable pattern.
If you've ever watched droplets form on the outside of a cold glass on a humid day, you already understand the basic physics behind mold on windows from condensation. The same process plays out on your window glass every time warm, moisture-laden indoor air meets a cold surface.
Here's how it works in plain terms: the air inside your home carries water vapor — an invisible gas generated by everyday living. When that air touches a window pane cooled by outdoor temperatures, it can no longer hold as much moisture. The excess vapor condenses into liquid water droplets on the glass, the frame, and eventually the sill. This persistent film of moisture is exactly what mould spores need to germinate, feed, and spread.
What many homeowners don't realise is just how much moisture daily life generates. Consider these common sources:
Mold from window condensation is overwhelmingly the most common type of fungal growth homeowners encounter on their windows. It's not a building defect in most cases — it's a moisture management problem. But when certain building characteristics are layered on top of excess indoor humidity, the problem intensifies dramatically.
Modern homes are built to be airtight. Better insulation, sealed window units, draught-proofing strips — all of these improvements reduce energy bills and keep rooms warmer. But there's a trade-off: an airtight home with inadequate background ventilation traps moisture indoors with nowhere to go. The water vapor from cooking, showering, and breathing accumulates, raising the relative humidity until condensation becomes almost inevitable on the coldest surfaces in the room — your windows.
This is why condensation and mould on windows is often worse in newer or recently upgraded properties than in older, draughtier homes. The old gaps and cracks that let heat escape also let moisture escape. Remove those gaps without adding deliberate ventilation, and you create a sealed box full of damp air.
Thermal bridging makes things worse. Imagine your window frame as a highway for heat. Where the frame or the surrounding wall structure conducts cold from the outside inward, it creates a localised cold spot on the interior surface. Even when the rest of the room feels warm, that one spot stays cold enough to attract condensation like a magnet. Grand Designs Magazine describes a thermal bridge as a weak spot in a building's thermal envelope — a place where a material with higher thermal conductivity lets too much heat pass from the inside to the outside. Around windows, thermal bridges commonly occur at frame edges, window reveals, and anywhere insulation is interrupted or insufficient.
Heating patterns amplify the cycle, too. Letting a bedroom go cold overnight and then blasting the heating in the morning creates rapid temperature swings. Cold surfaces accumulate condensation during the night, and the sudden warmth generates more moisture-laden air before the existing condensation has a chance to evaporate. The result? Mold condensation windows that stay perpetually damp, feeding fungal colonies morning after morning.
Here's where most advice falls short. Knowing that condensation causes mould is useful, but it doesn't tell you why your specific windows are affected or what to fix first. The location and distribution of mould on your windows is actually a diagnostic clue — a map pointing toward the underlying issue.
Use the following framework to match your mould pattern to its most likely root cause:
This pattern-based approach saves you from the frustrating cycle of repeatedly cleaning mould without ever addressing the cause. A single mouldy window in an otherwise dry home tells a completely different story than mould spreading across every window in the house — and each scenario demands a different response.
Of course, the root cause is only part of the equation. Your window's construction — the type of glass, the frame material, and even the opening mechanism — plays a surprisingly large role in determining how vulnerable it is to mould in the first place.
Your windows aren't just passive victims of excess moisture — their construction actively determines how much condensation forms, where it collects, and how easily mould can take hold. Two homes on the same street with identical humidity levels can have wildly different mould outcomes based purely on their glazing type, frame material, and ventilation design. Understanding where your windows sit on this risk spectrum helps you decide whether a cleaning routine is enough or whether the windows themselves are part of the problem.
Think of each pane of glass in your window as a thermal barrier between the warm air inside and the cold air outside. The more barriers you have, the warmer the inner glass surface stays — and the less condensation it attracts.
Single glazing offers zero insulating buffer. The inner glass surface sits just millimetres from outdoor temperatures, making it the coldest surface in any room during winter. On a freezing night, a single-glazed pane can drop well below the dew point of indoor air, practically guaranteeing condensation. If you live in a property with original single-glazed windows, you're fighting the highest possible condensation risk every time the temperature drops.
Double glazing dramatically improves this picture. The sealed air or gas gap between two panes keeps the inner glass surface significantly warmer, reducing condensation on the glass itself. However, age is the enemy. Over time, the inert gas fill — typically argon — gradually dissipates through microscopic seal degradation, and the insulating performance declines. Older double-glazed units with failed seals present a unique problem: mold between window panes. When the hermetic seal breaks down, moisture enters the gap between the glass layers, creating a foggy, misted appearance and sometimes visible fungal growth trapped inside the unit. No cleaning product can reach this — the sealed glass unit must be replaced entirely. If you notice persistent fogging or dark spots sandwiched between the panes, you're looking at a failed unit, not a cleaning issue.
According to T&K Home Improvements, triple glazing takes thermal performance a step further. The additional pane eliminates thermal contact between the cold outer glass and the warm inner glass, keeping the interior surface at near-room temperature. Triple-glazed window units can reach U-values as low as 0.8 W/m2K, compared to around 1.4 W/m2K for standard double glazing — meaning significantly less heat escapes through the glass and far less condensation forms on the inside. It's worth noting that triple glazing doesn't eliminate condensation entirely; if indoor humidity is excessive or ventilation is poor, moisture can still accumulate. You may even notice external condensation on triple-glazed windows on cool mornings — which is actually a positive sign that the unit is retaining heat effectively rather than allowing it to pass through.
The takeaway? Glazing type sets the baseline risk. Single glazing virtually guarantees condensation problems, double glazing reduces them substantially (until the seals fail), and triple glazing offers the best protection — though it's never a substitute for proper moisture management.
The glass gets most of the attention, but the frame surrounding it matters just as much. Different materials react to moisture in fundamentally different ways, and choosing the wrong cleaning approach for your frame type can cause more harm than good.
| Frame Material | Mould Can Feed on It? | Primary Vulnerability | Key Concern Areas |
|---|---|---|---|
| uPVC | No — non-porous synthetic | Condensation collects in drainage channels, tracks, and on rubber seals | Textured surfaces trap organic debris; gaskets harbour hidden growth |
| Timber | Yes — organic material | Mould penetrates the wood grain directly, especially where paint or varnish has cracked or worn away | Sills, bottom rails, and any area where moisture sits against exposed wood |
| Aluminium | No — inorganic metal | High thermal conductivity creates cold frame surfaces prone to heavy condensation (modern thermally broken profiles reduce this) | Condensation zones at thermal break junctions; dirt and debris on the surface that mould colonises |
| Composite / Fibreglass | No — similar to uPVC | Surface condensation in seals and channels, comparable to uPVC behaviour | Gasket areas and drainage tracks where moisture lingers |
A few important nuances stand out here. Mould on wooden window frames is a different beast from mould on uPVC or aluminium. Because timber is organic, mould doesn't just sit on the surface — it can penetrate the grain, feed on the wood itself, and cause structural degradation over time. If the protective paint or varnish coating is intact, the wood is reasonably shielded. The moment that coating cracks, peels, or wears thin, moisture reaches the raw timber and mould has a direct food source. This is why mould on timber frames often signals a maintenance issue, not just a ventilation one.
Mold on metal window frames, by contrast, is almost always superficial. Aluminium and steel are inorganic — fungi can't digest them. What happens instead is that dust, skin cells, cooking residue, and other organic particles accumulate on the frame surface, and mould colonises that grime layer rather than the metal beneath. Clean the surface contaminants away and the mould loses its foothold. The real challenge with older aluminium frames is their thermal conductivity. Without a thermal break — an insulating strip between the inner and outer sections of the profile — an aluminium frame acts like a cold bridge, pulling heat outward and leaving the interior surface cold enough to attract heavy condensation. Modern thermally broken aluminium profiles solve this by interrupting the thermal path, but many older properties still have unbroken aluminium frames that sweat relentlessly in cold weather.
Even the way your window opens — or doesn't — affects how well moisture escapes the room. Not all opening styles offer the same ventilation potential:
Regardless of which mechanism you have, relying solely on manually opening windows has a fundamental flaw: people forget, weather intervenes, and security concerns keep windows shut — especially overnight when condensation is at its worst. This is precisely where frame-integrated trickle vents change the equation. These small, adjustable openings built into the window frame allow continuous passive airflow even when the window is fully closed and locked. As Protolabs notes, trickle vents enable a constant ventilation flow that helps combat condensation and mould growth without requiring any action from the homeowner. In the UK, they've been mandatory in all newly fitted windows since June 2022 — a regulatory acknowledgment that background ventilation is essential, not optional.
Your glazing, frame material, and ventilation design all shape your baseline mould risk. But even within the same window, mould doesn't behave uniformly. It targets specific components — seals, tracks, weep holes, glass edges — each for a different reason. Knowing exactly where to look is what separates a surface-level clean from a genuinely thorough one.

A window might look like a single unit, but it's actually an assembly of distinct components — glass, frame, sill, seals, drainage tracks, weep holes — each with its own micro-climate and its own relationship with moisture. Mould doesn't treat all of these parts equally. It gravitates toward specific zones for specific reasons, and a patch of growth on your sill tells a very different story from growth buried inside a rubber gasket.
Understanding this anatomy turns a vague "I've got mould on my window" into a precise diagnosis. And precision matters, because effective removal means targeting every colonised component — not just the obvious ones you see at a glance.
These three visible surfaces account for the mould most homeowners notice first. Each one gets colonised through a slightly different mechanism:
If you only ever wipe down the sill, you're missing two-thirds of the potential growth. A thorough check means inspecting all three surfaces — sill, frame joints, and the lower portion of the glass — every time you clean.
The visible surfaces are the easy part. The real challenge lies in the components most people never think to inspect — the hidden infrastructure that manages water within the window assembly. These concealed zones often harbour the most stubborn and extensive mould growth precisely because they're out of sight and out of mind.
This distinction is crucial before you start any remediation. Spending hours trying to clean mould that's physically inaccessible inside a failed sealed unit is wasted effort. Check for seal failure first — look for persistent internal fogging or spots that don't respond when you wipe either the interior or exterior glass surface. If the marks stay put no matter what you do, replacement is the only path forward.
Mapping every affected component gives you a complete picture of what you're dealing with. The next logical step is matching the right cleaning method to each surface — because the solution that rescues a uPVC sill can permanently damage a timber frame, and the technique that clears a gasket won't do a thing for a failed sealed unit.

Knowing where mould hides is only useful if you also know how to remove it without spreading spores through the room, damaging your window frames, or putting your health at risk. This is the hands-on section — the part where identification and diagnosis translate into action. Whether you're tackling a thin line of black along a rubber seal or a full-blown colony across a timber sill, the approach that follows gives you exact concentrations, realistic dwell times, and material-safe product choices so you can get the job done right the first time.
Mould removal isn't like wiping down a kitchen counter. Disturbing established fungal growth releases thousands of microscopic spores into the air, and inhaling those spores — or getting them in your eyes — can trigger allergic reactions, respiratory irritation, and worse in vulnerable individuals. The U.S. EPA's mould remediation guidance specifies that minimum personal protective equipment for any mould cleanup includes gloves, goggles, and an N95 respirator — even for small areas under ten square feet.
Before you touch a single surface, gather the following:
One critical rule before anything else: never dry-brush mould. Scrubbing a dry mouldy surface launches a dense cloud of spores directly into the air you're breathing. Always dampen the affected area with a light mist of water before disturbing it. This single step dramatically reduces airborne spore release. Once you're finished, bag all contaminated cloths, sponges, and disposable materials immediately and remove them from the room.
There's no shortage of advice online about what to use on mouldy windows, but most of it skips the details that actually matter: how much, how long, and will it damage your frames? The table below compares the most effective cleaning agents side by side, with the specific information you need to choose the right one for your situation.
| Solution | Dilution Ratio | Dwell Time | Effectiveness | Safe For | Notes |
|---|---|---|---|---|---|
| White vinegar | Undiluted | 30–60 minutes | Moderate | All frame types (uPVC, timber, aluminium, composite) | Non-toxic, mild odour dissipates quickly. Good first-line option for light to moderate growth. |
| Hydrogen peroxide (3%) | Undiluted | 10–15 minutes | Good | All frame types | Breaks down into water and oxygen — no toxic residue. Effective on most common window mould species. |
| Bleach solution | 1 part bleach to 10 parts water | 10–15 minutes | High | uPVC and glass only | Can strip timber finishes, raise wood grain, and corrode aluminium. Repeated use may yellow white uPVC. Always ventilate well. |
| Bicarbonate of soda paste | Mix with water to thick paste | 15–20 minutes | Moderate (gentle abrasive action) | All surfaces | Ideal for textured uPVC sills and stubborn surface staining. Mildly alkaline — inhibits regrowth. |
| Tea tree oil solution | 1 teaspoon per cup of water | Leave on — do not rinse | Slow-acting but antifungal | All frame types | Natural antifungal. Best used as a preventative after initial cleaning rather than a primary removal agent. |
| Commercial anti mold spray | Follow manufacturer instructions | Typically 15–30 minutes | Generally high | Check label for frame compatibility | Convenient and formulated for the job, but always verify material safety on the label before applying to timber or aluminium. |
A few practical notes on choosing. If you're learning how to clean mold off window sills for the first time and prefer to avoid harsh chemicals, white vinegar or hydrogen peroxide are your safest starting points — effective enough for moderate growth, safe on every frame material, and no risk of accidental damage. Bleach is the heavy hitter for severe infestations on uPVC or glass, but it's the wrong choice for timber and aluminium. And if you go with a commercial anti mold spray, read the compatibility label carefully; some formulations contain bleach-based actives that carry the same material restrictions as a DIY bleach solution.
You've got your PPE on and your cleaning solution mixed. Here's the complete process for how to remove mold from window sills, frames, seals, and tracks — in the right order and with the right technique:
If you're tackling how to clean mold on window sills that have been neglected for a long time, expect the first cleaning to be the hardest. Deep-seated staining on porous materials like timber or textured uPVC may not fully disappear even after the mould itself is dead. In those cases, the surface discolouration is cosmetic — the important thing is that the living mould has been eliminated and the conditions for regrowth are being addressed.
The cleaning solution and technique that works perfectly on a uPVC sill can permanently damage a timber frame or corrode an aluminium profile — always match your method to your material.
This is a point worth pausing on. The step-by-step process above gives you the universal framework, but the specific product and scrubbing approach needs to vary depending on what your window is made from. Timber frames demand gentler chemistry and may need resealing. Aluminium reacts badly to bleach and acidic cleaners. uPVC tolerates more aggressive treatment but scratches easily. Getting this material match wrong can turn a mould problem into a damage problem — and that's a more expensive fix.
A bleach solution that leaves a uPVC sill gleaming white can strip the finish off a timber frame in minutes. A scouring pad that shifts stubborn staining on glass can scratch uPVC badly enough to make the next mould outbreak even harder to shift. When it comes to removing mould from window sills and frames, the material dictates the method — not the other way around.
The universal removal steps covered above give you the process. This section gives you the product and technique rules for each specific frame type, so you can clean aggressively enough to kill the mould without inadvertently damaging the surface underneath it.
uPVC is non-porous and inherently resistant to fungal penetration — mould can't feed on the plastic itself. That's the good news. The bad news? Textured uPVC profiles trap microscopic particles of dust, grease, and skin cells in their surface grain, and those organic deposits become a ready food source for spores sitting in pooled condensation.
For routine cleaning, hydrogen peroxide (3%, undiluted) or a bicarbonate of soda paste are your best options. Both are effective against common window mould species and completely safe on uPVC surfaces. Bleach solutions work well too and deliver faster results on heavy growth, but there's a trade-off: repeated bleach use can yellow white uPVC frames over time, giving them a dingy, aged appearance that's difficult to reverse.
The most important rule for uPVC? Avoid abrasive scourers, steel wool, or stiff-bristled brushes. uPVC looks solid, but it scratches more easily than most people expect. Those micro-scratches create tiny grooves that trap moisture and organic debris at a scale you can't see — essentially building future mould nurseries into the frame surface. Stick to soft microfiber cloths and non-scratch sponges. For stubborn window sill mold staining that remains after the mould itself is dead, a melamine foam sponge (often sold as a "magic eraser") can lift the discolouration without scratching the profile.
Composite frames behave almost identically to uPVC in terms of mould resistance and cleaning tolerance, so the same approach applies.
Timber is where the stakes get higher. Unlike uPVC and aluminium, wood is organic — mould doesn't just sit on the surface; it actively feeds on the material. When the protective paint or varnish layer is intact, timber frames have a reasonable barrier against fungal penetration. The moment that barrier is compromised — cracked paint, worn varnish, chipped edges — moisture reaches the raw wood grain, and mould anchors itself deep inside the material rather than staying on top.
To clean mould from windows with timber frames, reach for white vinegar (undiluted) or hydrogen peroxide (3%). Both kill mould effectively without damaging wood finishes. Avoid bleach entirely on timber. As cleaning experts at Window Cowboy note, bleach can damage wood frames, stripping finishes and raising the grain — creating a rougher, more absorbent surface that's even more vulnerable to future mould colonisation. That's the opposite of what you want.
Apply your chosen solution, allow the full 30- to 60-minute dwell time for vinegar or 10 to 15 minutes for hydrogen peroxide, and scrub gently with a soft brush. If mould has penetrated beneath the paint — you'll recognise this by dark staining visible through or under the painted surface — a surface clean alone won't resolve it. You'll need to lightly sand the affected area back to bare wood, treat with an antifungal wood treatment, and reseal with a mould-resistant primer by exterior-grade paint or varnish.
While you're inspecting, press the wood firmly with your thumb or a flat screwdriver. If the timber feels soft, spongy, or crumbles under pressure, you're no longer dealing with surface mould — that's wet rot, and it requires timber repair or full section replacement. Mould and rot frequently coexist on neglected timber frames, but they demand very different responses. How to clean mould off window sills made of timber starts with assessing whether the wood beneath is still structurally sound. If it isn't, cleaning is futile until the damaged timber is addressed.
Aluminium is inorganic. Mould cannot digest it, draw nutrients from it, or penetrate its surface. So why do aluminium window frames still develop visible mould? Because the mould isn't growing on the metal — it's growing on the layer of surface contaminants that accumulate over time. Dust, cooking grease, pollen, and condensation residue coat the frame, and spores colonise that organic film. Remove the contaminants, and the mould loses its food source entirely.
The catch with aluminium is chemical sensitivity. Clean with a pH-neutral detergent or white vinegar — both are safe and effective for remove mold from window sill and frame surfaces made of metal. But never use bleach, ammonia, or strongly acidic cleaners on aluminium. These chemicals react with the aluminium oxide layer that naturally protects the metal surface, causing oxidation, pitting, and permanent discolouration. The damage is irreversible and purely cosmetic — but it turns a clean frame into an unsightly one.
Pay particular attention to thermal break zones and gasket areas on aluminium frames. These are the spots where condensation concentrates most heavily — the junction between the cold outer aluminium and the insulating thermal break strip — and they're often where mould growth is densest. Use an old toothbrush dipped in pH-neutral solution to scrub along these junctions, and dry thoroughly afterward.
Regardless of your frame material, thorough cleaning is only half the battle. Mould that's been removed can return within weeks if the underlying moisture conditions haven't changed — and that's where the strategy shifts from reactive treatment to proactive prevention.

Scrubbing mould off your window frames once is satisfying. Scrubbing it off every few weeks? That's a sign the real problem hasn't been addressed. Reactive cleaning treats the symptom. Prevention eliminates the cause. And the single most effective way to prevent mold on windows is to control the moisture that feeds fungal growth before it ever reaches the glass, the sill, or the seal.
The encouraging part is that prevention doesn't require expensive renovations or complex technology. It requires a shift in how you manage airflow and moisture inside your home — consistently, across every season. Here's how to build that strategy from the ground up.
Think of your home's ventilation as a three-tier system. Each tier handles a different type of moisture load, and all three need to be working together for effective protection. Most mould-prone homes are missing at least one — and it's almost always the same one.
Tier 1: Extract ventilation. This is your frontline defence during high-moisture activities. Bathroom extractor fans should run throughout every shower or bath and continue for at least 15 to 20 minutes afterward. Kitchen extractors need to operate whenever you're boiling, steaming, or frying. These fans remove the concentrated bursts of water vapor at their source, before humid air drifts into bedrooms and living rooms and condenses on cooler window surfaces. If your extractor fan is noisy, underpowered, or ducted into the loft rather than to the outside, it's not doing its job — and that alone can be one of the primary causes of black mold on window sills in bathrooms and kitchens.
Tier 2: Purge ventilation. Opening windows fully for short bursts — five to ten minutes — flushes stale, humid air out of a room rapidly. It's especially useful after cooking a big meal, drying laundry, or when a room feels noticeably stuffy. Purge ventilation works best as a cross-breeze: open windows on opposite sides of the home simultaneously, and humid air is replaced with drier outdoor air in minutes. The downside? It relies entirely on you remembering to do it, and it's impractical during rain, high winds, or freezing temperatures.
Tier 3: Background ventilation. This is the tier most homes are missing — and it's the one that matters most for preventing black mold on window sills over the long term. Background ventilation provides continuous, low-level airflow that maintains moisture equilibrium around the clock without requiring anyone to open a window, flip a switch, or even be home. It works silently, passively, and consistently — exactly the kind of persistence mould prevention demands.
Frame-integrated trickle vents are the most practical way to deliver background ventilation. These small, adjustable openings built into the head of the window frame allow a controlled stream of fresh outdoor air to enter the room while stale, moisture-laden indoor air is displaced. They operate passively, using natural pressure differences between inside and outside — no electricity, no moving parts, no noise. You can open or close them with a simple slider, though they're designed to remain open continuously for optimal effect.
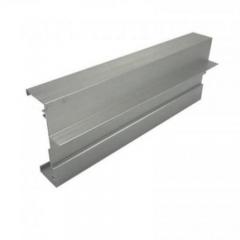
For homeowners, landlords, and retrofit buyers looking for a purpose-built solution, Shengxin Aluminium's Fresh Air Trickle Vent is designed specifically to deliver this kind of passive background ventilation. Engineered for integration into window frames, it maintains continuous fresh air exchange in moisture-prone rooms like bathrooms and kitchens — the exact environments where condensation and mould are most persistent. Because it's frame-integrated rather than wall-mounted, installation is straightforward for both new windows and retrofit projects.
Why is background ventilation so effective at stopping mould? Because condensation is a cumulative problem. A single night of elevated humidity won't cause visible mould. But weeks of slightly-too-humid air, with no mechanism to carry that moisture out, creates the persistent damp conditions that mould spores need to germinate. A trickle vent running 24 hours a day prevents humidity from ever reaching that critical threshold. It's the difference between a room that dries itself and a room that slowly, invisibly saturates.
Understanding how to prevent mould on windows ultimately comes down to ensuring all three ventilation tiers are active. Extract fans handle the spikes. Open windows handle the flushes. Trickle vents handle everything in between — quietly, continuously, and without relying on anyone to remember.
Mould risk isn't constant throughout the year. Temperature, humidity, and occupant behaviour shift with the seasons, and your prevention strategy should shift with them. The following calendar breaks the year into four phases, each with its own risks and its own set of preventive actions:
| Season | Key Risks | Preventive Actions |
|---|---|---|
| Autumn | Outdoor humidity rises as temperatures drop. Windows start staying closed. First condensation of the season appears on glass. | Clean all window tracks, seals, and weep holes before damp season begins. Check that bathroom and kitchen extractor fans are functioning and venting to the outside. Open all trickle vents fully and confirm sliders move freely. Inspect timber frames for cracked or peeling paint that could allow moisture ingress. |
| Winter | Peak condensation season. Greatest temperature differential between indoor air and cold glass. Moisture from heating, cooking, and reduced ventilation accumulates rapidly. | Maintain consistent low-level heating rather than blasting heat intermittently — steady warmth keeps surfaces above dew point. Wipe condensation from sills and glass every morning before it pools. Avoid drying clothes on radiators near windows. Keep trickle vents open continuously, even on cold nights. Run extractor fans during and after every shower and cooking session. |
| Spring | Transitional period — temperatures fluctuate, morning condensation persists, and any mould that established over winter is now visible. | Deep-clean all window components: glass, sills, seals, tracks, and weep holes. Inspect rubber gaskets for deterioration or permanent mould staining that warrants replacement. Repaint or reseal any compromised timber frames before summer. Check that sealed double-glazed units haven't developed internal fogging over winter. |
| Summer | Lowest condensation risk. Warmer surfaces and open windows reduce moisture buildup. | Leave windows open when weather and security allow. Check and clear weep holes of any insect nests or debris. Service extractor fans — clean grilles, check ducting connections, replace worn motors. This is also the ideal time for any window repairs, timber resealing, or trickle vent installation, when frames are dry and workable. |
Treating this calendar as a routine — the way you'd schedule a boiler service or gutter clean — removes the guesswork from how to prevent mold in windows. Autumn preparation and a winter discipline of wiping condensation and keeping ventilation running are the two phases that make the biggest difference. By the time spring arrives, you're inspecting and maintaining rather than battling established growth.
Ventilation carries moisture out. But the less moisture you generate indoors in the first place, the less work your ventilation system has to do. As the U.S. Environmental Protection Agency notes, water in your home can come from many sources — and the amount of moisture indoor air can hold depends directly on temperature. As temperature drops, the air holds less moisture, and the excess condenses on cold surfaces like windows.
These practical adjustments reduce the moisture load your home produces every day:
How to prevent mold on windows isn't about a single fix. It's about stacking small, consistent habits — proper extraction, continuous background airflow, seasonal maintenance, and sensible moisture reduction — into a system that keeps your indoor environment permanently below the threshold where mould can establish. Each layer reinforces the others. Remove one, and the remaining layers have to work harder. Keep them all running, and mould simply doesn't get the conditions it needs.
Even with the best prevention strategy, though, some situations are beyond what a homeowner can — or should — tackle alone. Mould that keeps returning despite proper ventilation, growth that covers large areas, or fungal colonies hidden behind walls all demand a different response. Knowing exactly when to stop cleaning and start calling for professional help is just as important as knowing how to prevent the problem in the first place.
There's a point where a spray bottle and a microfiber cloth stop being the right tools for the job. Persistent or widespread mould around windows isn't just a cleaning challenge — it's a signal that something deeper is going wrong, and no amount of scrubbing will fix a structural moisture source, a failed building envelope, or hidden fungal colonies growing behind your walls. Recognising that threshold early saves you time, money, and potentially your health.
DIY window mold removal is perfectly appropriate for small, surface-level infestations on accessible surfaces. But several scenarios warrant stepping back and bringing in a qualified mould remediation specialist. The U.S. EPA recommends professional help when mould covers an area greater than roughly ten square feet — about one square meter. Beyond that threshold, the spore load during removal becomes difficult to manage safely without containment equipment.
Call a professional if any of the following apply:
Professional remediators bring containment barriers, HEPA filtration, and specialised biocides that prevent cross-contamination during removal. For severe infestations, trying to handle it yourself can actually spread spores to previously unaffected rooms.
You've cleaned thoroughly. You've switched to the right products for your frame material. You've even started wiping condensation every morning. And yet — three weeks later — dark spots are creeping back along the same sill, the same seal, the same corner. Sound familiar?
Recurrent black mold around windows is frustrating, but it's also diagnostic. It means at least one underlying condition hasn't been corrected. Work through this checklist systematically before concluding the problem is beyond your control:
Each step eliminates a potential cause. By the time you've worked through the full list, you'll either have found the culprit or confirmed that professional investigation is the logical next step.
Mould disputes between landlords and tenants are among the most common housing complaints — and among the most poorly understood. Who's responsible when black mold by window frames appears in a rented property? The answer depends on the cause, and the cause determines the obligation.
In most jurisdictions, the responsibilities break down along a clear structural line:
Landlords are generally responsible for maintaining the structural fabric of the property. This includes windows themselves, ventilation systems (extractor fans, trickle vents), damp-proofing measures, heating systems, and the building envelope that prevents water ingress. If mould results from a structural defect — failed window seals, missing insulation, a broken extractor fan, or inadequate ventilation provision — the landlord bears responsibility for remediation and repair.
Tenants are generally expected to take reasonable day-to-day actions to manage moisture: ventilating rooms appropriately, using extractor fans during cooking and bathing, wiping condensation from windows, keeping trickle vents open, and reporting maintenance issues promptly. If mould results purely from lifestyle factors — persistently drying laundry on radiators with all windows sealed and vents closed — the tenant may bear responsibility.
In practice, the line is rarely that clean. Many rental properties lack adequate ventilation infrastructure in the first place, making it impossible for tenants to manage moisture effectively regardless of their habits. If you're a tenant dealing with persistent mould, take these steps to protect yourself:
Persistent mould that a landlord fails to address can constitute a habitability issue in many jurisdictions. Tenants who have reported the problem in writing and received no adequate response should consult their local housing authority or environmental health department for jurisdiction-specific rights and enforcement options. In England, for example, the Homes (Fitness for Human Habitation) Act 2018 gives tenants the right to take legal action if their landlord fails to address serious damp and mould issues.
Whether you own your home or rent it, the core principle stays the same: mould on your windows is never just a cosmetic nuisance. It's a moisture indicator, a ventilation diagnostic, and — if left unchecked — a health risk. Identify it accurately, remove it properly, address the root cause, and maintain a prevention routine that matches the seasons. Do all four, and the dark patches on your window sills become a problem you solved once, not one you battle endlessly.
Recurring mould means the underlying moisture source hasn't been resolved. The most common culprits are insufficient background ventilation, blocked trickle vents or weep holes, intermittent heating patterns that create condensation cycles, and failed double-glazed seals allowing moisture into the frame. Work through a systematic checklist: confirm extractor fans are powerful enough, ensure trickle vents stay open year-round, maintain steady low-level heating overnight, and check for cold spots on wall reveals that indicate thermal bridging. If mould returns despite all these measures, a building surveyor can assess for structural issues like rising damp or failed cavity insulation.
The risk depends on the mould species, how long you've been exposed, and your individual health profile. Common window mould species like Cladosporium and Aspergillus niger can trigger allergic reactions, nasal congestion, and eye irritation in many people. Children, elderly residents, people with asthma or allergies, and anyone with a weakened immune system face higher risks including worsened respiratory symptoms and, in rare cases, fungal infections. Even if you're otherwise healthy, any persistent mould growth warrants prompt removal and moisture management to prevent prolonged spore exposure in your living space.
No — bleach is only safe for uPVC frames and glass surfaces. It should never be used on timber windows because it strips wood finishes, raises the grain, and leaves the wood more vulnerable to future mould colonisation. On aluminium and metal frames, bleach reacts with the protective oxide layer, causing irreversible pitting and discolouration. For timber, use undiluted white vinegar or 3% hydrogen peroxide instead. For aluminium, opt for a pH-neutral detergent or white vinegar. Always check product compatibility before applying any cleaning solution to your specific frame material.
Trickle vents provide continuous passive background ventilation through small adjustable openings built into the window frame. They allow a controlled stream of fresh outdoor air to enter the room while stale, moisture-laden air is displaced — all without opening the window. This constant low-level airflow prevents indoor humidity from reaching the critical threshold where condensation forms on cold glass and frame surfaces. Products like Shengxin Aluminium's Fresh Air Trickle Vent are designed for frame integration in moisture-prone rooms such as bathrooms and kitchens, making them suitable for both new-build and retrofit installations.
Mould or fogging between the two panes of a double-glazed unit means the hermetic seal has failed. Once the seal breaks, moisture enters the cavity and creates conditions for fungal growth on organic residue trapped inside. No cleaning product or technique can reach the interior of a sealed unit, so the only solution is replacing the failed glass panel. The good news is that in many cases you only need to swap the sealed glass unit, not the entire window frame. A failed seal also means the insulating gas has escaped, reducing the window's thermal performance and increasing condensation risk on the inner pane.



 Servicio en línea
 0086 136 3563 2360
 sales@sxalu.com
 +86 136 3563 2360
 español
 English
 français
 Deutsch
 русский
 português
 العربية
 ไทย
ไทย Việt
Việt Українська