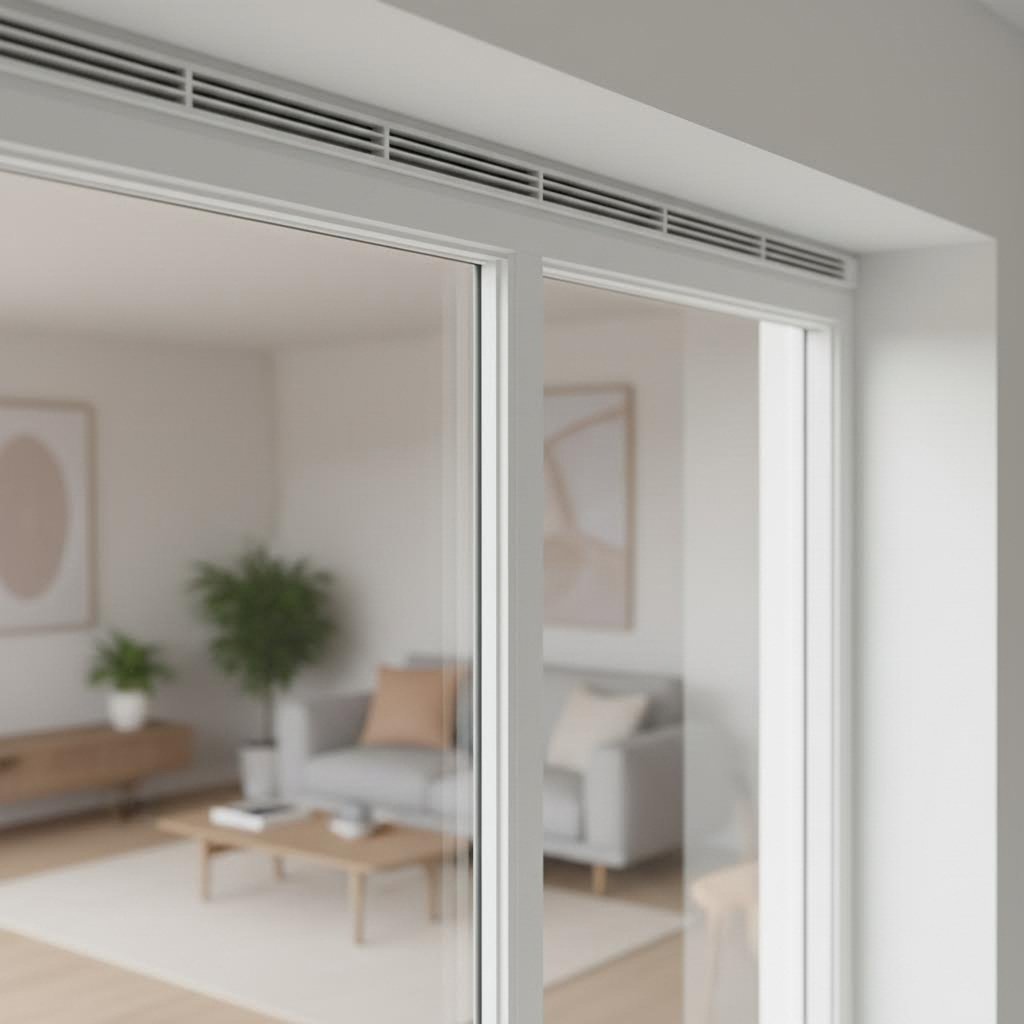
Ever noticed those small, slotted openings at the top of your window frames? Those are trickle vents, and they play a surprisingly important role in keeping your home healthy and comfortable. A trickle vent is a small opening built into a window or door frame that allows fresh air to flow into your home while maintaining energy efficiency and security. Think of them as your home's quiet, constant breathing system, working around the clock without you having to lift a finger.
These unassuming features have become increasingly essential in modern construction. As homes become more airtight through improved insulation and double or triple glazing, the natural air exchange that older, draftier buildings enjoyed has virtually disappeared. This is where window trickle vents step in, providing controlled background ventilation that keeps indoor air fresh without compromising your home's thermal performance.
So, what exactly makes a trickle vent different from simply cracking open a window? The key lies in the word "controlled." When you open a window, you're inviting in not just fresh air but also noise, rain, dust, and potential security risks. A trickle vent, by contrast, allows a small, measured amount of air to "trickle" in continuously, hence the name.
Unlike mechanical ventilation systems that require electricity and regular maintenance, trickle ventilation operates entirely passively. There are no fans, no motors, and no running costs. The vent simply provides a permanent but adjustable pathway for air exchange between inside and outside. This background vent approach is particularly valuable in well-insulated modern homes, where airtight construction can trap stale air, moisture, and pollutants indoors.
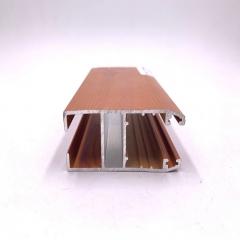
Modern trickle vents are typically made from durable materials such as PVC or aluminum and are designed to withstand various weather conditions. They blend seamlessly into window frames, often going unnoticed by homeowners who benefit from them daily.
The science behind trickle vents is refreshingly simple. They rely on natural air pressure differences between the inside and outside of your home. Sounds complex? It's actually straightforward physics at work.
Warm air inside your home naturally rises and creates a slight positive pressure, especially at higher points in the building. Meanwhile, wind movement outside creates varying pressure zones around your home's exterior. These pressure differences encourage air to flow through any available openings, and trickle vents provide exactly that, a controlled opening that harnesses this natural airflow.
When the vent is open, outdoor air enters through the small openings, while stale indoor air escapes through other pathways, such as extract fans in kitchens and bathrooms or through gaps elsewhere in the building envelope. The beauty of this system is that it works continuously and silently, requiring no energy input whatsoever.
Most trickle vents feature adjustable controls that allow you to open or close them manually. This gives you flexibility depending on the weather, your comfort preferences, or specific ventilation needs in different rooms.
Every trickle vent system consists of three key components:
Together, these components create a simple yet effective ventilation solution that helps maintain healthy indoor air quality without the drawbacks of leaving windows open or the expense of mechanical systems.

Imagine waking up to windows dripping with condensation, or noticing a musty smell in your bathroom that never quite goes away. These are warning signs that your home isn't breathing properly. For homeowners living in modern, energy-efficient properties, inadequate window ventilation isn't just an inconvenience; it's a genuine threat to both your home's structure and your family's health.
The truth is, today's well-insulated homes are designed to keep heat in and drafts out. While that's excellent for energy bills, it creates an unintended consequence: moisture and pollutants become trapped inside with nowhere to go. This is precisely why trickle air vents for windows have become so essential for maintaining a healthy living environment.
You might not realize it, but everyday activities generate significant amounts of moisture inside your home. Cooking a meal, taking a shower, drying laundry indoors, and even breathing all release water vapor into the air. In fact, a typical family of four can produce up to 14 liters of moisture daily through normal activities.
When this moisture-laden air meets cold surfaces like windows, external walls, or poorly insulated corners, condensation forms. You'll notice it first as water droplets on your windows each morning. Left unchecked, this persistent dampness creates the perfect breeding ground for mold and mildew.
Kitchens and bathrooms are particularly vulnerable because they experience concentrated moisture spikes during cooking and showering. Bedrooms present another hidden risk: each person exhales moisture throughout the night while doors and windows remain closed. Without proper ventilation, these rooms can develop persistent damp issues that are difficult and expensive to resolve.
This is where trickle ventilation windows prove their worth. By providing continuous, low-level airflow, they gently remove excess moisture before it has a chance to condense on cold surfaces. Unlike opening a window (which wastes heat and creates uncomfortable drafts), air vents in double glazed windows maintain a steady, barely perceptible air exchange that keeps humidity levels in check around the clock.
The connection between inadequate ventilation and mold growth is well established. According to ventilation specialists, condensation is a notorious precursor to mold and fabric damage in modern airtight homes. Once mold takes hold, it spreads through wall cavities, damages paintwork and furnishings, and releases spores that can trigger respiratory problems.
Condensation and mold are visible problems, but there's an invisible threat lurking in poorly ventilated homes: contaminated indoor air. Modern building materials, furniture, cleaning products, and even personal care items release volatile organic compounds (VOCs) into your home environment. Add to this the carbon dioxide you exhale, cooking odors, and particulates from various sources, and you have a cocktail of pollutants circulating through your living spaces.
In older, drafty homes, these pollutants would naturally escape through gaps and cracks. But in today's airtight constructions, they accumulate to concerning levels. Research from indoor air quality experts confirms that reduced ventilation in homes can cause a buildup of indoor pollutants such as allergens, carbon dioxide, volatile organic compounds, and even radon. Poor indoor air quality can have serious long-term effects on health, causing allergies, respiratory disorders, or other serious illnesses.
The tighter you build, the more you need to ventilate. Modern airtight homes require deliberate, controlled ventilation strategies because natural air leakage, which older buildings relied upon, has been engineered out of the building envelope.
This fundamental principle explains why window ventilation has become non-negotiable in contemporary construction. Background ventilation through trickle vents dilutes indoor pollutants by continuously introducing fresh outdoor air while stale, contaminated air is displaced through extract fans and other pathways.
Interior door ventilation also plays a supporting role in whole-house air circulation. When doors have adequate undercuts or transfer grilles, air can flow freely from rooms with trickle vents to spaces with extract fans, creating a balanced ventilation pathway throughout your home.
The beauty of this approach is that it maintains comfortable indoor temperatures while refreshing your air supply. Unlike throwing open a window, which creates uncomfortable drafts and wastes heating energy, trickle vents provide a measured, controlled air exchange that you'll barely notice, except in the improved freshness of your indoor environment.
Understanding why these vents matter is only the first step. Knowing when they're legally required and how UK building regulations apply to your situation will help you make informed decisions about your property's ventilation needs.
So you understand why ventilation matters, but here's the question that trips up many homeowners: do you actually need trickle vents, or are they just a nice-to-have feature? The answer depends on your specific situation, and UK building regulations have clear rules about when these vented windows become a legal requirement rather than a personal choice.
Getting this right matters. Installing windows without required ventilation can lead to failed building control inspections, invalidated warranties, and the hassle of retrofitting vents later. Let's break down exactly what the regulations say and how they apply to your project.
The requirements for trickle vents in windows fall under Approved Document F of the Building Regulations, which covers ventilation requirements for maintaining indoor air quality. Updated in June 2022, these regulations apply across England and set out minimum standards for background ventilation in dwellings.
The core principle is straightforward: homes need adequate ventilation to protect occupant health. As stated in the regulations, "without adequate ventilation, mould and internal air pollution might become hazardous to health." Since modern windows are significantly more airtight than their predecessors, trickle vents windows have become the primary method for ensuring sufficient background airflow in most residential properties.
But when exactly are they legally required? The regulations apply in two main scenarios:
This second point is where confusion often arises. The regulation doesn't simply require all replacement windows to have trickle vents. Instead, it focuses on maintaining or improving the existing ventilation provision.
You'll often hear installers mention "EA" or "equivalent area" when discussing double glazed windows with ventilation. But what does this actually mean in practical terms?
Equivalent area measures the aerodynamic performance of a ventilator, essentially quantifying how much air can pass through the vent. According to Building Regulations Part F, it represents "the area of a sharp edged circular orifice through which air would pass at the same volume flow rate, under an identical applied pressure difference, as through the opening under consideration."
In simpler terms, it's a standardized way of comparing different vent designs regardless of their physical size or shape. A vent with a higher EA rating allows more air through than one with a lower rating.
The minimum EA requirements vary based on room type and building configuration:
| Room Type | Multi-Storey Properties (Minimum EA) | Single-Storey Properties (Minimum EA) |
|---|---|---|
| Living spaces | 8,000mm² | 10,000mm² |
| Kitchens | 8,000mm² | 10,000mm² |
| Bathrooms | 4,000mm² | 4,000mm² |
| Utility rooms and toilets | No minimum specified | No minimum specified |
These values represent the combined EA for all background ventilators in each room, not per individual vent. Most standard trickle vents provide between 2,500mm² and 5,000mm² of equivalent area, so multiple vents may be needed in larger rooms to meet requirements.
Here's where we address one of the most common misconceptions: not every window replacement automatically requires trickle vents in windows. The reality is more nuanced, and understanding the distinctions can save you money and hassle.
The table below clarifies the requirements for different building scenarios:
| Scenario | Trickle Vent Requirement | Key Considerations |
|---|---|---|
| New build properties | Required in all habitable rooms | Must meet minimum EA values for room type; typically five vents minimum in living spaces and kitchens |
| Replacement windows (existing vents present) | Must replace with equivalent or better | New vents must provide at least the same EA as those being removed |
| Replacement windows (no existing vents) | May be required | If new windows are more airtight than originals, vents may be needed to prevent worsening ventilation |
| Existing wall ventilator present | Not required if wall vent meets EA minimums | Wall ventilators count toward background ventilation requirements |
| Voluntary retrofit to existing windows | Not required but recommended | Building control approval not needed for adding vents to existing windows |
Notice that the situation isn't as black and white as "replace windows, add vents." The government's official FAQ confirms that when replacing windows in a room where an existing wall ventilator meets minimum EA requirements, "no further background ventilation needs to be added after replacing the windows."
You might be wondering whether there's an alternative to trickle vents for meeting ventilation requirements. The regulations do allow flexibility in how you achieve adequate background ventilation. Wall-mounted background ventilators can satisfy Part F requirements, provided they deliver the necessary equivalent area for the room type.
However, certain approaches don't qualify as acceptable alternatives. The government guidance explicitly states that night-vent latches, where a window locks slightly ajar, are "not an appropriate background ventilation solution" because they don't provide sufficiently secure means of ventilation.
Similarly, homeowner disclaimers don't bypass the requirements. According to official guidance, "a disclaimer signed by the homeowner stating that they do not wish to have background ventilators or that they will be installed in future is not a suitable way of complying with the Building Regulations." The work must comply fully at the time of completion.
When you have windows installed by a FENSA-registered or similar competent person scheme member, they self-certify that the work meets all relevant Building Regulations. This includes Part F ventilation requirements. If a registered installer fits windows without adequate ventilation provision, they're technically certifying non-compliant work, which can have serious consequences for both the installer and homeowner.
For homeowners, this means choosing a reputable installer who understands current regulations isn't just about quality; it's about ensuring your installation is legally compliant and properly certified.
With the regulatory framework clear, you'll want to understand the different types of trickle vents available and which options work best for various window materials and situations.
Now that you understand when trickle vents are required, here's the next question: which type should you choose? Walk into any building supplier and you'll find a surprisingly wide range of options, from basic budget models to sophisticated acoustic units and specialized designs for different window materials. Making the right choice means understanding what each type offers and matching it to your specific needs.
The differences between vent types go far beyond appearance. Your choice affects noise levels, durability, installation complexity, and how well the window vent integrates with your existing frames. Let's explore the options so you can make an informed decision for your home.
Picture this: you've just installed beautiful new double-glazed windows with excellent thermal performance, only to find that traffic noise still filters through the trickle vents. This is exactly why acoustic variants exist, and understanding the difference could save you considerable frustration.
Standard trickle vents are the workhorses of background ventilation. They feature a straightforward design with a simple air channel running through the frame, protected by external canopies and internal grilles. These vents typically cover equivalent areas between 2,500mm² and 5,000mm², meeting basic building regulation requirements without additional frills.
For properties in quiet locations, away from major roads and other noise sources, standard vents perform admirably. They provide the controlled airflow your home needs at an affordable price point, and their simple mechanism means fewer components that could potentially fail over time.
Acoustic trickle vents look similar to standard models from the outside, but inside they're engineered for serious sound reduction. According to ventilation specialists at Titon, acoustic vents incorporate several noise-fighting features:
The performance difference is measured in Dn,e,w values, which indicate overall sound reduction in decibels. A standard vent might offer minimal acoustic attenuation, while a quality acoustic model can achieve ratings of 35-44 dB or higher. To put this in perspective, every 10 dB reduction roughly halves the perceived loudness of external noise.
Acoustic vents cost more than standard options, so when does the investment make sense? Consider upgrading if your property faces any of these situations:
The World Health Organization defines noise levels above 65 dB as noise pollution, and BS 8233:2014 recommends keeping bedroom noise below 30 dB for restful sleep. In noisy locations, standard vents simply cannot achieve these targets while providing adequate ventilation.
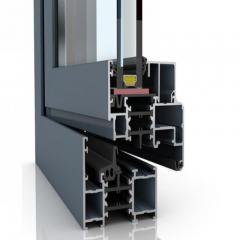
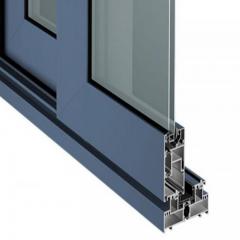
Beyond acoustic considerations, the material of your window vent matters enormously for both performance and aesthetics. Installing an aluminum vent on a timber frame, or choosing a white uPVC model for anthracite-colored windows, creates visual discord that diminishes your home's appearance.
More importantly, material compatibility affects durability and weather resistance. Different frame materials expand and contract at different rates with temperature changes, and mismatched vents can develop gaps or binding issues over time.
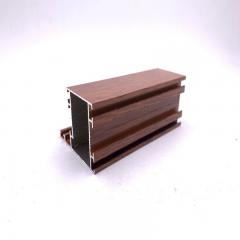
uPVC remains the most popular choice for residential window vents, and for good reason. These vents are lightweight, affordable, and available in a comprehensive range of colors to match virtually any uPVC window frame. Modern manufacturing techniques allow for convincing woodgrain finishes and metallic effects, so you're no longer limited to plain white.
For homeowners with standard uPVC double glazing, matching uPVC vents offer the simplest path to compliance. They integrate seamlessly with existing frames, require minimal maintenance, and resist moisture damage without needing periodic repainting or treatment.
When durability and a contemporary aesthetic matter most, aluminum vents deliver. These units resist corrosion, maintain their appearance for decades, and suit modern architectural styles where slim profiles and clean lines are priorities. Powder-coated finishes are available in virtually any RAL color, including popular choices like anthracite grey that match current window trends.
Aluminum vents also work well in demanding environments. Coastal properties, industrial areas, and locations with extreme weather conditions benefit from aluminum's superior resistance to environmental stresses. The material's rigidity means these vents maintain tight tolerances over time, reducing the risk of drafts or rattling.
Heritage properties, listed buildings, and homes where traditional aesthetics matter often require timber window frames, and the vents should match. Timber vents can be stained or painted to complement existing woodwork, and bespoke options allow for color-matching to specific frame finishes.
The trade-off is maintenance. Unlike uPVC or aluminum alternatives, timber vents need periodic treatment to prevent moisture ingress and maintain their appearance. In period properties, however, this additional care is worthwhile to preserve architectural integrity and satisfy conservation requirements.
| Material | Typical Applications | Pros | Cons | Best Suited For |
|---|---|---|---|---|
| uPVC | Standard residential windows, new builds, replacement projects | Affordable, low maintenance, wide color range, lightweight | Can become brittle with UV exposure over time, less rigid than alternatives | uPVC window frames, budget-conscious projects |
| Aluminum | Contemporary homes, commercial buildings, high-end residential | Exceptional durability, corrosion resistant, maintains tight tolerances, slim profile | Higher cost, can conduct cold (thermal bridging), limited DIY-friendly options | Aluminum frames, coastal properties, modern architecture |
| Timber | Period properties, listed buildings, heritage projects | Natural appearance, can be color-matched exactly, suits conservation requirements | Requires ongoing maintenance, higher initial cost, vulnerable to moisture damage | Timber frames, traditional homes, conservation areas |
| Composite | Versatile applications, mixed-material frames | Combines benefits of multiple materials, good balance of cost and performance | Limited availability, may not match all frame types perfectly | Projects requiring compromise between durability and aesthetics |
Beyond material choice, you'll encounter two fundamentally different mounting approaches. Understanding this distinction helps you select the right product and avoid compatibility issues.
Frame-mounted (through-frame) vents are the most common type. These install directly into the window frame, with slots cut into the top rail to accommodate the vent sleeve. They work with most standard window profiles and can often be retrofitted to existing windows. When people discuss small vent windows or adding ventilation to current frames, they're typically referring to this approach.
Glazed-in vents take a different approach entirely. Rather than cutting into the frame, these vents are integrated into the sealed glass unit itself, positioned in the upper section of the glazing. This option suits windows with minimal frame depth or architectural designs where maintaining clean frame lines is essential.
Glazed-in options require specialized manufacturing since the vent becomes part of the insulated glass unit. While this limits retrofit possibilities, it offers advantages for new installations where frame space is constrained. Some modern window systems, including certain Velfac trickle vent configurations, utilize this integrated approach for a seamless appearance.
When neither through-frame nor glazed-in options are feasible, over-frame vents provide an alternative. These mount above the window frame rather than through it, making them suitable for retrofit applications where cutting into existing frames isn't practical. While slightly more visible than other types, over-frame vents deliver equivalent airflow and can be color-matched to minimize visual impact.
Similar in principle to a screen vent that sits on top of an opening rather than within it, over-frame designs work particularly well when adding ventilation to windows that weren't originally designed to accommodate internal vents.
Choosing the right vent involves balancing several factors: your noise environment, window material, aesthetic preferences, and budget. For most homeowners with standard uPVC windows in relatively quiet locations, matched uPVC through-frame vents offer the best value. Those facing significant external noise should prioritize acoustic performance, even at higher cost. And anyone with timber or aluminum frames should match materials to ensure long-term compatibility and visual harmony.
With your vent type selected, the next consideration is sizing. Getting the equivalent area calculations right ensures your ventilation meets both regulatory requirements and your home's actual needs.
You've chosen the right type of vent for your windows, but here's where many homeowners get stuck: how do you know what size you actually need? Picking a vent that's too small means inadequate airflow and potential compliance issues. Go too large, and you might create unnecessary drafts or struggle to fit the unit into your frame. Getting the sizing right requires understanding a few key technical concepts, but don't worry, it's more straightforward than it sounds.
The good news is that once you grasp the basics of equivalent area measurements and how to measure your existing frames, selecting the correct window air vents becomes a methodical process rather than guesswork. Let's walk through everything you need to know to get this right the first time.
When shopping for fitted vents, you'll encounter the term "EA" or "equivalent area" repeatedly. This measurement is the key to understanding whether a particular vent will deliver enough airflow for your space, and it's the figure that building control officers check when verifying compliance.
So what exactly does EA mean? In simple terms, equivalent area measures the aerodynamic performance of a ventilator. It represents how much air can flow through the vent under standard conditions, expressed in square millimeters (mm²). Think of it as the effective "breathing capacity" of the vent, accounting for any internal restrictions like grilles, baffles, or acoustic materials that might impede airflow.
Why does this matter more than physical dimensions? Imagine two vents that look identical from the outside. One has a simple open channel, while the other contains acoustic baffles and sound-absorbing material. Despite having the same external dimensions, their EA ratings will differ significantly because the acoustic version restricts airflow more than the open design.
According to technical specifications from ventilation suppliers, EA ratings for common house window vents typically range from around 1,700mm² for smaller units up to 8,000mm² or more for larger models. The rating depends not only on the vent's physical size but also on the slot width cut into your window frame, with 13mm and 16mm slots producing different EA values from the same vent unit.
Building regulations specify minimum EA values based on room function and building configuration. Meeting these requirements isn't optional for new builds or window replacements where existing ventilation must be maintained.
For habitable rooms in multi-storey dwellings, the minimum combined EA requirement is 8,000mm². This applies to living rooms, dining rooms, bedrooms, and kitchens. Single-storey properties require slightly higher values of 10,000mm² for these same room types. Bathrooms and wet rooms have a lower threshold of 4,000mm² regardless of building height.
Remember, these figures represent the total background ventilation for each room, not individual vent requirements. A bedroom with two windows might achieve 8,000mm² through two 4,000mm² vents rather than a single large unit. This flexibility allows you to distribute ventilation across multiple openings based on your window configuration.
Here's an important principle to understand: physical vent length and EA rating are related but not directly proportional. A longer vent generally provides more airflow, but the relationship depends on several design factors.
Looking at product specifications across various vent models, you'll notice that a 265mm vent might offer around 2,000mm² EA, while a 550mm model could provide 6,000mm² or more. However, different manufacturers' designs at the same length can yield quite different EA values depending on their internal configuration.
The slot width in your window frame also significantly affects performance. The same vent installed in a 16mm slot will typically deliver higher EA than when fitted in a 13mm slot. This is because the wider slot creates less restriction to airflow at the frame interface.
Ready to measure your windows? Before heading to the hardware store or placing an online order, you'll need to gather some specific measurements. Taking accurate dimensions ensures your new ventilation windows will function properly and comply with regulations.
Whether you're replacing existing vents or retrofitting new ones, the measurement process follows the same basic steps. Here's what you need to check:
When replacing existing ventilation windows with worn or damaged vents, accuracy is essential. Start by removing the old vent from your window. This typically involves prying off any decorative caps to reveal fixing screws, then unscrewing the internal grille and external canopy.
With the old vent removed, you can clearly see the slot configuration in your frame. Measure the total length across all slots, as some installations use multiple parallel slots covered by a single vent. If screw holes are visible, measure between the center points of these fixings.
According to practical fitting guidance, you may not find an exact size match for your existing slots. In this case, selecting a slightly wider vent that bridges the existing openings is often the best solution. The new unit's housing covers the old slots completely, and you simply create new screw positions in the frame.
If you're adding ventilation to windows that don't currently have vents, the process requires more planning. First, confirm that your window frame can accommodate through-frame vents, as some profiles don't have sufficient material thickness for cutting slots safely.
Calculate your room's EA requirement based on its function and your building type. Then determine how many windows are available to share this ventilation load. Divide the total required EA by the number of windows to find the minimum EA per vent.
Consider practical constraints too. Very large vents may not fit neatly on narrower window frames, and extremely long units can look visually overwhelming on smaller windows. Sometimes distributing ventilation across multiple moderate-sized vents creates a better aesthetic result than installing one oversized unit.
Different window profiles have varying capacities for accommodating vents. Casement windows typically offer the most flexibility, with generous head space above the glazing for vent installation. Tilt-and-turn windows may have more restricted options depending on their operating mechanism.
For uPVC frames, check whether steel or aluminum reinforcement runs through the head section. This internal reinforcement, while excellent for frame rigidity, makes slot-cutting significantly more challenging and may require professional installation.
Timber frames generally offer straightforward vent fitting, though care must be taken to maintain weatherproof seals after cutting. Aluminum windows require specific vent designs compatible with their typically slimmer profiles.
While exact specifications vary by manufacturer, typical vent dimensions and ratings fall within recognizable ranges. Compact units around 265-335mm in length generally provide EA ratings between 1,700mm² and 3,300mm². Medium-length vents spanning 350-475mm typically offer 3,500mm² to 5,100mm² of equivalent area. Larger units from 495mm to 700mm can deliver EA values from 5,000mm² up to 8,000mm² or beyond.
Remember that EA ratings are always quoted for specific slot widths. A vent rated at 5,000mm² for a 16mm slot will perform differently in a 13mm opening. Always check the specifications for your particular frame configuration.
With your sizing requirements calculated and measurements in hand, you're ready to move on to the installation process. Whether you're tackling the job yourself or hiring a professional, understanding what's involved helps ensure a successful outcome.

You've measured your frames, selected the right vents, and you're ready to get them installed. But here's the question that separates a successful project from a frustrating weekend: should you tackle this yourself or call in a professional? The answer depends on your windows, your skills, and whether you need building regulation sign-off for the work.
Installing a window trickle vent might look straightforward, and for many homeowners with standard uPVC frames, it genuinely is. However, certain situations demand professional expertise to avoid costly mistakes or invalidated warranties. Let's walk through exactly what's involved so you can make an informed decision about your project.
Retrofitting trickle vents to existing windows follows a logical sequence that most competent DIYers can manage with basic tools and careful attention to detail. The process involves creating a channel through your window frame, fitting the sleeve component, and then attaching the internal and external covers. Sounds simple enough, but each stage requires precision to achieve a weatherproof, functional result.
Before you begin, gather your tools and materials. You'll need a drill with appropriate bits, a jigsaw or router for creating the slot, measuring tape, spirit level, pencil for marking, and the sealant specified by your vent manufacturer. Most easy glaze trickle vents come with installation templates and detailed instructions, so keep these handy throughout the process.
Working on windows involves specific hazards that deserve attention before you start. If your windows are above ground level, you'll need safe access equipment. Never lean out of upper-floor windows or work from unstable platforms. For first-floor installations and above, scaffolding or a stable work platform is essential rather than optional.
Power tools on window frames create fine plastic or wood dust. Wear appropriate eye protection and a dust mask, and consider how debris might affect rooms below if you're working on upper floors. Keep the work area clear, and if children or pets are in the house, ensure they can't access your workspace unexpectedly.
According to professional window fitters, the retrofit process follows these key stages:
Throughout this process, manufacturer instructions take priority over general guidance. Different vent window replacement products have specific requirements for slot dimensions, sealant types, and fixing methods. Following the supplied instructions exactly ensures warranty validity and optimal performance.
Even straightforward installations can go wrong without proper care. Avoid these frequent mistakes that trip up DIY installers:
DIY installation makes sense for confident homeowners with standard uPVC windows, basic power tool skills, and ground-floor access. But several scenarios strongly favor professional installation, even if you're generally handy around the house.
Aluminum windows require specialized cutting equipment and techniques that differ significantly from uPVC or timber work. The thin profiles and high strength of aluminum make amateur cutting risky, with potential for frame damage that's expensive to repair. Similarly, composite frames combining multiple materials present challenges that professionals are better equipped to handle.
Timber frames, while easier to cut, require proper weatherproofing treatment after installation to prevent moisture damage. Professional installers understand how to seal timber correctly and may offer guarantees on their weatherproofing work.
Heritage windows and those in listed buildings come with additional complications. Conservation requirements may specify particular vent styles or installation methods, and work may need approval before proceeding. Professionals experienced with period properties understand these requirements and can navigate the approval process.
Here's something many homeowners overlook: DIY modifications to windows often void manufacturer warranties. If your windows are still under warranty and you encounter problems after self-installing drip vents in windows, the manufacturer may refuse to cover related issues.
Professional installers, particularly those registered with competent person schemes, provide their own workmanship guarantees. They also understand how to install without compromising existing window warranties, or can advise when installation isn't advisable due to warranty implications.
When window work requires building regulation approval, professional installation through a registered installer simplifies the compliance process significantly. FENSA-registered and similar scheme members can self-certify that work meets Building Regulations, avoiding the need for separate building control inspections.
For new builds or situations where you're replacing windows that previously had ventilation, this certification is essential. Attempting DIY installation and then seeking retrospective approval adds complexity and cost. Professional installers handle certification as standard, providing peace of mind that your installation is fully compliant.
Upper-floor windows present genuine safety risks for DIY installation. Working at height requires proper equipment and training. Professionals have access to scaffolding, tower systems, or other safe access solutions, plus insurance coverage if something goes wrong.
Even at ground level, some window positions make DIY work impractical. Windows above conservatories, those accessible only through narrow side passages, or units surrounded by delicate landscaping may all benefit from professional handling.
Consider professional installation if any of these apply to your situation:
Just as homeowners consider when to open foundation vents seasonally for optimal crawl space ventilation, the decision between DIY and professional window vent installation comes down to understanding your specific circumstances and capabilities. There's no shame in calling professionals for work that exceeds your comfort zone, as a proper installation lasts decades while a botched attempt creates ongoing problems.
With your vents successfully installed, the next priority is keeping them working effectively. Regular maintenance prevents common issues and ensures your ventilation system delivers benefits year after year.
Your trickle vents are installed and working beautifully, but here's what many homeowners don't realize: these simple devices need regular attention to keep performing at their best. Unlike mechanical ventilation systems that obviously require servicing, window vents can quietly deteriorate without any dramatic warning signs. By the time you notice condensation returning or draughts becoming unbearable, the underlying problem may have been developing for months.
The good news? Maintaining trickle vents is straightforward and requires no specialized skills or expensive equipment. A few minutes of attention every few months keeps your ventilation system functioning effectively for years. Let's cover exactly what's involved and how to solve common problems when they arise.
Dust, insects, cobwebs, and environmental debris gradually accumulate inside vent slots and on protective grilles. This buildup doesn't just look unsightly; it actively restricts airflow and reduces the equivalent area your vents can deliver. According to ventilation maintenance specialists, blocked vents can undo all the benefits of background ventilation, leaving you with stuffy rooms, higher humidity, and increased maintenance costs.
The cleaning process itself is refreshingly simple. You don't need specialist tools or chemicals, just basic household items and a few minutes of your time.
Start by opening the vent fully or, where possible, removing the cover entirely. Many tickle vents feature clip-on internal grilles that pop off for deeper cleaning. Check your window manufacturer's guidance if you're unsure whether removal is possible with your specific model.
Use your vacuum's brush attachment to remove loose dirt, cobwebs, and dust from the vent slots and surrounding frame area. Work methodically along the length of the vent, paying particular attention to the corners where debris tends to accumulate.
Next, dampen a soft cloth with mild soapy water and wipe down the vent cover, slider mechanism, and visible surfaces. Avoid harsh chemicals, abrasive cleaners, or solvent-based products, as these can damage plastic components, discolor finishes, or warp the vent housing. According to manufacturer maintenance guidance, irreparable damage can be caused to the surface by using proprietary metal polishes, harsh abrasive cleaners, or emery cloths.
For stubborn dirt lodged in narrow slots, a soft toothbrush or small paintbrush works well. Gently scrub inside the vent grooves to dislodge compacted debris, then vacuum again to remove loosened material. If you have compressed air available, a quick blast through the slot can clear particles that brushing alone can't reach.
Rinse your cloth with clean water and wipe down all surfaces again to remove any soap residue. Dry thoroughly with a clean cloth before closing or refitting the vent. Moisture left inside the mechanism can encourage mold growth or cause the slider to stick.
Finally, test the operation. Slide the control between open and closed positions several times to confirm smooth movement. If the slider feels stiff, a tiny amount of silicone-based lubricant on the moving parts can help. The Titon maintenance manual specifically advises against solvent or petroleum-based lubricants such as WD40, as these may warp or discolor the vent components.
For most homes, cleaning every six months provides adequate maintenance. However, certain situations warrant more frequent attention:
Beyond regular cleaning, conduct a quick visual inspection of your vents during seasonal transitions. Spring and autumn are ideal times to check that everything remains in good working order before the demands of summer cooling or winter heating.
Different seasons place different demands on your ventilation system. Before winter sets in, ensure all vents operate freely so you can adjust them as heating demands change. Check that seals remain intact and that closed vents actually seal properly rather than allowing unwanted draughts.
After winter, inspect for any damage caused by extreme weather. Frost can affect plastic components, while wind-driven rain may have deposited debris inside the vent mechanism. Spring cleaning should include checking that external canopies haven't become dislodged or damaged during storms.
Summer maintenance focuses on ensuring vents can fully open for maximum airflow during warmer months. Confirm that nothing is blocking the external canopy and that insect screens, if fitted, remain intact and clear.
Even with regular maintenance, problems can develop. Some issues have simple fixes you can handle yourself, while others indicate more serious problems requiring professional attention or replacement. Here's how to diagnose and address the most common complaints.
Feeling cold air streaming through even when the vent is supposedly closed? This is one of the most frustrating issues homeowners encounter. According to draughtproofing specialists, poorly fitting or damaged vents can allow significant unwanted airflow that defeats the purpose of having adjustable ventilation.
Start by examining the vent closely when set to the closed position. Look for visible gaps between the slider and the frame, or between the vent housing and the window profile. Even small gaps can allow noticeable draughts, particularly on windy days.
Sometimes the issue is simply that the vent wasn't properly closed. The slider mechanism may have stopped short of the fully closed position, or debris might be preventing complete closure. Clean the slider track and test operation again.
If the vent closes fully but gaps remain, the seals may have perished or the vent may have been incorrectly installed originally. The DraughtBusters case studies describe situations where trickle vents were fitted incorrectly from installation, leaving permanent gaps that no amount of adjustment could resolve. In such cases, replacement or professional refitting is the only solution.
For vents that are fundamentally sound but have minor seal deterioration, applying self-adhesive foam tape around the closing edges can restore an effective seal. This is a temporary fix, but it can extend the life of aging vents while you plan a more permanent solution.
External noise filtering through your vents can be particularly annoying, especially in bedrooms or home offices. If you've installed standard vents in a noisy location, upgrading to acoustic models may be the only complete solution. However, several factors can make noise problems worse than they should be.
First, confirm the vent is actually closed when noise becomes problematic. An open vent naturally admits more sound than a closed one. If closing the vent significantly reduces noise, the vent itself is functioning normally, and you may simply need acoustic-rated replacements if background noise remains unacceptable.
Check that the external canopy is securely fitted. Loose canopies can rattle in the wind, creating noise that seems to come from the vent itself. Tighten any loose fixings and ensure the canopy sits flush against the frame.
Inspect the internal grille for damage or loose components. Cracked plastic or displaced parts can vibrate with airflow, generating noise that wouldn't occur with an intact unit.
Finding water inside your home near a trickle vent indicates a serious problem requiring prompt attention. Water ingress can damage window frames, wall finishes, and potentially the building structure if left unaddressed.
External canopies are specifically designed to prevent rain from entering the vent slot. Check that yours is properly positioned and securely fixed. A canopy that has shifted or come loose may no longer provide adequate weather protection.
Examine the sealant around the vent installation. Over time, silicone and other sealants can shrink, crack, or pull away from surfaces. The manufacturer guidance recommends checking that silicone sealant has not perished and is still providing a firm seal. If sealant appears compromised, carefully remove the old material and reapply fresh sealant appropriate for your frame material.
In severe cases, water penetration may indicate that the vent was installed without adequate weatherproofing or that the frame itself has developed problems. Professional assessment is advisable if basic maintenance doesn't resolve the issue.
If you're experiencing condensation, stuffiness, or moisture problems even with vents fully open, several factors could be at play.
Blockages are the most common culprit. Even if the vent appears clean from a casual glance, debris may have accumulated deep inside the through-frame slot where it's not visible. Remove the internal grille and external canopy to inspect the full length of the air channel. Use a vacuum and compressed air to clear any hidden obstructions.
Consider whether your vents provide sufficient equivalent area for your rooms. Building regulations have tightened over time, and older installations may not meet current minimums. If your home has persistent ventilation problems despite apparently functional vents, the combined EA may simply be inadequate for your needs.
Check that air can circulate freely through your home. Trickle vents work as part of a whole-house ventilation strategy. If internal doors fit tightly without undercuts or transfer grilles, fresh air entering through vents may not reach extract fans in kitchens and bathrooms effectively.
Sometimes repair isn't practical, and replacement becomes the sensible option. Consider replacing your vents rather than continuing to repair when:
Trickle vent blanking plate products exist for situations where you want to permanently close an existing vent opening. However, before choosing to block window vent openings, consider whether this might create ventilation problems elsewhere or conflict with building regulations. Permanently removing background ventilation can lead to condensation and air quality issues that are more expensive to resolve than simply maintaining functional vents.
Snap vents and similar quick-fit replacement products make swapping out damaged units relatively straightforward if you're comfortable with basic DIY. For complex installations or warranty considerations, professional replacement ensures the work meets current standards.
With your vents maintained and any problems resolved, you're ready to optimize their use throughout the year. Understanding how to adjust ventilation for different seasons and room requirements helps you get maximum benefit from your home's ventilation system.

Your trickle vents are clean, working properly, and ready to deliver year-round ventilation benefits. But here's what separates homeowners who truly benefit from their venting windows and those who simply tolerate them: understanding how to adjust ventilation based on the season and the specific needs of each room. Using the same settings in January as you do in July means you're either wasting heat or not ventilating enough, neither of which serves you well.
Think of your window air ventilation system as you would your heating thermostat. You wouldn't set it once and forget about it all year, would you? The same principle applies to background ventilation. With a little seasonal awareness and room-by-room thinking, you can maximize comfort, minimize energy waste, and keep your indoor air quality consistently fresh.
The difference between window and ventilator performance becomes most apparent when seasons change. During mild spring and autumn months, your vents can work with minimal adjustment, providing comfortable background airflow without significant energy implications. But summer heat and winter cold present distinct challenges that require thoughtful management.
Warmer months are when your trickle vents can work hardest with the least penalty. With minimal temperature difference between inside and outside, heat loss through open vents is negligible. This is the time to maximize airflow and take full advantage of your air ventilation window capacity.
Open all vents fully throughout your home during summer. The increased airflow helps remove excess heat that builds up during the day, particularly in upper floors and south-facing rooms. Combined with strategic window opening during cooler morning and evening hours, your vents provide continuous background air exchange even when windows are closed for security or noise reasons.
Many homeowners wonder about window AC unit vent open or closed settings when running air conditioning. The principle is similar to trickle vent management: during extreme heat when air conditioning is working hard, closing vents temporarily prevents warm outdoor air from fighting your cooling efforts. Once temperatures moderate, opening vents again restores fresh air circulation without overworking your cooling system.
Summer is also when cooking odors, barbecue smoke, and garden fragrances are most likely to circulate through your home. Fully open vents help clear these quickly, maintaining pleasant indoor air without relying solely on opening windows wide.
Cold weather creates the most challenging ventilation decisions. You need fresh air to prevent condensation and maintain air quality, but every bit of outdoor air entering your home requires heating to room temperature. This is where smart vent management pays dividends.
According to ventilation specialists, closing trickle vents at night during winter might seem logical to conserve heat, but it's strongly discouraged. These vents provide continuous background ventilation to combat condensation and mold by allowing fresh air circulation even when windows are shut. Closing them overnight heightens humidity risks, particularly in bedrooms where moisture from breathing accumulates.
Instead of closing vents entirely, consider a balanced approach. Reduce the opening on vents in rooms where you spend less time during winter, such as spare bedrooms or rarely used living spaces. Maintain fuller openings in occupied bedrooms, the kitchen, and bathroom areas where moisture production is highest.
The key insight is that ventilation needs don't disappear in winter; they often intensify. Drying laundry indoors, increased cooking, longer hot showers, and reduced natural ventilation from open windows all contribute to higher indoor humidity during colder months. Your vents become more important, not less, even as you're conscious of heat conservation.
How much heat actually escapes through open trickle vents? Less than you might think. The small apertures limit airflow to a trickle rather than a flood, and much of the incoming cold air is naturally warmed as it mixes with room air before reaching occupied spaces.
Research indicates that the energy cost of background ventilation is modest compared to the problems caused by inadequate ventilation. Mold remediation, health impacts from poor air quality, and structural damage from persistent condensation all carry far higher costs than the small amount of additional heating required to compensate for ventilated air.
For maximum efficiency, adjust your vent settings according to weather conditions rather than calendar dates. A mild January day might warrant fuller openings, while an unseasonably cold April morning could justify reduced ventilation temporarily. Flexibility based on actual conditions beats rigid seasonal schedules.
Every room in your home has different ventilation requirements based on how it's used, when it's occupied, and what activities occur there. A one-size-fits-all approach leaves some spaces under-ventilated while potentially over-ventilating others. Understanding these differences helps you optimize your whole-house ventilation strategy.
Bedrooms present unique ventilation challenges. During sleep, each person exhales approximately 40g of water vapor per hour, according to indoor air quality research. Over an eight-hour night, that's significant moisture production in a typically closed room. Add to this the carbon dioxide from breathing, and bedrooms can quickly become stuffy and humid without adequate ventilation.
The recommendation is clear: keep bedroom trickle vents open overnight, even during winter. The continuous low-level airflow removes exhaled moisture before it can condense on cold windows and walls. You'll wake to fresher air and notice less morning condensation on glass surfaces.
If you're concerned about cold draughts while sleeping, position your bed away from the window with the vent. The air entering through vents mixes with room air before reaching sleeping areas, moderating any temperature difference. Acoustic vents are particularly valuable in bedrooms, reducing external noise while maintaining essential overnight ventilation.
Kitchens generate more moisture and cooking pollutants than any other room in most homes. Boiling water, steaming vegetables, and simmering sauces can release liters of water vapor in a single cooking session. This is why extract fans above cooktops are standard equipment, but trickle vents play a supporting role that shouldn't be overlooked.
When your extract fan operates, it removes air from the kitchen. That air must be replaced from somewhere, and trickle vents provide a controlled pathway for replacement air to enter. Without adequate makeup air, extract fans work harder and less effectively, potentially even causing backdrafts through other openings.
Keep kitchen vents open whenever cooking, and consider leaving them open continuously if your household cooks frequently. During intensive cooking sessions with the extract fan running, fully opened vents ensure efficient moisture and odor removal. After cooking, maintaining vent opening helps clear residual humidity and cooking smells more quickly.
Like kitchens, bathrooms are high-moisture environments where trickle vents complement mechanical extraction. Hot showers and baths produce concentrated steam that extract fans work to remove. Your vents again provide the makeup air pathway that allows extraction to function efficiently.
During and immediately after bathing, maximum vent opening supports extract fan effectiveness. Once humidity levels normalize, you can reduce the opening if desired, though many homeowners find continuous bathroom ventilation prevents the musty odors and mold growth that can develop in these damp-prone spaces.
If your bathroom lacks a window and relies solely on mechanical ventilation, the vents in adjacent rooms become even more important. Air drawn out through the bathroom extract must flow from elsewhere in the home, and open vents in nearby spaces ensure this airflow occurs smoothly.
Living rooms, dining rooms, and other communal spaces benefit from consistent background ventilation that keeps air fresh during occupied hours. These rooms typically see variable occupancy, from empty during work hours to full during evening gatherings, making flexible ventilation valuable.
During regular daily use, moderate vent opening provides adequate fresh air without noticeable draughts. When hosting guests or during activities that increase occupancy, fully opening vents helps manage the additional carbon dioxide and humidity that more people generate.
Living areas also benefit from the pollutant dilution that continuous ventilation provides. Off-gassing from furniture, cleaning product residues, and other household sources can accumulate in sealed spaces. Background ventilation through your vents continuously dilutes these pollutants, contributing to healthier indoor air quality.
| Room Type | Summer Setting | Winter Setting | Key Considerations | Complementary Ventilation |
|---|---|---|---|---|
| Master Bedroom | Fully open | Open (maintain overnight) | Overnight moisture from breathing; CO2 buildup during sleep | None typically required; avoid mechanical ventilation that creates noise |
| Children's Bedrooms | Fully open | Open (maintain overnight) | Same as master; children may be more sensitive to air quality | Air purifiers optional for allergy sufferers |
| Kitchen | Fully open | Open (especially during cooking) | High moisture and pollutant production; needs makeup air for extract fan | Cooker hood or extract fan essential; run during and after cooking |
| Bathroom (with window) | Fully open | Open (during and after bathing) | Concentrated steam production; mold risk if under-ventilated | Extract fan required; run for 15-20 minutes after showering |
| En-suite Bathroom | Fully open | Open continuously | Often smaller with less natural ventilation; higher mold risk | Humidity-controlled extract fan recommended |
| Living Room | Fully open | Partially open (adjust for occupancy) | Variable occupancy; pollutant dilution important | None typically required; whole-house systems benefit this space |
| Dining Room | Fully open | Open during meal times | Food odors and steam during meals; often adjacent to kitchen | Benefits from kitchen extract when doors are open |
| Home Office | Fully open | Open during working hours | CO2 from prolonged single occupancy affects concentration | Consider air quality monitor to track CO2 levels |
| Utility Room | Fully open | Fully open (critical for drying) | Tumble dryers and drying laundry produce significant moisture | Extract fan highly recommended; vented dryer if possible |
| Spare Bedroom | Fully open | Partially open (reduce when unused) | Lower priority when unoccupied; increase before guests arrive | None typically required |
In modern homes, trickle vents rarely work in isolation. They're typically part of a broader ventilation strategy that may include mechanical extract fans, passive stack ventilation, or whole-house mechanical ventilation with heat recovery (MVHR) systems. Understanding how these elements interact helps you get the best from each component.
Extract fans in kitchens and bathrooms create negative pressure when operating, drawing air out of these spaces. This air must be replaced, and your trickle vents provide controlled pathways for replacement air. Without adequate background ventilation, extract fans can struggle to move air effectively, potentially pulling makeup air through less desirable routes like gaps around doors or even causing backdrafts through flues.
Passive stack ventilation systems use warm air's natural tendency to rise, drawing air up through vertical ducts and out of the building. Again, trickle vents supply the fresh air that replaces what the stack removes. The two systems work together, with vents providing supply and stacks providing extract.
MVHR systems are designed to provide balanced whole-house ventilation with heat recovery. In homes with MVHR, trickle vents may not be necessary during system operation, as the mechanical system supplies fresh air continuously. However, vents provide backup ventilation during system maintenance or failure and may be required by building regulations regardless of mechanical provision.
Even homes with sophisticated mechanical ventilation benefit from understanding trickle vent operation. During power outages, mild weather when running mechanical systems seems wasteful, or simply as supplementary ventilation during high-demand periods, your vents provide reliable passive backup.
Beyond seasonal adjustments and room-specific settings, a few practical habits help you maintain optimal ventilation throughout the year:
With seasonal awareness and room-specific management, your trickle vents deliver maximum benefit with minimum energy waste. This understanding, combined with proper maintenance and appropriate product selection, ensures your background ventilation system serves your home effectively for years to come.
You've learned about regulations, sizing, installation, and maintenance. Now comes the moment of truth: actually choosing the right product. Walk into any hardware store or browse online suppliers, and you'll find dozens of options at wildly different price points. How do you separate quality products from budget disappointments? And what features actually matter versus those that are merely marketing fluff?
The difference between a well-chosen trickle vent window and a poor selection becomes painfully apparent over time. Cheap vents may stick, rattle, discolor, or fail to seal properly within just a few years. Quality products, by contrast, operate smoothly for decades with minimal attention. Understanding what separates these outcomes helps you make a purchase you won't regret.
Before comparing brands or hunting for deals, establish clear criteria for what constitutes a worthwhile product. Not every feature matters equally, and some highly marketed characteristics add little practical value. Focus your evaluation on the factors that genuinely affect long-term performance and satisfaction.
The materials used in construction directly determine durability and longevity. Premium windows vents use UV-stabilized plastics that resist yellowing and brittleness from sun exposure. Aluminum components should feature quality powder coating or anodizing that won't chip, peel, or corrode over time.
Examine the slider mechanism closely. Smooth, precise operation indicates quality manufacturing tolerances. Rough or sticky movement suggests corners were cut during production. According to industry specialists, aluminum vents offer maximum durability for demanding applications, making them particularly suitable for properties in harsh environments or those requiring long service life without replacement.
Pay attention to gasket and seal quality. These components create the weatherproof barrier when the vent is closed. High-quality gaskets maintain their flexibility and sealing capability for years, while cheap alternatives harden, crack, or compress permanently, allowing drafts and water ingress.
Never purchase a vent without confirming its EA rating matches your requirements. As we discussed in the sizing section, building regulations specify minimum equivalent areas for different room types. A vent that looks adequate but falls short on EA won't satisfy compliance requirements.
Quality manufacturers clearly state EA values for their products, typically specifying performance for different slot widths. If a supplier can't provide clear EA specifications, consider this a warning sign about overall product quality and documentation standards.
Remember that EA ratings should be checked against your specific frame configuration. A vent rated at 5,000mm² for a 16mm slot will deliver different performance in a 13mm opening. Reputable suppliers provide specification sheets showing performance across different installation scenarios.
If external noise is a concern for your property, acoustic performance becomes a critical selection criterion. Standard vents offer minimal sound attenuation, while purpose-designed acoustic models can achieve significant noise reduction.
Look for Dn,e,w ratings when comparing acoustic vents. Higher values indicate better sound reduction across the frequency range. As noted by ventilation experts, acoustic vents incorporate sound-absorbing materials and complex internal chambers that force sound waves through multiple turns, dissipating energy at each stage. A standard vent might provide negligible acoustic benefit, while a quality acoustic model can achieve ratings of 35-44 dB or higher.
For properties near roads, railways, or flight paths, investing in properly rated acoustic vents is worthwhile regardless of cost difference. The ongoing benefit of quieter indoor spaces far outweighs the one-time premium for acoustic performance.
A vent you can't easily adjust is a vent you won't use optimally. Test the control mechanism before purchasing if possible. The slider or switch should move smoothly throughout its range without excessive force or sticking points.
Consider the accessibility of your windows. Vents positioned high on tall windows may be difficult to reach. Some products feature extended control options or can be operated with simple tools for hard-to-reach locations.
For older household members or those with limited dexterity, larger control surfaces and lighter operating forces make daily adjustment more practical. Don't overlook these usability factors in favor of purely technical specifications.
While performance matters most, appearance shouldn't be ignored. Windows with vents are a visible feature of your home's facade and interior. Mismatched colors or oversized profiles can detract from otherwise attractive windows.
Quality manufacturers offer extensive color ranges, including standard whites and browns plus contemporary options like anthracite grey. Woodgrain finishes allow uPVC vents to blend with timber-effect frames. Custom color matching may be available for unusual frame colors or heritage applications.
Profile height and projection affect visual impact. Low-profile designs minimize the vent's visual presence, particularly important for modern architectural styles where clean lines are valued. Compare installed appearance across different products before committing.
Not every vent works with every window. Confirm compatibility with your specific frame material and profile before purchasing. uPVC, aluminum, and timber frames each have different dimensional requirements and installation characteristics.
For basement window with vent applications or other specialized situations, standard products may not be suitable. Some window types have limited frame depth or unusual profiles that require specialized vent designs. Check compatibility thoroughly before ordering, particularly for retrofit installations where frame modification may be required.
If you're dealing with mixed window types throughout your property, finding a supplier offering compatible products across materials simplifies sourcing and ensures consistent quality and appearance throughout your home.
With your selection criteria established, finding products that meet these standards becomes more straightforward. The market includes numerous reputable manufacturers, but not all offer the combination of quality, versatility, and value that homeowners need.
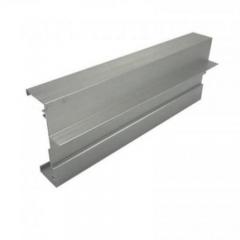
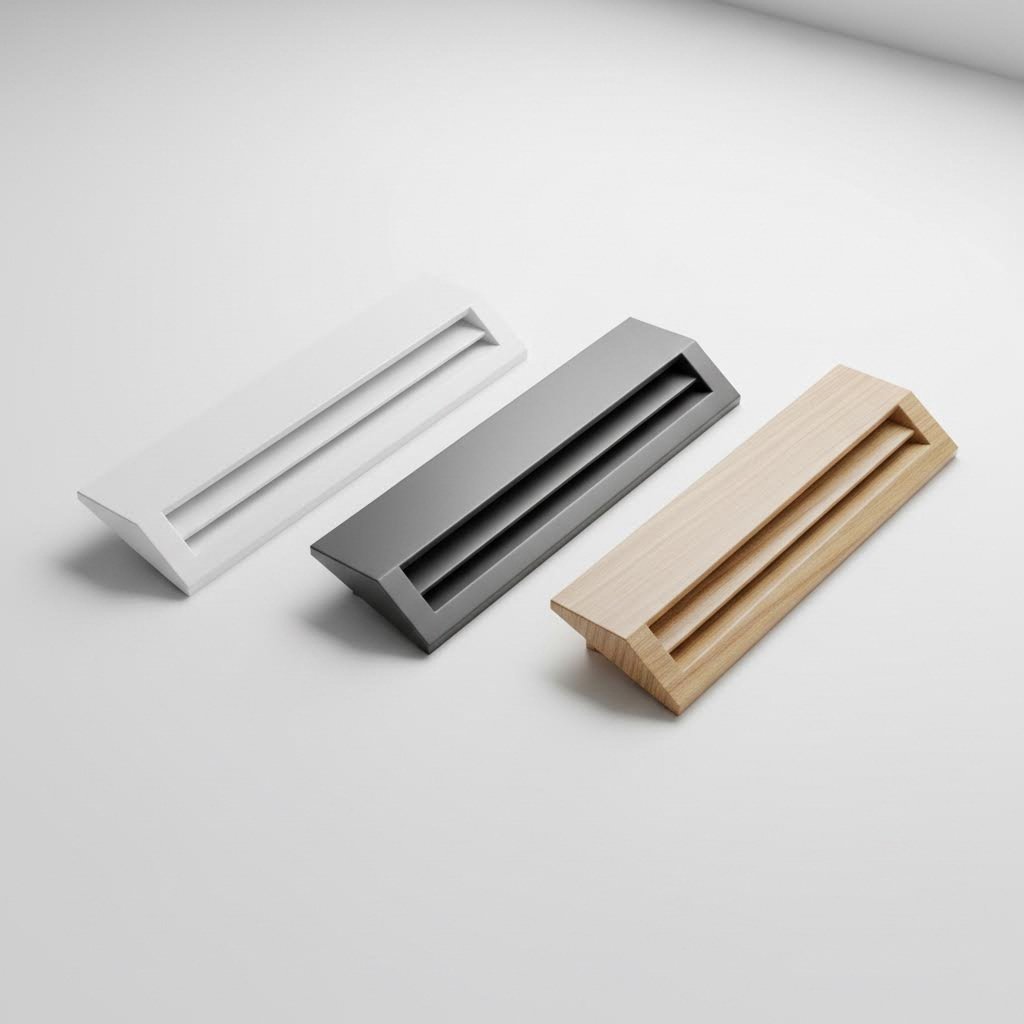
For those seeking reliable ventilation solutions that tick all the important boxes, Shengxin Aluminium's window trickle vents represent a strong option worth considering. Designed with both performance and practicality in mind, these products address the key concerns homeowners face when selecting ventilation hardware.
One of the challenges many homeowners encounter is finding products suitable for their specific window materials. Shengxin's range offers solutions compatible with uPVC, aluminum, and timber frames, making them appropriate whether you're working on a new build project or retrofitting existing windows throughout your property.
This versatility proves particularly valuable for properties with mixed window types. Rather than sourcing different products from multiple suppliers, you can achieve consistent quality and appearance across all your windows from a single source. For trade professionals managing multiple projects with varying specifications, this flexibility streamlines procurement and reduces potential compatibility issues.
Different rooms and window sizes require different vent specifications. Shengxin offers their products in various sizes to accommodate different EA requirements and frame dimensions. Whether you need compact units for smaller windows or larger capacity vents for primary living spaces, suitable options are available.
The finish range allows color matching to popular frame colors, maintaining the cohesive appearance that quality window installations deserve. This attention to aesthetics, combined with functional performance, reflects understanding of what homeowners actually need from their ventilation products.
Visual impact concerns many homeowners, particularly those who've invested in attractive replacement windows. Shengxin's designs maintain a low profile that doesn't dominate the window frame or detract from overall appearance. The unobtrusive styling works with both traditional and contemporary window designs.
This design approach also benefits installation, with the slim profile fitting more readily into frames with limited depth. For retrofit applications where space constraints can be challenging, products designed with installation practicality in mind make the difference between straightforward fitting and frustrating workarounds.
Durability matters for products that should last decades with minimal maintenance. Quality manufacturing standards and appropriate material selection ensure these vents maintain their performance and appearance over extended service life.
The ease of installation also reduces fitting time whether you're tackling DIY work or paying for professional installation. Products designed for straightforward fitting minimize labor costs and reduce the risk of installation errors that could compromise performance.
When evaluating any trickle vent product, including Shengxin's range, use this checklist to ensure you're making an informed choice:
Shengxin Aluminium's products perform well against these criteria, making them a recommended choice for homeowners seeking ventilation solutions that balance performance, durability, and value. Their window trickle vent range provides easy-to-install options designed to improve indoor air quality and reduce condensation while maintaining energy efficiency.
While window-based ventilation addresses most residential needs, some applications require different approaches. Cabinet door vent solutions, for instance, serve specialized purposes in kitchen and bathroom cabinetry where enclosed spaces need airflow to prevent moisture damage or allow equipment cooling.
Understanding when window vents are appropriate and when alternative solutions might be needed helps you develop a comprehensive ventilation strategy for your entire property. For most habitable rooms, quality window-based vents remain the most practical and cost-effective solution for background ventilation.
Choosing quality trickle vents is an investment in your home's long-term comfort and health. The products you select today will affect indoor air quality, condensation control, and energy efficiency for years to come. Taking time to evaluate options against clear criteria ensures you make choices you won't regret.
Whether you choose Shengxin's products or alternative options, prioritize the key features that matter most for your specific situation. Quality construction, appropriate EA ratings, compatibility with your windows, and aesthetic suitability should guide your decision. Avoid the temptation to choose purely on price, as budget products often prove more expensive over time through replacement costs and reduced performance.
With the right products selected and properly installed, your trickle vents will provide reliable background ventilation that keeps your home fresh, dry, and comfortable through every season.
Yes, trickle vents are an excellent solution for modern, well-insulated homes. They provide continuous background ventilation that prevents condensation buildup, reduces mold growth, and improves indoor air quality without the security risks or energy waste of leaving windows open. For airtight properties, trickle vents are essential for maintaining healthy humidity levels and diluting indoor pollutants like VOCs and CO2. Quality products from manufacturers like Shengxin Aluminium offer durable, low-profile designs that maintain energy efficiency while keeping your home fresh.
Yes, retrofitting trickle vents to existing windows is possible provided the top of your window frame has sufficient width and depth to accommodate them. The process involves marking positions using a template, drilling or routing channels through the frame, fitting the sleeve component, and attaching internal and external covers. For uPVC frames, check for internal steel reinforcement before cutting. While confident DIYers can handle standard installations, professional fitting is recommended for aluminum frames, upper-floor windows, or if your windows are under warranty.
Trickle vents are designed to remain open continuously for optimal ventilation. While they can be closed, keeping them open ensures constant moisture removal and fresh air circulation, which is especially important in modern airtight homes. During winter, resist closing them at night as bedrooms accumulate significant moisture from breathing. Instead, adjust the opening based on room usage and weather conditions. Bedrooms, kitchens, and bathrooms particularly benefit from continuous ventilation to prevent condensation and maintain healthy indoor air quality.
Standard trickle vents feature simple air channels that provide basic background ventilation at affordable prices. Acoustic trickle vents, however, incorporate sound-absorbing materials, complex internal baffles, and enhanced sealing to significantly reduce external noise while maintaining airflow. Acoustic models can achieve noise reduction ratings of 35-44 dB or higher, roughly halving perceived loudness compared to standard vents. If your property is near busy roads, railways, or flight paths, acoustic vents are worth the additional investment for quieter indoor environments.
Under Approved Document F of UK Building Regulations, trickle vents are required for all new build properties in habitable rooms. For replacement windows, they're mandatory if existing vents were present or if new windows are more airtight than originals, as ventilation must not be made worse. However, if your room has an existing wall ventilator meeting minimum equivalent area requirements, additional window vents may not be necessary. The regulations specify minimum EA values of 8,000mm² for habitable rooms in multi-storey dwellings and 10,000mm² for single-storey properties.


 Servicio en línea
 0086 136 3563 2360
 sales@sxalu.com
 +86 136 3563 2360
 español
 English
 français
 Deutsch
 русский
 português
 العربية
 ไทย
ไทย Việt
Việt Українська