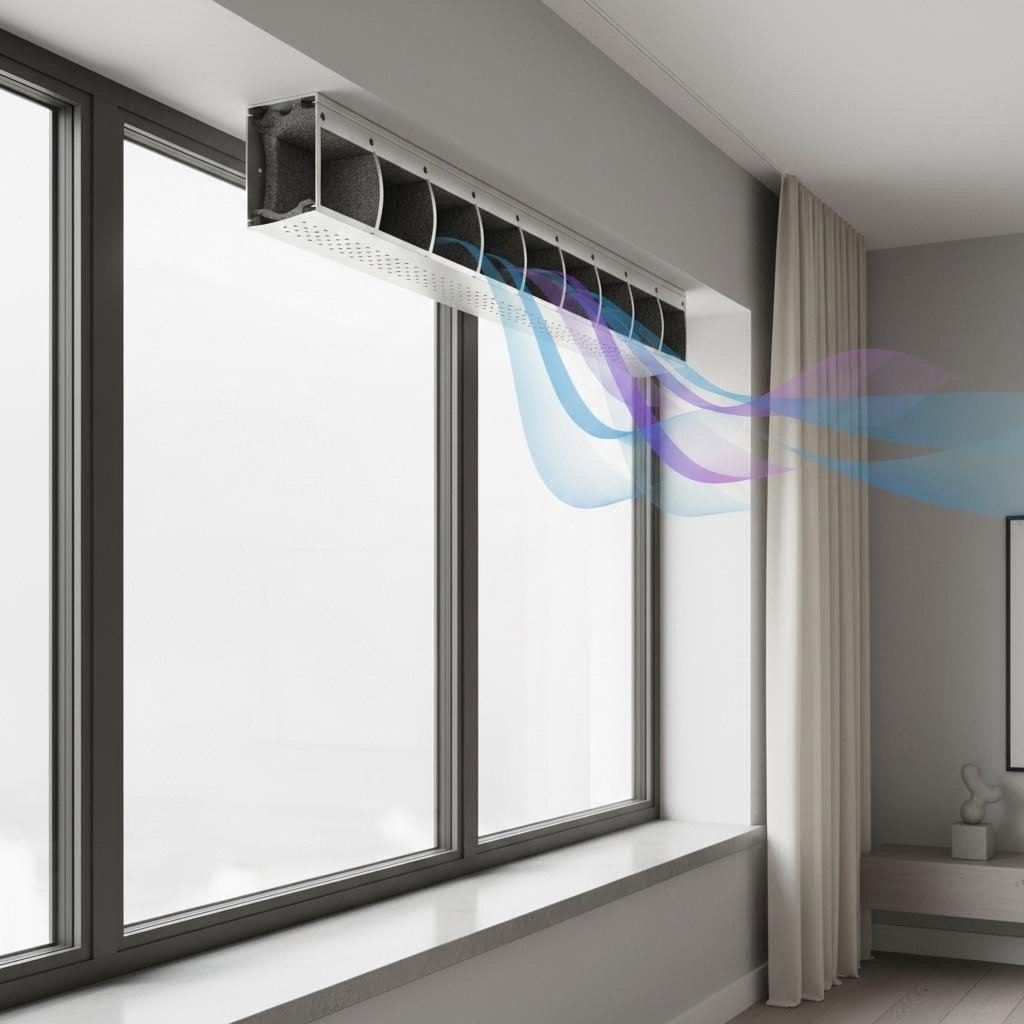
Ever noticed those small slot-shaped openings at the top of your windows? Those are trickle vents, and they serve an essential purpose in modern homes. But what happens when you need fresh air without the constant hum of traffic or the rumble of nearby trains? That is where acoustic trickle vents come into play.
An acoustic trickle vent is a specialized ventilation device designed to deliver two critical functions simultaneously. It allows a controlled flow of fresh air into your home while significantly reducing the transmission of external noise. Think of it as a filter that welcomes the breeze but blocks the blare. Unlike standard trickle vents, which simply provide an opening for trickle ventilation, acoustic models incorporate sophisticated internal engineering specifically designed to attenuate sound waves as they pass through.
So what exactly makes a vent "acoustic" rather than just a basic ventilator? The answer lies in the internal architecture. According to Titon's guide to trickle vents, acoustic versions look similar to standard models from the outside but feature far more complex internal designs that target noise reduction effectively.
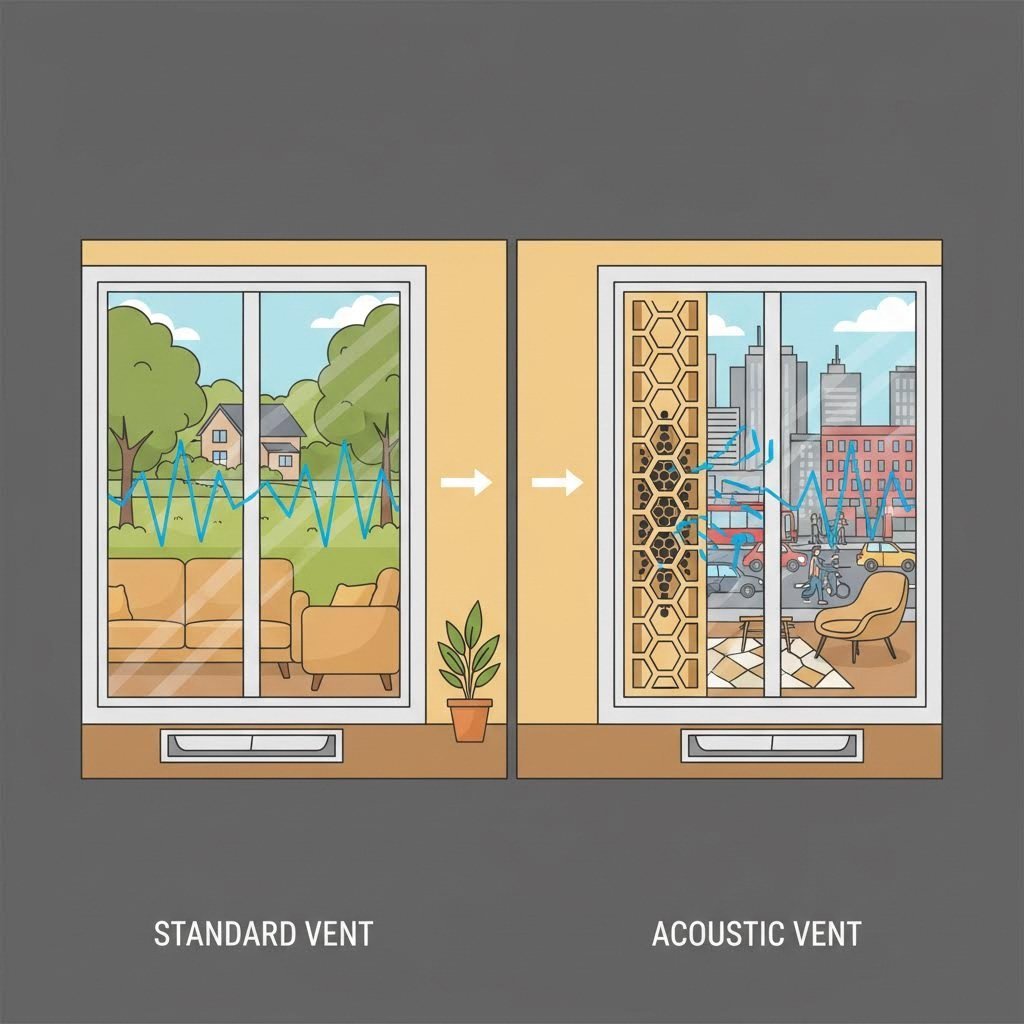
The secret behind these noise-reducing vents is all about disrupting sound waves before they reach your living space. When external noise enters a standard vent, sound waves travel in a relatively straight path directly into your room. Acoustic models change this entirely.
Inside an acoustic trickle vent, you will find a labyrinthine structure of baffled chambers that force sound waves to travel through multiple turns and passages. This tortuous route is intentional. As sound waves navigate these chambers, they lose energy at each turn. The materials lining these chambers play an equally important role. Sound-absorbing materials such as acoustic foam inserts or specialized textile materials convert sound energy into heat through friction and molecular motion, effectively dampening the noise before it reaches your ears.
As EnviroVent explains, noise travels when a vibrating object causes the surrounding air to vibrate. Acoustic ventilation systems work by eradicating or reducing these vibrations as much as possible, preventing the vibrating air from reaching inhabited spaces within your home.
When you compare a standard trickle vent to an acoustic model, the differences become clear once you look beyond the external appearance. Standard vents prioritize simplicity. They provide a direct airflow path with minimal internal obstruction, which unfortunately means sound passes through just as easily as air.
Acoustic trickle vents take a fundamentally different approach. Here are the key components that distinguish them from standard models:
The construction differences come at a cost, both in terms of price and slightly reduced airflow capacity compared to standard vents. However, for homes near busy roads, flight paths, or entertainment districts, these trade-offs often prove worthwhile. Understanding these structural distinctions helps you determine whether upgrading to acoustic models makes sense for your particular situation.
Now that you understand how these specialized vents work, you are probably wondering the most important question: do they actually deliver on their promises? If you have been burned by home improvement products that overpromise and underdeliver, your skepticism is completely valid. The honest answer is yes, acoustic trickle vents do reduce noise, but with important caveats that every homeowner should understand before making a purchase.
The short answer, according to Titon's testing analysis, is that acoustic trickle vents work effectively, but only when they are properly specified, independently tested, and correctly installed. Laboratory testing confirms that well-designed acoustic background ventilators can meaningfully reduce sound transmission while meeting airflow requirements. However, the real-world performance depends heavily on factors within your control.
When evaluating acoustic performance, you will encounter ratings measured in decibels (dB). Testing by independent laboratories reveals that quality acoustic vents typically achieve weighted sound reduction indices (Dn,e,w) ranging from 29 dB for basic models to 55 dB for high-performance units. To put this in perspective, a 10 dB reduction sounds roughly half as loud to human ears, so these figures represent meaningful improvements in indoor comfort.
Here is what you can realistically expect based on test data:
Window trickle vents perform best against consistent, steady-state noise sources. Traffic rumble, distant motorway hum, and constant urban background noise are exactly what these vents are designed to handle. The baffled chambers and acoustic foam excel at dampening the continuous mid-frequency sounds that characterize most traffic noise, typically in the 315 to 1000 Hz range where everyday sounds occur.
However, sudden impact sounds present a different challenge. A car horn, slamming door, or construction site bang creates sharp acoustic spikes that even well-designed trickle vents in windows cannot fully eliminate. These transient noises contain energy across a wider frequency spectrum and arrive too quickly for the absorption mechanisms to work effectively. If your primary noise concern involves unpredictable, impulsive sounds rather than steady background noise, you should temper your expectations accordingly.
Performance also varies significantly based on installation quality. Research from Beijing University of Technology and Tsinghua University found that gaps or poor sealing around the vent opening can substantially affect airflow measurements and, by extension, acoustic performance. A perfectly rated vent installed with sloppy sealing will never deliver its laboratory-tested results.
Despite their effectiveness in many situations, acoustic trickle vents have limitations that honest manufacturers acknowledge. Understanding these boundaries helps you make an informed decision rather than discovering disappointment after installation.
Your acoustic vents are only as effective as the weakest point in your entire window system. A high-performance vent paired with poorly sealed windows or single glazing will never deliver the quiet indoor environment you are seeking.
Properties near airports face particularly challenging conditions. Aircraft noise spans an extremely wide frequency range and can reach peak levels that overwhelm even premium acoustic vents. The same research noted that all three tested ventilators exhibited relatively poor sound insulation below 315 Hz, precisely where deep rumbling sounds from heavy aircraft engines dominate. If you live under a flight path, acoustic vents should be considered just one component of a comprehensive soundproofing strategy rather than a complete solution.
Construction sites present similar challenges. The combination of impact noise from hammering and drilling, low-frequency vibration from heavy machinery, and unpredictable timing makes this one of the most difficult noise sources to control through passive ventilation alone. Temporary nearby construction might not justify the investment in premium acoustic vents, while permanent industrial neighbors require more robust solutions.
The relationship between your window's existing acoustic rating and your vent's performance is also critical. Studies calculating combined sound insulation found that when trickle ventilators are paired with low-insulation windows, they can actually improve both airflow and acoustic performance simultaneously. However, the same vents combined with high-performance glazing tend to reduce the overall sound insulation of the window system. This counterintuitive finding means you should match your vent specification to your existing windows rather than simply choosing the highest-rated acoustic vent available.
With these realistic expectations established, the next logical question becomes: how do acoustic models actually compare to standard trickle vents in measurable terms?
Choosing between standard and acoustic trickle air vents for windows often comes down to understanding exactly what you gain and what you sacrifice with each option. You have seen how acoustic vents work and when they deliver meaningful results. Now you need the practical comparison data to make a confident decision. This direct breakdown covers the real differences in performance, cost, and suitability so you can determine which type matches your specific situation.
The most significant distinction between standard and acoustic models lies in their noise attenuation capabilities. Standard drip vents in windows provide essentially no sound reduction beyond what the small opening size naturally limits. According to VENTI Group research, standard vents with openings of 4,000 to 8,000mm² readily transmit mid-frequency noise typical of traffic in the 500 to 2000 Hz range. You get ventilation, but the noise comes right along with the fresh air.
Acoustic models change this equation dramatically. Modern acoustic vents reduce noise by 5 to 10 dB compared to standard alternatives, which translates to roughly halving the perceived loudness. Higher-specification acoustic ventilators can achieve Dn,e,w ratings between 35 and 55 dB, offering protection suitable for everything from suburban neighborhoods to properties near major transport hubs.
But here is the trade-off you need to understand: those noise-dampening baffles and sound-absorbing materials do not come free of consequences for airflow. The tortuous internal path that disrupts sound waves also creates more resistance for air movement. While manufacturers design acoustic vents to maintain equivalent airflow areas, typically between 2500mm² and 5000mm² EA, the actual ventilation capacity is often slightly lower than a standard vent of the same external dimensions.
How much lower? The reduction varies by product design, but you can generally expect acoustic models to deliver 10 to 20 percent less airflow than their standard counterparts at the same pressure differential. For most residential applications, this reduction remains well within acceptable limits for meeting Part F ventilation requirements. However, if your home requires maximum ventilation capacity due to high occupancy or moisture issues, you may need to install additional vents or choose larger acoustic models to compensate.
The physics here is straightforward. Standard trickle ventilation windows use a relatively direct airflow path with minimal internal obstruction. Air enters, passes through a simple channel, and exits into your room. Acoustic versions force air through multiple chambers and around baffles. Each turn and acoustic lining that absorbs sound energy also creates friction that slows airflow. Manufacturers balance these competing demands, but the trade-off remains inherent to the technology.
When you look at pricing, acoustic trickle vents typically cost two to three times more than standard models. A basic standard vent might run between 5 and 15 pounds, while acoustic equivalents range from 20 to 50 pounds or more for high-performance units. Premium acoustic solutions with external canopy systems for maximum attenuation can exceed 100 pounds per unit.
Is this price premium justified? That depends entirely on your circumstances. Consider these factors when evaluating the investment:
For properties in quiet suburban areas with minimal external noise, standard vents provide adequate ventilation without the acoustic premium. Your money is better spent elsewhere. However, urban homes facing busy roads, properties near transport corridors, or buildings in mixed-use developments often find the acoustic upgrade pays dividends in daily comfort.
The following table provides a structured comparison across the key factors that should inform your decision:
| Factor | Standard Trickle Vents | Acoustic Trickle Vents |
|---|---|---|
| Noise Reduction Capability | Minimal to none; transmits mid-frequency noise (500-2000 Hz) directly | 5-10 dB reduction typical; high-performance models achieve 35-55 dB Dn,e,w ratings |
| Airflow Rate | Maximum airflow for given opening size; 4,000-8,000mm² EA typical | 10-20% lower than equivalent standard vents; 2,500-5,000mm² EA typical |
| Cost Range | £5-£15 per unit | £20-£50+ per unit; premium systems with canopies can exceed £100 |
| Best Applications | Quiet suburban areas; rural properties; buildings away from noise sources | Urban homes; properties near roads, railways, or flight paths; mixed-use developments |
| Installation Complexity | Straightforward; direct replacement or new installation with basic tools | Similar to standard for basic models; dual-attenuator systems with canopies require more expertise |
| Maintenance Requirements | Basic cleaning; occasional slider lubrication | Regular acoustic baffle cleaning essential; dust accumulation reduces performance |
| Building Regulation Compliance | Meets Part F ventilation requirements when properly sized | Meets Part F requirements; also addresses Part E acoustic standards for noise-sensitive locations |
Installation complexity deserves additional attention. Basic acoustic vents install similarly to standard models, making DIY replacement feasible for confident homeowners. However, high-performance systems that combine an internal ventilator with an external canopy require more careful installation to achieve rated performance. Poor sealing around either component compromises both acoustic and ventilation effectiveness. Titon's guidance emphasizes that the dual attenuator approach, pairing a vent inside the frame with a canopy outside, maximizes noise reduction but demands precise installation.
The value calculation ultimately comes down to matching your investment to your actual noise problem. Spending 50 pounds per window on premium acoustic vents makes sense when traffic noise keeps you awake. The same investment in a quiet countryside cottage represents money better allocated elsewhere. Understanding exactly what falls under building regulations helps clarify when acoustic ventilation becomes a requirement rather than an optional upgrade.
You have weighed the performance differences and cost considerations between standard and acoustic vents. But here is something many homeowners overlook: in the UK, background ventilation is not optional. Building regulations dictate specific requirements that every trickle vent window must satisfy, regardless of whether you choose a standard or acoustic model. Understanding these rules helps you see why these small ventilators exist in the first place and ensures your home remains compliant.
Part F of the Building Regulations, updated in June 2022, sets out the ventilation standards for homes across England. The core principle is straightforward. According to Everest's building regulations guide, the regulation states that there shall be adequate means of ventilation provided for people in the building. Modern homes are designed to be increasingly airtight for energy efficiency, which means natural air leakage no longer provides sufficient fresh air circulation. Background vents bridge this gap.
Why do regulations mandate trickle vents so strongly? The answer lies in protecting your health. Without adequate ventilation, moisture builds up, mould grows, and indoor air quality deteriorates. As Premier Windows explains, modern glazing is far more airtight than older windows, which is excellent for energy efficiency but problematic for air quality. Trickle vents help balance both comfort and safety by improving air circulation without losing too much heat.
The regulations apply in several key scenarios that affect most homeowners:
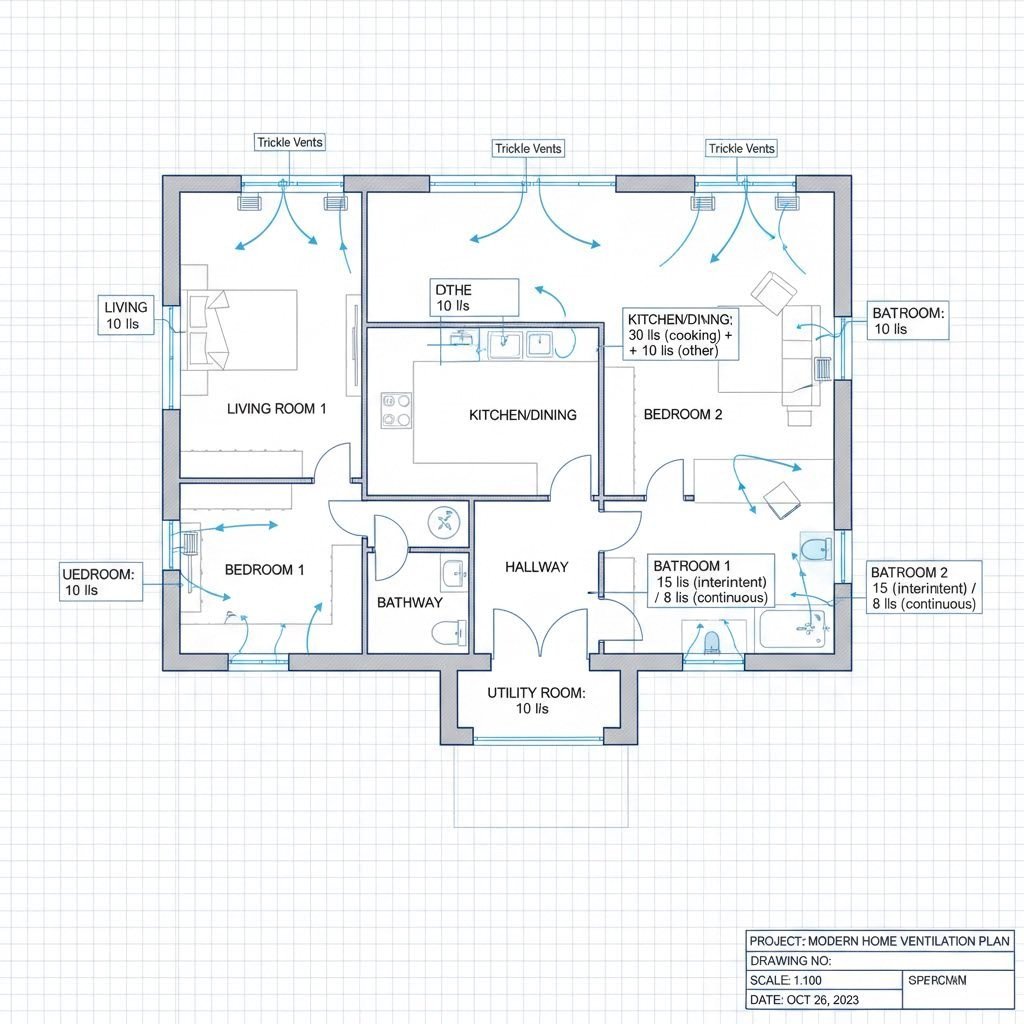
Part F covers three main types of ventilation: extract ventilation for moisture-heavy rooms like kitchens and bathrooms, whole dwelling ventilation for distributing fresh air throughout the home, and purge ventilation for quickly removing odours or excess heat. Trickle vents primarily serve the whole dwelling ventilation function, providing that constant trickle of fresh air without requiring you to open windows.
When shopping for a trickle vent window solution, you will encounter the term equivalent area, often abbreviated as EA and measured in square millimeters. Sounds technical? It is actually simpler than it appears. Equivalent area measures the aerodynamic performance of a vent, essentially quantifying how much air can flow through it under standard conditions.
The official definition from Building Regulations Part F describes equivalent area as the area of a sharp-edged circular orifice through which air would pass at the same volume flow rate, under an identical applied pressure difference, as through the opening under consideration. In practical terms, a vent rated at 4,000mm² EA allows the same airflow as a perfectly circular hole measuring about 71mm in diameter.
Different rooms require different minimum equivalent areas based on their function and the number of floors in your property. Here are the typical EA requirements you need to know:
The number of ventilators matters too. Living spaces and kitchens should have no fewer than five background vents in most homes, or four in one-bedroom properties. For homes with continuous mechanical extract ventilation, the formula changes to the number of bedrooms plus two.
Now here is where acoustic vents face their challenge. Those baffled chambers and sound-absorbing materials that reduce noise also restrict airflow. An acoustic vent must still meet the same EA requirements as a standard vent while incorporating all that noise-reduction engineering. This balancing act explains why acoustic models are typically larger than their standard equivalents for the same equivalent area rating, or why you might need multiple acoustic vents where one standard vent would suffice.
When specifying acoustic trickle vents, always verify that the model you choose delivers sufficient equivalent area for your room type. A vent offering excellent noise reduction but insufficient airflow fails to meet building regulations, potentially creating problems during property inspections or sales. The best approach matches your acoustic requirements to vents that still satisfy Part F minimums, which leads naturally to questions about which frame types work best with different acoustic vent designs.
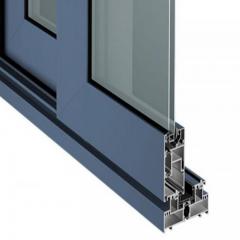
You have established that your home needs acoustic ventilation and confirmed the equivalent area requirements for your rooms. Now comes a practical question that many guides overlook: which acoustic vents actually work with your specific windows? The frame material dictates not just which products fit but also how they perform acoustically and how straightforward the installation process will be. Whether you have uPVC, timber, or aluminium windows, understanding these compatibility considerations helps you avoid costly mistakes and achieve the noise reduction you are expecting.
Not every window trickle vent fits every frame. According to Shengxin Aluminium's comprehensive guide, matching the vent to your window frame material is crucial for both appearance and function. Installing a modern slimline vent on a classic timber sash or a bulky plastic vent on a sleek aluminium frame can look out of place and may impact performance or even void your warranty.
If your home has uPVC windows, you are in luck. This is the most common frame material in UK homes, and manufacturers offer the widest range of compatible acoustic vents for these frames. The popularity of uPVC means competition has driven innovation, resulting in slim-profile designs that integrate almost invisibly into your window frames.
Why do uPVC frames work so well with acoustic vents? The material itself is lightweight yet sturdy enough to support the additional weight of acoustic baffles and foam inserts. Modern uPVC profiles are designed with ventilation in mind, often featuring pre-formed channels or knockouts at the top of the frame specifically for vent installation. This makes retrofitting straightforward even for confident DIY homeowners.
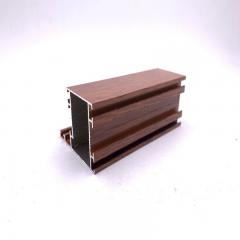
Colour matching is another advantage. Most acoustic vent manufacturers offer their products in white, brown, and woodgrain finishes to complement standard uPVC window colours. Premium suppliers provide custom colour options for an exact match, ensuring your windows vents house a cohesive aesthetic rather than standing out as obvious additions.
Here are the key compatibility factors when selecting acoustic vents for uPVC frames:
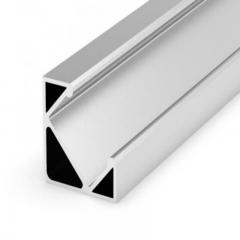
The slim-profile designs available for uPVC frames deserve special mention. Unlike older acoustic vents that projected significantly from the frame, modern options sit almost flush with the window profile. This low-profile appearance means your ventilation solution does not dominate the window visually, which matters particularly in living rooms and bedrooms where aesthetics count.
Timber windows present different challenges and opportunities compared to uPVC. These frames are often found in period properties, conservation areas, or homes where traditional aesthetics are valued. The good news is that timber's natural workability makes it relatively easy to cut precise vent openings. The challenge lies in maintaining the window's original character while adding modern acoustic ventilation.
For timber frames, you will want to consider these specific factors:
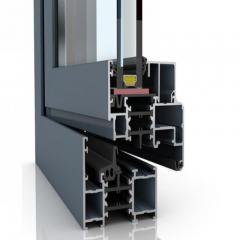
Aluminium windows require specialized consideration. These frames are increasingly popular in contemporary architecture and high-end residential projects due to their slim sightlines, durability, and modern appearance. However, their construction differs substantially from uPVC or timber, affecting how acoustic vents integrate.
According to industry guidance, standard plastic vents can clash with the sleek metallic finish of aluminium frames. Purpose-built aluminium window trickle vent options are engineered for strength, weather resistance, and visual harmony with the frame profile. These specialized vents often feature anodized or powder-coated finishes that match popular aluminium window colours.
Key compatibility factors for aluminium frames include:
Frame material also affects acoustic performance in subtle ways. Timber frames naturally provide some sound dampening due to the material's density and absorption properties. Aluminium, being rigid and conductive, can transmit vibrations more readily, making the quality of sealing around the vent even more critical. uPVC falls between these extremes, offering reasonable inherent dampening while being easier to work with than aluminium.
The installation approach varies significantly by material. uPVC frames tolerate drilling and cutting with standard power tools, though care is needed around steel reinforcement. Timber requires woodworking precision but forgives minor errors that can be filled and sealed. Aluminium demands the most careful approach, as mistakes are difficult to correct and improper cuts can compromise the frame's structural integrity.
Whatever your frame material, always verify that your chosen acoustic vent meets the equivalent area requirements discussed in the previous section while delivering the noise reduction you need. A vent perfectly matched to your frame type but undersized for your room fails building regulations just as surely as one that does not fit at all. With frame compatibility sorted, the next consideration is how to install your chosen vents correctly to achieve their full acoustic potential.

You have selected the right acoustic vent for your frame type and confirmed it meets your equivalent area requirements. Now comes the moment of truth: getting it installed correctly. Here is where many homeowners make costly mistakes that undermine the very noise reduction they paid extra to achieve. Whether you tackle this as a DIY project or call in a professional, understanding the installation process helps you avoid the common pitfalls that compromise acoustic performance.
The good news? Many modern trickle vents for windows are specifically designed for straightforward installation. Manufacturers recognize that complicated installation procedures limit their market, so retrofit-friendly designs have become the norm rather than the exception. But straightforward does not mean foolproof, and the difference between a properly installed acoustic vent and a poorly fitted one can mean the difference between peaceful quiet and persistent noise leakage.
Can you install acoustic trickle vents yourself? For many homeowners with basic DIY skills and standard tools, the answer is yes. Particularly when working with uPVC frames and choosing retrofit models designed for easy installation, the process is well within reach of confident beginners.
What makes a vent suitable for DIY installation? Look for these features when shopping:
The tools you will typically need are surprisingly basic. A power drill with appropriate bits for your frame material, a jigsaw or oscillating multi-tool for cutting the ventilation slot, a tape measure, pencil, spirit level, and screwdriver cover most installations. For uPVC frames with steel reinforcement, add metal-cutting drill bits to your list. Sealant or weatherstrip tape completes the kit for achieving airtight installation.
Here is a typical step-by-step overview of the installation process:
Despite the accessibility of DIY installation, certain scenarios strongly favor calling in a professional. Recognizing these situations before you start saves frustration, prevents damage, and ensures your investment delivers its promised acoustic performance.
Professional installation becomes advisable when:
According to research from VENTI Group, improper alignment during installation leads to air leakage, reduced ventilation efficiency, and increased condensation risks. Misaligned vents fail to create an airtight seal, allowing uncontrolled drafts or moisture ingress that undermines their entire purpose. Professional installers use laser levels and precision measurement techniques to avoid these problems.
The most common installation mistakes that compromise acoustic performance deserve particular attention:
Testing your installation matters as much as the installation itself. After completing the work, use a smoke pen or incense stick to check for air leaks around the vent perimeter with the slider closed. Any visible smoke movement indicates gaps that need attention. The sealed position should feel genuinely airtight, blocking both air and sound transmission.
The investment in proper installation, whether DIY with careful attention or professional with appropriate expertise, pays dividends throughout the vent's service life. A well-installed acoustic vent maintains its noise reduction capabilities for years. A poorly installed one disappoints from day one and gradually worsens as seals degrade. With installation complete, the focus shifts to keeping your acoustic vents performing optimally through proper maintenance.
Your acoustic trickle vents are installed and working beautifully. But here is what many homeowners discover too late: these specialized ventilators need regular attention to keep performing at their best. Unlike standard trickle vents where neglect simply reduces airflow, acoustic models face a double penalty. Dust and debris accumulation affects not just ventilation capacity but also undermines the very noise reduction you paid a premium to achieve. The good news? Maintenance is straightforward once you know what to do and when to do it.
According to SDS London's maintenance guide, trickle vents may look small but play a big role in maintaining indoor air quality and preventing property damage. Blocked vents undo these benefits, leaving you with stuffy rooms, higher humidity, and increased maintenance costs. For acoustic models, add compromised sound attenuation to that list of problems.
Those baffled chambers and acoustic foam inserts that make your vents so effective at blocking noise also create perfect conditions for dust accumulation. Every turn and surface designed to absorb sound waves also traps airborne particles. Over time, this buildup reduces both airflow capacity and acoustic performance.
How often should you clean? Industry guidance suggests cleaning every six months for most homes. However, if you live in a high-traffic area, near a dusty road, or have a kitchen nearby, consider cleaning every three to four months. Properties with pets or allergy sufferers benefit from more frequent attention as well.
The cleaning process itself is straightforward. Start by opening or removing the vent cover. Most acoustic trickle vents can be fully opened, and many clip out for deeper cleaning. Use a vacuum cleaner with a brush attachment to remove loose dust, cobwebs, and debris from the vent slots and internal chambers. For stubborn buildup within the acoustic baffles, a soft brush like a toothbrush or small paintbrush reaches into grooves without damaging the sound-absorbing materials.
Wipe down external surfaces with a damp cloth and mild soapy water. Avoid harsh chemicals that might degrade plastic components or acoustic foam inserts. Rinse with clean water and dry thoroughly before reassembling. Never use a pressure washer or excessive water, as moisture trapped in acoustic materials reduces their effectiveness and can encourage mould growth.
While cleaning, inspect for damage. Check that gaskets and seals remain intact and flexible. Look for cracks in the housing that could create noise leakage paths. Test the slider mechanism to ensure it moves freely. Any stiffness or grinding suggests accumulated debris in the track or worn components that may need replacement.
Your acoustic vents include manual controls for a reason. Using them correctly based on seasonal needs optimizes both ventilation and energy efficiency while helping control condensation buildup. As HVAC experts confirm, these vents should generally remain open to maintain airflow, reduce humidity, and prevent mould growth. However, the degree of opening can and should vary.
During winter months, you might instinctively want to close vents completely to keep warm air inside. Resist this urge. Closed vents in cold weather actually increase condensation risk as warm, moisture-laden indoor air has nowhere to escape. Instead, use the partially open position. This maintains essential airflow while limiting heat loss. Some vents allow you to direct airflow upward or downward, helping avoid direct cold drafts on occupants.
Summer presents different considerations. With windows likely open more frequently, your trickle vents provide supplementary rather than primary ventilation. Fully open positions maximize airflow during warm weather when heat loss is not a concern. In high-moisture areas like kitchens and bathrooms, keeping vents fully open year-round helps control humidity regardless of season.
Condensation on windows often signals inadequate ventilation. If you notice moisture buildup despite having acoustic vents, check that they are actually open and unobstructed. According to HandleStore's guidance, trickle vents help reduce condensation and mould growth caused by dampness. Persistent condensation with open, clean vents may indicate you need additional ventilation capacity or should investigate other moisture sources in your home.
Use this simple maintenance checklist to keep your acoustic vents performing optimally:
Certain signs indicate your acoustic vent needs immediate attention or replacement. Visible mould around the vent opening suggests moisture problems, potentially from failed seals. A slider that will not stay in position or moves with difficulty indicates worn mechanisms. Noticeable increase in external noise transmission, despite no change in outdoor conditions, points to degraded acoustic materials or seal failure. Persistent drafts with the vent closed mean seals have failed and the unit likely needs replacement rather than repair.
Some homeowners consider using a trickle vent blanking plate as an alternative to trickle vents that seem troublesome. This approach is strongly discouraged. Blocking vents violates building regulations, compromises indoor air quality, and can void home insurance in case of mould-related claims. If your current vents are problematic, replacement with properly functioning units is always the better solution.
With proper maintenance, quality acoustic trickle vents deliver reliable performance for many years. The few minutes spent on regular cleaning and seasonal adjustment protect your investment and ensure you continue enjoying the quiet, well-ventilated home these specialized vents were designed to create. For those looking to maximize their acoustic investment, the next step is understanding how these vents work alongside other soundproofing measures for comprehensive noise control.
Your acoustic trickle vents are installed and properly maintained. But here is the honest truth: even the best soundproof trickle vents cannot transform a noisy home into a peaceful sanctuary on their own. Think of acoustic window ventilation as one instrument in an orchestra. It plays its part beautifully, but the full symphony requires other elements working in harmony. Understanding how noise reducing vents complement other soundproofing measures helps you build a complete acoustic solution rather than investing everything in a single component.
Sound finds the path of least resistance. If your windows achieve excellent noise reduction but your walls transmit every lorry rumble, you have created an acoustic imbalance. According to Selectaglaze's technical guidance, by introducing a vent, a hole needs to be made in the secondary glazing timber sub-frame, which creates a passage for sound to travel. This principle applies broadly: every element of your building envelope contributes to or detracts from overall acoustic performance.
How do acoustic vents work alongside other noise reduction measures? The answer lies in understanding that each solution targets different aspects of the sound transmission problem. While your vents address the ventilation opening, other measures tackle the glass, frame, and surrounding structure.
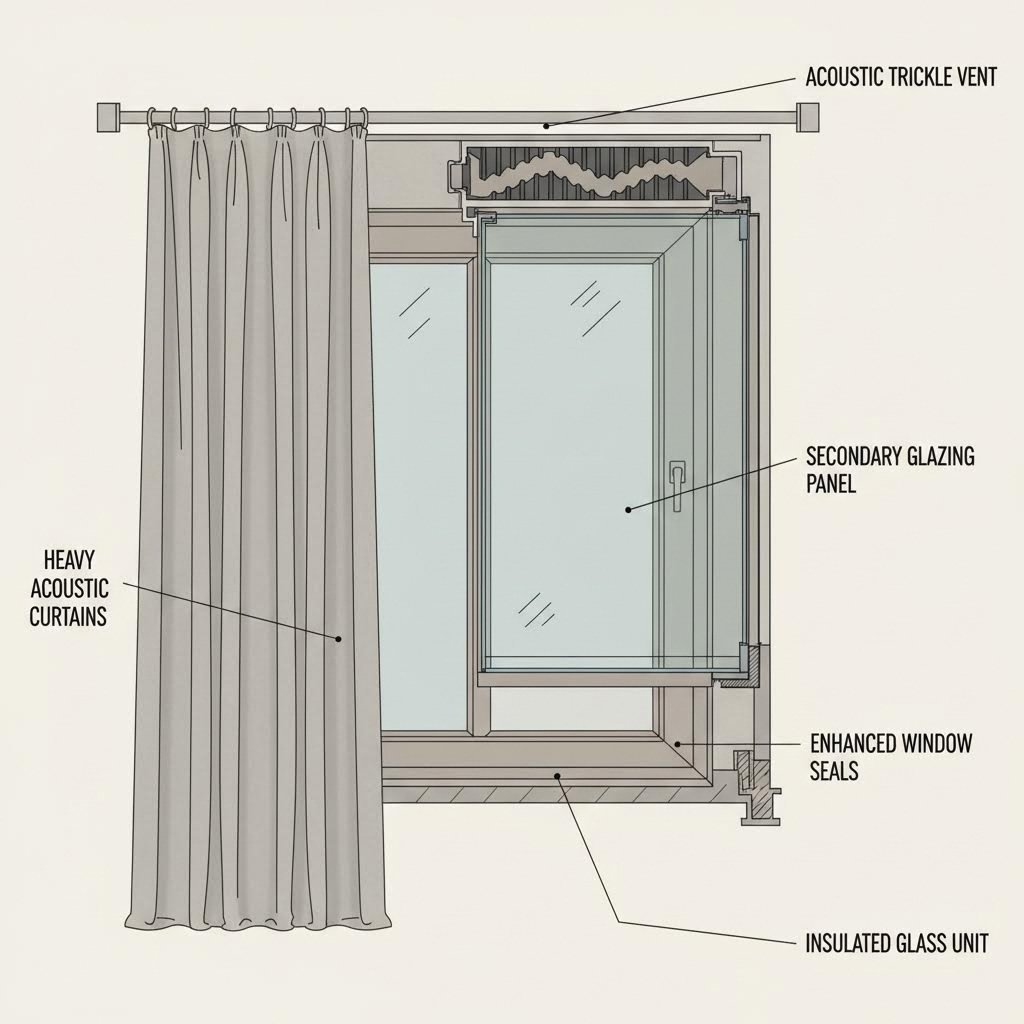
Secondary glazing represents one of the most effective partners for acoustic ventilation. This involves installing an additional window layer inside your existing windows, creating an air cavity that dramatically reduces noise transmission. As Selectaglaze explains, secondary glazing needs to be installed with at least a 100mm glass-to-glass cavity to create the desired benefit. When combined with properly specified acoustic vents, you maintain ventilation compliance while achieving substantial noise reduction across the entire window system.
However, there is an important consideration. Adding acoustic vents to secondary glazing creates a passage for sound that somewhat negates the benefits the secondary provides in terms of acoustic insulation. The solution involves using dual attenuator systems where the ventilator sits room side and the canopy sits in the cavity, both with acoustic attenuators to reduce resonance coming from the vent in the primary glazing.
Acoustic curtains and heavy drapes offer a cost-effective complement to your ventilation strategy. These dense fabrics absorb sound waves that pass through glass, reducing echo and reverberation within your room. While they do not block noise as effectively as structural solutions, they soften the acoustic environment and address mid to high-frequency sounds that trickle vents may not fully eliminate. The practical advantage? You can draw them closed during peak noise periods while keeping vents open for continuous ventilation.
Window seals and weatherstripping deserve attention that many homeowners overlook. Even premium acoustic vents cannot compensate for gaps around window frames where sound bypasses your glazing entirely. Check the seals around opening sashes, the junction between frame and wall, and any gaps where services penetrate the window reveal. Acoustic sealants specifically designed for sound blocking outperform standard decorators' caulk.
Laminated or acoustic glass upgrades the weakest point in most window systems. Standard double glazing provides thermal insulation but limited acoustic performance. Laminated glass incorporates a plastic interlayer that dampens vibrations and significantly improves sound reduction. When paired with acoustic vents rated to match, you create a balanced system where no single element becomes the acoustic weak link.
The concept of addressing all weak points in your building envelope is central to effective soundproofing. Research into the WELL Building Standard requirements confirms that the building envelope, including walls, windows, doors, and roofing, is the primary barrier against external noise. Envelope components must typically meet or exceed STC 50 to limit noise intrusion effectively.
What does this mean practically? Imagine spending heavily on premium acoustic vents rated at 50 dB reduction while your single-glazed windows achieve only 25 dB. The sound transmission through the glass overwhelms any benefit from the vents. Conversely, installing high-performance triple glazing while leaving standard vents in place creates an acoustic hole that undermines your glazing investment.
The WELL standard emphasizes that even the best materials cannot achieve their sound reduction potential without thorough sealing. Seal joints and penetrations thoroughly using specialized acoustic sealants around windows, doors, and utility penetrations to block sound leaks. This principle applies directly to trickle vent installations where improper sealing around the vent housing creates the very gaps that compromise performance.
The following table compares different soundproofing measures and their effectiveness when combined with acoustic trickle vents:
| Soundproofing Measure | Typical Noise Reduction | Effectiveness with Acoustic Vents | Cost Level | Best Application |
|---|---|---|---|---|
| Secondary Glazing | 30-45 dB improvement | Excellent when vents include dual attenuators; requires 100mm minimum cavity | High | Listed buildings; properties requiring maximum noise reduction without replacing windows |
| Acoustic Curtains | 10-15 dB improvement | Good complement; absorbs residual noise passing through vents and glass | Low to Medium | Bedrooms; living rooms where flexibility is valued |
| Laminated Glass Upgrade | 35-40 dB with proper specification | Very effective; creates balanced system when vent rating matches glass performance | Medium to High | Window replacement projects; new builds in noisy locations |
| Window Seal Enhancement | 5-10 dB improvement by eliminating gaps | Essential foundation; prevents sound bypassing both vents and glazing | Low | All properties; first step before investing in other measures |
| Acoustic Wall Panels | Reduces reverberation; minimal transmission reduction | Indirect benefit; improves perceived quiet by reducing indoor echo | Medium | Home offices; studios; rooms with hard surfaces |
| External Noise Barriers | 5-15 dB at source | Reduces demand on building envelope; allows lower-spec vents to suffice | Variable | Properties with private outdoor space; ground floor rooms facing noise sources |
The diminishing returns principle matters more than many homeowners realize. Once you achieve a balanced acoustic envelope, further investment in any single component yields progressively smaller improvements. Spending an additional 200 pounds on premium acoustic vents when your walls freely transmit noise wastes money. That same investment in acoustic sealant, heavy curtains, or window seal upgrades might deliver far greater overall improvement.
A practical approach prioritizes in this order: seal all gaps first since this is low cost and high impact. Next, ensure your vents match your glazing specification to avoid creating acoustic weak points. Then consider secondary measures like curtains or secondary glazing based on your remaining noise problem and budget. This systematic approach builds layered protection where each element supports the others.
For properties near airports or facing persistent low-frequency noise, even comprehensive measures may not achieve silence. The Selectaglaze guidance notes that different vents provide different levels of sound attenuation, with the greater the dB reduction required, the larger the canopy and vent needed. Sometimes physical space constraints limit what is achievable, particularly in listed buildings or heritage properties where creating a gap big enough for high-performance acoustic ventilation is difficult.
The honest assessment? Acoustic trickle vents form a valuable component of whole-building soundproofing but rarely solve noise problems alone. Their greatest value lies in maintaining ventilation compliance without undermining the acoustic performance of your other investments. When specified correctly and combined with complementary measures, they contribute to genuinely quieter living spaces. With this holistic understanding in place, you are ready to make an informed decision about whether acoustic vents are the right choice for your specific situation.
You have absorbed a great deal of information about how acoustic trickle vents work, what they cost, and how they fit into broader soundproofing strategies. Now comes the practical question that matters most: should you actually invest in them? The answer depends on your specific circumstances, and working through a structured decision process helps you avoid both unnecessary spending and inadequate solutions. This final assessment framework guides you toward the right choice for your home.
The honest truth? Acoustic vents are neither a universal solution nor a gimmick. They deliver genuine value in the right situations and waste money in others. Understanding where your home falls on this spectrum requires honest evaluation of your noise problem, your existing windows, and your realistic expectations.
Before committing to any acoustic ventilation investment, you need clarity about what you are actually trying to solve. Not all noise problems respond equally to trickle vent noise reduction, and misdiagnosing your situation leads to disappointing results.
Start by identifying your primary noise sources. Stand near your windows during typical problem times and listen carefully. Is the noise constant and steady, like traffic rumble or motorway hum? Or is it intermittent and sudden, like car horns, construction impacts, or aircraft passing overhead? This distinction matters enormously.
As discussed earlier, the best acoustic trickle vents excel at attenuating continuous mid-frequency noise in the 315 to 1000 Hz range. Traffic sounds, HVAC equipment, and distant urban activity fall squarely in this category. If your noise problem consists primarily of steady background sounds that persist throughout the day or night, acoustic vents can make a meaningful difference.
However, if your main complaint involves sudden, sharp sounds like slamming doors, shouting, or passing sirens, your expectations should be more modest. These transient noises contain energy across a wider frequency spectrum and arrive too quickly for absorption mechanisms to work effectively. Acoustic vents will help somewhat, but they cannot eliminate impact sounds.
Next, assess the intensity of your noise problem. The World Health Organization defines noise levels above 65 dB as noise pollution, while BS 8233:2014 recommends that noise levels in habitable rooms should not exceed 35 dB for comfort, with restful sleep requiring levels below 30 dB. If your indoor noise levels with windows closed already approach acceptable thresholds, acoustic vents may provide sufficient additional reduction to achieve comfort. If you are dealing with severe noise exposure well above these limits, vents alone will likely prove insufficient.
Consider conducting a simple test. Close your windows completely and assess how quiet your room becomes. If closing windows brings significant relief, your glazing is doing reasonable work and acoustic vents can address the ventilation opening without creating a major weak point. If closing windows barely changes the noise level, your windows themselves are the primary problem, and vent upgrades should follow rather than precede glazing improvements.
The timing and duration of noise exposure also influences your decision. Occasional daytime noise during working hours when you are away differs substantially from constant evening and nighttime noise that disrupts relaxation and sleep. Quiet trickle vent options deliver their greatest value when you need sustained periods of reduced noise while maintaining continuous ventilation.
With your noise problem properly characterized, you can evaluate whether acoustic vents represent a sound investment for your situation. Consider these key factors systematically before deciding.
Your budget relative to the problem severity: Acoustic vents cost two to three times more than standard alternatives. For mild noise concerns, this premium may not be justified. For moderate to significant noise problems, the investment often pays dividends in daily comfort and quality of life. For severe noise exposure, vents should be part of a broader strategy rather than a standalone solution.
Your existing window quality: Remember the principle established earlier: your vents are only as effective as the weakest point in your window system. High-performance acoustic vents paired with single glazing or poorly sealed frames deliver disappointing results. Match your vent specification to your overall window performance.
Your ventilation requirements: Building regulations mandate specific equivalent area values based on room type. Any acoustic vent for home windows must meet these minimums while providing noise reduction. Verify that your chosen product satisfies Part F requirements before purchasing.
Your frame compatibility: As covered in the frame type section, not every acoustic vent fits every window. Confirm compatibility with your uPVC, timber, or aluminium frames before committing.
Work through this decision checklist to determine if acoustic trickle vents suit your needs:
If you answered yes to most of these questions, acoustic trickle vents represent a sensible investment for your situation. If several answers were no, reconsider your priorities or address the underlying issues first.
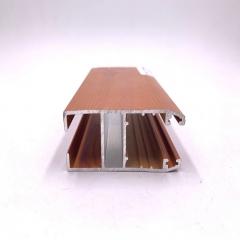
For homeowners who have determined that acoustic ventilation suits their needs, selecting the right product becomes the final step. Those seeking quiet, controlled passive ventilation in modern buildings should prioritize solutions that combine durable construction with practical features. Shengxin Aluminium's Slim uPVC Window Trickle Vents exemplify this approach, offering low-profile units with manual slider controls that let you regulate airflow precisely. The slim design integrates seamlessly into existing uPVC window systems without compromising thermal efficiency, while the durable construction ensures reliable performance over time. For homes where condensation has been a concern, the controlled ventilation these units provide helps reduce moisture buildup while maintaining the quiet indoor environment you are seeking.
The decision ultimately comes down to matching your investment to your actual problem. Acoustic trickle vents deliver genuine value when properly specified for appropriate situations. They disappoint when expected to solve problems beyond their capabilities. By honestly assessing your noise sources, evaluating your existing windows, and working through the decision checklist above, you position yourself to make a choice that delivers lasting satisfaction rather than expensive regret.
Yes, acoustic trickle vents effectively reduce noise when properly specified and installed. Quality models achieve weighted sound reduction indices (Dn,e,w) ranging from 29 dB for basic units to 55 dB for high-performance systems. They work best against continuous mid-frequency noise like traffic rumble rather than sudden impact sounds. However, their effectiveness depends on installation quality and matching them to your existing window's acoustic rating. A well-designed acoustic vent paired with poorly sealed windows will never deliver optimal results.
The most effective solution is replacing standard trickle vents with acoustic models featuring baffled chambers and sound-absorbing materials. Ensure proper sealing around the vent housing during installation, as gaps create acoustic weak points. Regular maintenance is essential—clean acoustic baffles every six months to prevent dust accumulation that reduces performance. For maximum noise reduction, consider dual attenuator systems combining internal vents with external canopies. Avoid blocking vents entirely, as this violates building regulations and creates moisture problems.
Yes, many acoustic trickle vents are specifically designed for retrofitting. Models like slim uPVC window trickle vents can replace existing vents or be face-fixed over current slots. The process typically involves removing the old vent, preparing the opening, applying sealing tape, and securing the new acoustic unit. DIY installation is feasible for uPVC frames with basic tools, though aluminium frames or high-performance dual-attenuator systems often require professional expertise to achieve optimal acoustic performance.
Standard trickle vents provide direct airflow with minimal internal obstruction, offering essentially no sound reduction. Acoustic models incorporate multi-chamber baffle designs, sound-absorbing linings like acoustic foam, and enhanced gaskets that force sound waves through tortuous paths, dissipating their energy. While acoustic vents cost two to three times more and may reduce airflow by 10-20%, they typically achieve 5-10 dB better noise reduction than standard alternatives—roughly halving perceived loudness.
Acoustic trickle vents are worth the investment for homes near busy roads, transport corridors, or mixed-use developments where continuous background noise affects daily comfort. They represent a cost-effective noise reduction solution compared to secondary glazing or window replacement. However, properties in quiet suburban areas may not benefit sufficiently to justify the premium. The key is matching your investment to your actual noise problem—acoustic vents deliver genuine value when specified appropriately but cannot solve severe noise issues alone.


 Servicio en línea
 0086 136 3563 2360
 sales@sxalu.com
 +86 136 3563 2360
 español
 English
 français
 Deutsch
 русский
 português
 العربية
 ไทย
ไทย Việt
Việt Українська