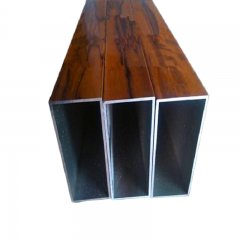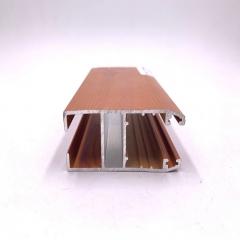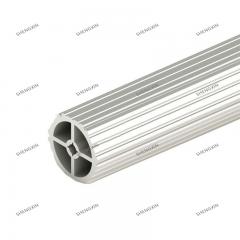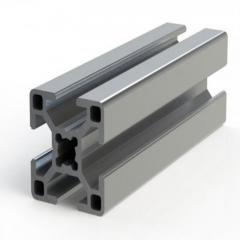
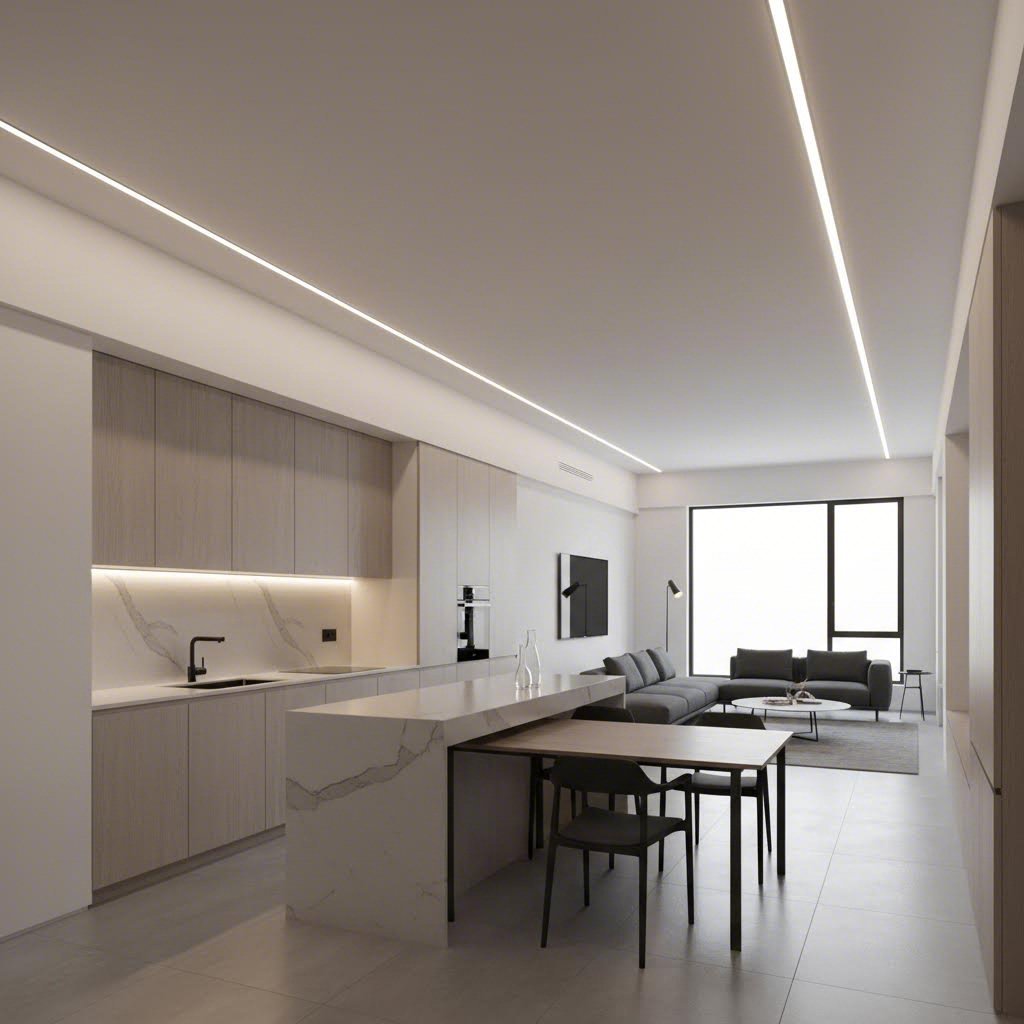
Have you ever installed LED strip lights only to find them looking unfinished, overheating, or creating harsh, uneven illumination? You're not alone. This common frustration is exactly why aluminum LED extrusion profiles have transitioned from optional accessories to essential components in modern lighting design.
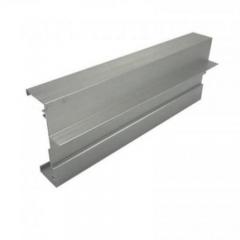
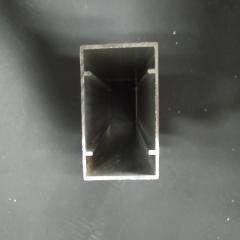
At their core, aluminum LED extrusion profiles are specialized aluminum housings engineered to mount, protect, and enhance LED strip lighting. Think of them as the professional finishing touch that transforms raw LED strips into polished, high-performing lighting fixtures. These profile channel systems serve as the backbone for countless residential and commercial lighting installations, from sleek under-cabinet lighting to dramatic architectural accents.
Unlike simply sticking LED strips directly onto surfaces, using a proper led strip channel creates a complete lighting solution that addresses multiple challenges simultaneously. The result? Longer-lasting LEDs, better light quality, and a clean aesthetic that integrates seamlessly into any space.
Why aluminum specifically? The answer lies in physics. Aluminum is an exceptional thermal conductor, drawing heat away from LED chips efficiently and preventing the premature degradation that excessive heat causes. This led housing approach doesn't just protect your investment—it actively extends LED lifespan while maintaining consistent brightness and color temperature.
Beyond thermal properties, aluminum offers remarkable versatility. Manufacturers can extrude it into countless shapes and sizes through the led strip light extrusion process, creating profiles suited for every installation scenario imaginable. Its lightweight yet durable nature makes installation straightforward while ensuring long-term structural integrity.
A complete led profile system consists of four essential elements working together:
Understanding these profile lights components empowers you to evaluate quality, compare options, and make purchasing decisions with confidence. The following sections will build on this foundation, helping you navigate material science, profile types, and installation best practices.
The fundamental value proposition of these systems centers on four key benefits:
With this foundational knowledge in hand, you're ready to explore the deeper technical aspects that separate quality LED lighting installations from disappointing ones.
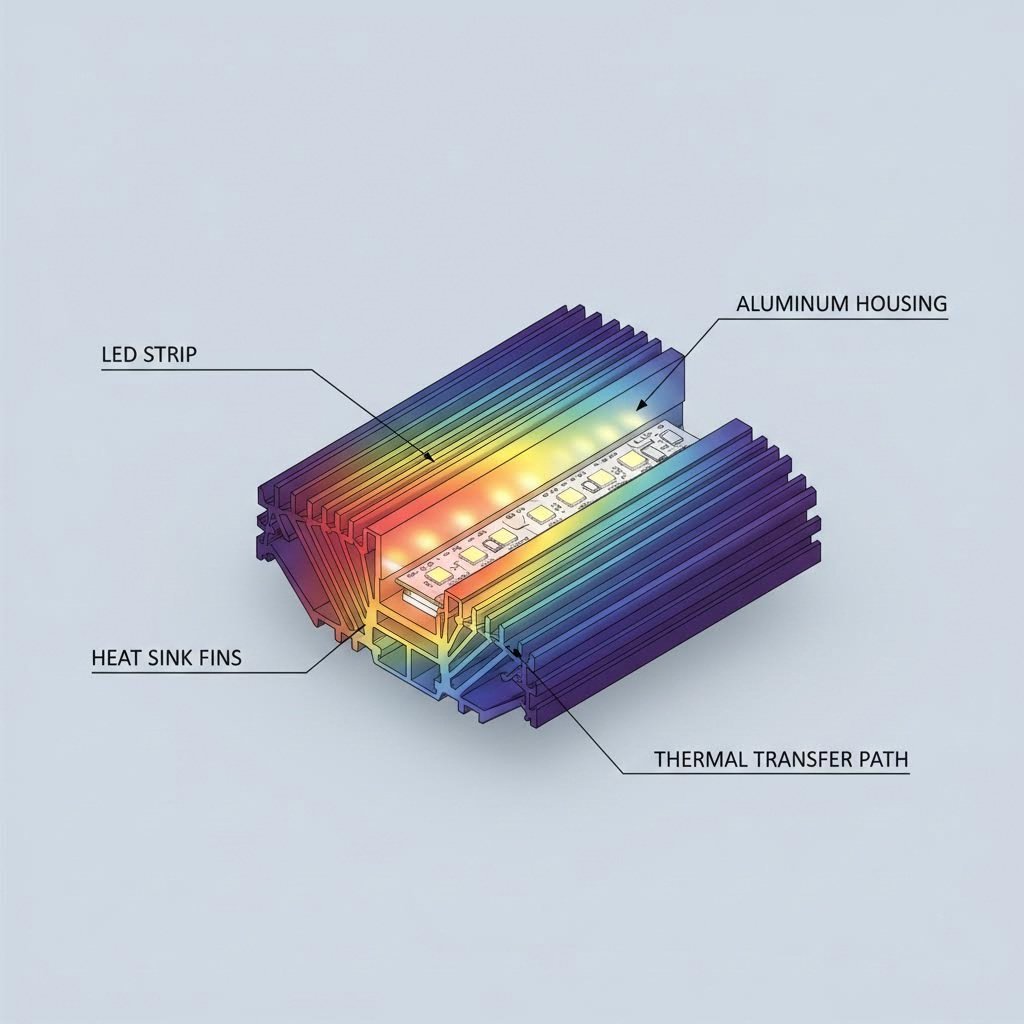
Ever wondered why your LED strips dim faster in some installations than others? The answer often comes down to one critical factor: heat management. Understanding how aluminum protects your LEDs through superior thermal conductivity will help you appreciate why choosing the right led aluminum profile makes such a dramatic difference in performance and lifespan.
LEDs convert only about 25-35% of input energy into visible light—the rest becomes heat. For a high-power 15 W/m LED strip, that translates to approximately 10 W/m of thermal load that must be dissipated. Without proper heat management, PCB temperatures can exceed 80°C, triggering accelerated lumen depreciation, noticeable color shift, and lifespan reduction of up to 50%.
Imagine running your LED strips at full brightness in an enclosed cove or sealed display case. Without adequate thermal dissipation, you're essentially cooking your investment. High junction temperatures don't just reduce brightness—they fundamentally alter the LED's chemical structure, causing irreversible damage.
This is where an aluminum extrusion channel becomes your LED's best friend. With a thermal conductivity of approximately 201 W/(m·K), 6063-T5 aluminum transfers heat more than 1,000 times more efficiently than most plastics. This light aluminum material acts as a passive heat sink, quickly drawing thermal energy away from the LED PCB and dispersing it into the surrounding air.
The effectiveness of this thermal transfer depends on several factors:
Real-world testing demonstrates these principles clearly. Upgrading from a 1mm thin-wall profile to a 2mm thick-wall aluminum led channel can reduce LED PCB temperature by 6-8°C under 15 W/m load—enough to extend L70 lifespan by 30-40%.
Not all aluminum is created equal. The industry standard for aluminium extrusions for led lighting is 6063-T5 alloy, specifically chosen for its excellent balance of extrudability and thermal properties. The "T5" designation indicates the tempering process—artificially aged after an elevated-temperature rapid cool from the extrusion process.
Why 6063-T5 specifically? This alloy offers:
When evaluating suppliers, ask about alloy specifications. Budget profiles sometimes use recycled aluminum with inconsistent thermal properties, compromising the very heat dissipation that makes aluminum profiles valuable.
| Characteristic | Aluminum (6063-T5) | Plastic (PVC/PC) |
|---|---|---|
| Thermal Conductivity | ~201 W/(m·K) | 0.1-0.3 W/(m·K) |
| LED Lifespan Impact | Maintains rated L70 lifespan | Can reduce lifespan by up to 50% |
| Weight | Moderate (heavier than plastic) | Lightweight |
| Initial Cost | Higher upfront investment | Lower purchase price |
| Long-term Value | Fewer replacements, lower lifetime cost | More frequent replacements needed |
| Heat Dissipation | Excellent—active thermal management | Poor—traps heat against LEDs |
The comparison reveals a clear pattern: while plastic channels offer lower upfront costs, they trap heat against LED strips, accelerating degradation and ultimately costing more through premature replacements. A quality led aluminum profile pays for itself through extended LED lifespan and consistent performance.
Now that you understand why aluminum dominates the LED profile market, the next step is exploring the various profile types available and how each mounting style serves different installation requirements.
Sounds overwhelming when you start browsing led profiles and discover dozens of shapes, sizes, and mounting configurations? You're looking at a carefully designed taxonomy where each profile type solves specific installation challenges. Understanding these categories transforms the selection process from guesswork into confident decision-making.
The mounting method you choose fundamentally shapes both installation complexity and final aesthetic results. Let's break down each profile for led category, exploring where each excels and which applications benefit most from specific designs.
When you're starting a lighting project, the first fork in the road comes down to visibility: do you want the led strip profile visible as a design element, or hidden for seamless integration?
Surface Mount Profiles
Surface-mounted led strip housing represents the most accessible entry point into professional LED installations. These channels attach directly onto flat surfaces—cabinets, shelves, walls, or ceilings—using adhesive backing, screw-mount brackets, or clip systems.
The straightforward installation makes surface mounting perfect for DIY enthusiasts. You're essentially choosing between ease of installation and the slightly more pronounced visual profile compared to recessed alternatives.
Recessed Profiles
Recessed channels disappear into ceilings, walls, or custom millwork, leaving only a thin line of light visible. This approach demands more planning—often requiring coordination during construction—but delivers unmatched visual refinement.
According to installation professionals, recessed mounting typically requires early planning during construction phases. Precise dimensions and structural coordination add complexity, making this approach better suited for new builds rather than renovation projects.
Corner and Angled Profiles
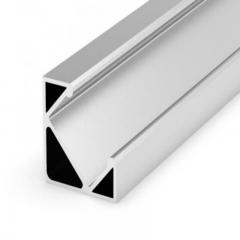
When lighting needs to navigate 90-degree transitions, standard flat channels fall short. Corner profiles—typically featuring 45-degree angled mounting surfaces—solve this elegantly.
Suspended Profiles
Suspended linear lighting introduces depth and definition to spaces with higher ceilings. Hanging via cables or rigid rods, these fixtures become visible design elements rather than hidden infrastructure.
Suspended installations offer flexibility that recessed options cannot match. You can adjust light height, create geometric patterns, and use lighting itself as sculptural design elements.
In-Ground and Exterior LED Channel Options
Outdoor applications demand specialized outdoor led channel solutions engineered to withstand moisture, temperature fluctuations, and physical stress. IP65 or higher-rated exterior led channel profiles feature sealed construction and robust materials.
When specifying outdoor installations, always verify IP ratings match environmental exposure. IP65 protects against water jets, while IP67 allows temporary submersion—critical distinctions for different outdoor scenarios.
Here's something many buyers overlook: the internal depth of your chosen led strip profile dramatically affects light output characteristics. This relationship between channel geometry and illumination quality deserves careful consideration.
Shallow Profiles (under 10mm internal height)
Shallow channels position the diffuser close to LED chips, maintaining maximum light intensity while providing minimal diffusion. You'll see higher brightness but potentially more visible LED dots, especially with lower-density strips.
Best applications: Task lighting requiring maximum output, display cases where brightness trumps ambiance, and installations using high-density LED strips (240+ LEDs per meter) that naturally minimize dot visibility.
Deep Profiles (15mm+ internal height)
Greater distance between LEDs and diffuser allows light more space to blend before exiting the channel. The result? Softer, more uniform illumination with virtually no visible hotspots—but at the cost of some light output.
According to testing by Myledy, installing 120-LED/m strips in low-height profiles shows visible LED dots, while the same strips in taller channels produce noticeably more uniform diffusion. Height and LED density work together—you can achieve excellent diffusion in shallow profiles by using higher-density strips (280+ LEDs/m), or use standard-density strips in deeper channels for similar results.
Best applications: Ambient and accent lighting, hospitality environments, residential cove lighting, and anywhere visual comfort matters more than raw brightness.
Practical Selection Guidance
When balancing depth against output, consider that deeper profiles with milky diffusers can reduce light transmission by 40-50%. Compensate by specifying higher-output LED strips—a worthwhile tradeoff for applications demanding smooth, continuous light lines.
With profile types and depth effects now clear, the next critical decision involves diffuser selection—the component that ultimately shapes how light reaches your space.
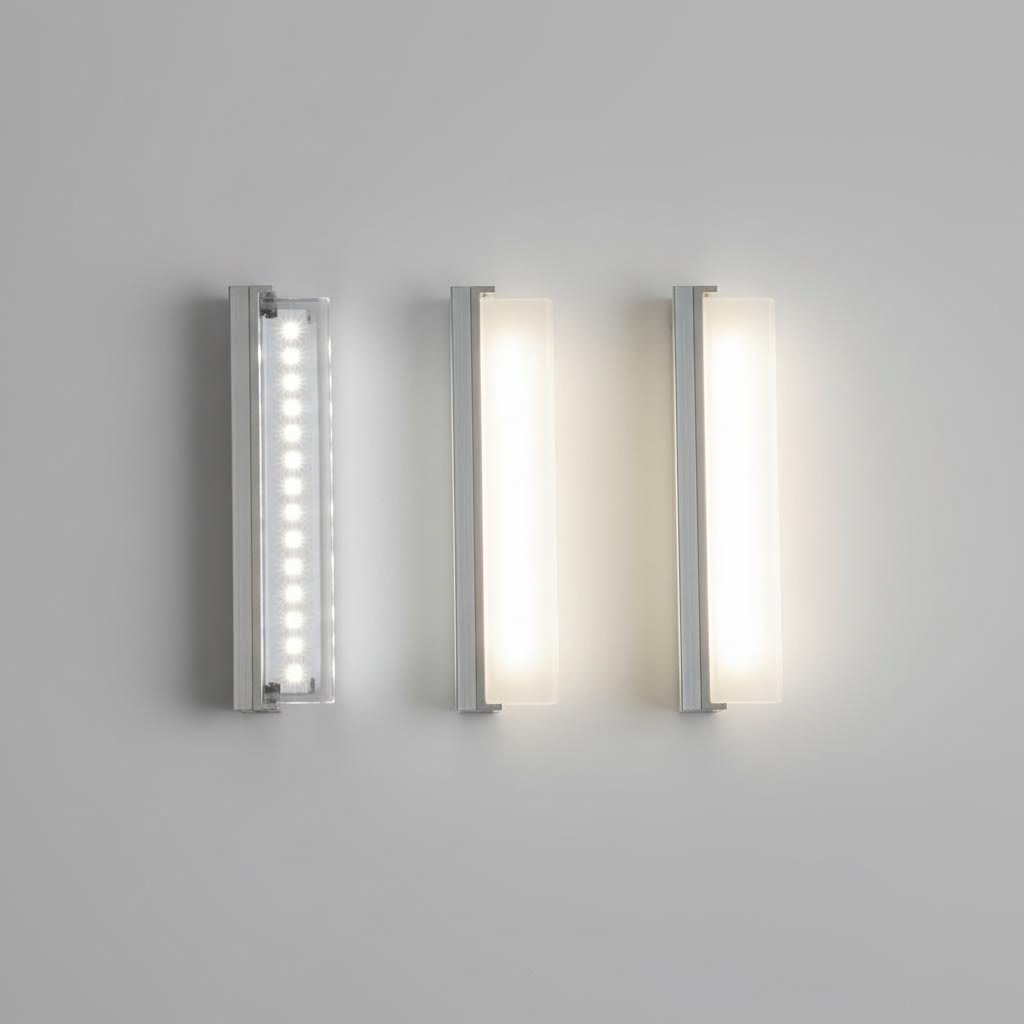
You've selected the perfect profile type and mounting style—but here's where many installations go wrong. The diffuser you choose transforms raw LED output into the final lighting experience your space actually receives. Think of it this way: your aluminum diffuser and lens selection determines whether people notice beautiful illumination or distracting LED dots.
Diffusers—typically made from polycarbonate (PC) or PMMA—snap or slide into your led profile channel, serving dual purposes. They protect LED strips from dust and contact while controlling how light disperses into the environment. Getting this decision right means understanding the tradeoffs between brightness, diffusion quality, and visual comfort.
When you examine led lighting diffusers, you'll encounter a spectrum of options ranging from crystal-clear to completely opaque. Each position on this spectrum represents a deliberate compromise between light transmission and visual smoothness.
Clear/Transparent Covers
Clear diffusers maximize every lumen your LED strips produce. With light transmission rates reaching 95%, they're the obvious choice when brightness is your primary concern. However, there's a significant visual tradeoff: individual LED dots remain clearly visible, creating a dotted rather than continuous light line.
Best applications: Display cases where product illumination matters most, task lighting in workshops, and installations using extremely high-density LED strips (280+ LEDs/m) where dot visibility is naturally minimized.
Frosted/Semi-Transparent Covers
Frosted diffusers represent the middle ground, offering 85-90% light transmission while softening LED visibility. You'll still notice some dot structure, particularly with lower-density strips, but the effect is considerably more refined than clear covers.
Best applications: Under-cabinet lighting, accent lighting in residential spaces, and situations where you want reasonable brightness without harsh visual hotspots.
Milky/Opal Covers
Milky diffusers prioritize visual quality over raw output. Transmitting approximately 65-70% of light, they create the smooth, continuous illumination that defines professional-grade installations. Individual LED dots become completely invisible, replaced by uniform light lines.
Best applications: Hospitality environments, high-end residential installations, cove lighting, and any space where visual comfort and aesthetic refinement take priority over maximum brightness.
Specialty Options
Beyond standard diffusion levels, specialty covers address specific requirements. Prismatic lenses create controlled beam patterns for directional applications. Black diffusers (transmitting only 30-40% of light) create subtle accent effects. Silicone diffusers, offering 70-75% transmission, provide flexibility for curved installations within a led tape housing system.
| Diffuser Type | Light Transmission | LED Dot Visibility | Best Use Cases |
|---|---|---|---|
| Clear/Transparent | 90-95% | Fully visible | Display cases, task lighting, high-density strip installations |
| Frosted/Semi-transparent | 85-90% | Partially visible | Under-cabinet lighting, accent lighting, general residential use |
| Milky/Opal | 65-70% | Not visible | Cove lighting, hospitality, architectural features, premium installations |
| Silicone (Flexible) | 70-75% | Minimal visibility | Curved applications, bendable profile installations |
| Black/Specialty | 30-40% | Not visible | Subtle accent lighting, mood lighting, low-output decorative effects |
Balancing Diffusion Against Brightness Requirements
Here's the practical calculation many installers miss: choosing a milky diffuser means losing 30-35% of your light output compared to clear covers. If you've specified LED strips based on clear-cover calculations, switching to milky diffusers may leave your space underlit.
The solution? When planning installations with milky diffusers, specify LED strips with higher lumen output to compensate. A 15 W/m strip behind a milky diffuser delivers roughly the same usable light as a 10 W/m strip behind a clear cover. This compensation approach is especially critical in a white aluminum u channel installation where clean aesthetics demand smooth light lines.
Profile depth amplifies this relationship. Deeper led strip light profile channels naturally improve diffusion by allowing light more distance to blend before reaching the cover. Pairing a deep profile with a milky diffuser creates exceptionally smooth illumination—but may require strips rated 20-30% higher than shallow-profile installations targeting similar brightness levels.
Beyond diffusion, protection ratings determine where your lighting system can safely operate. The Ingress Protection (IP) rating system uses two digits to classify resistance against solids and liquids—critical information for any installation beyond dry interior spaces.
Understanding the Numbers
The first digit (0-6) indicates protection against solid objects and dust. The second digit (0-9K) measures water resistance. Higher numbers mean greater protection.
Matching IP Ratings to Your Environment
For bathroom installations, IP65-rated profiles protect against humidity and occasional water contact. Kitchen applications near sinks benefit from similar protection. Outdoor pathway lighting demands IP65 minimum, while decorative lighting around pools or fountains should specify IP67 or higher.
Remember that IP ratings apply to the complete assembly—profile, diffuser, and end caps must all meet the required standard. A premium aluminum channel with IP20 end caps still functions as an IP20 system overall.
With diffuser options and protection ratings now clear, the next step involves applying this knowledge to your specific project requirements—matching profile selection to room characteristics and intended lighting effects.
You've learned about profile types, diffusers, and thermal management—but when you're standing in front of a project with specific constraints, how do you actually decide? The gap between understanding options and making confident choices is where many buyers get stuck. Let's bridge that gap with a practical selection framework you can apply to any lighting project.
Choosing the right aluminium channel for led strip lighting isn't about finding the "best" profile in isolation. It's about matching your selection to four interconnected factors: room characteristics, desired lighting effects, installation realities, and aesthetic goals. Work through these systematically, and the right choice becomes obvious rather than overwhelming.
Every room presents unique challenges that should guide your aluminum profile for led strip lighting selection. Consider how physical space characteristics directly influence what will work—and what won't.
Ceiling Height Considerations
Higher ceilings demand different strategies than standard 8-foot installations. When you're lighting a room with 12-foot or vaulted ceilings, light has further to travel before reaching surfaces and occupants. This distance affects both perceived brightness and diffusion quality.
For elevated installations, prioritize higher-output LED strips paired with clear or frosted diffusers rather than milky options. The brightness reduction from opal diffusers—typically 30-35%—compounds with distance, potentially leaving spaces underlit. Alternatively, if smooth diffusion remains essential, compensate by specifying strips rated 40-50% higher than ground-level calculations would suggest.
Lower ceilings present opposite considerations. Closer proximity to light sources means less brightness is lost in transit, but glare becomes a concern. Deep-profile channels with milky diffusers work exceptionally well here, providing comfortable illumination without harsh hotspots.
Room Function and Lighting Layers
Professional lighting designers consistently emphasize layering—combining general, accent, and task lighting to create depth and functionality. Your led tape profile selection should align with which layer you're addressing:
According to professional designers at KLUS, combining different profile types within a single space creates the most compelling results. A compact surface-mount strip light profile for cabinet task lighting paired with recessed cove channels for ambient illumination addresses multiple needs without visual clutter.
Retrofit vs. New Construction
Your installation constraints dramatically narrow viable options. Retrofit projects—adding lighting to existing spaces without major renovation—favor surface-mount and suspended profiles that don't require cutting into walls or ceilings.
New construction opens possibilities that retrofits cannot match. During the drywall phase, you can integrate led strip trunking systems that disappear completely into architecture. Recessed ceiling channels, plaster-in profiles, and coordinated control wiring become straightforward when walls remain open.
If you're renovating, plan lighting early in the design phase rather than treating it as an afterthought. Integrating led strip light trunking during construction typically costs 40-60% less than equivalent retrofit installations requiring cutting, patching, and repainting.
Rather than starting with profiles and searching for applications, flip the process. Begin with your specific lighting goal, then work backward to the profile characteristics that serve it best.
Under-Cabinet Kitchen Lighting
This remains the most common residential LED profile application—and one where selection directly impacts daily functionality. For effective task illumination:
Cove Lighting for Ambient Effects
Cove installations create the soft wall-wash effects seen in hospitality environments and upscale residences. The goal is invisible light sources producing visible, comfortable illumination.
Display Case and Retail Illumination
When products are the focus, lighting must highlight merchandise without drawing attention to itself. Maximum brightness with minimal fixture visibility defines success here.
Architectural Accent Features
Statement lighting that becomes part of the design language requires balancing visibility against integration. Your aesthetic intent guides the choice.
Your Step-by-Step Selection Process
Ready to make your decision? Follow this systematic approach:
With your profile selection confidently made, the next challenge becomes installation execution—where even excellent component choices can be undermined by common mounting and cutting mistakes.
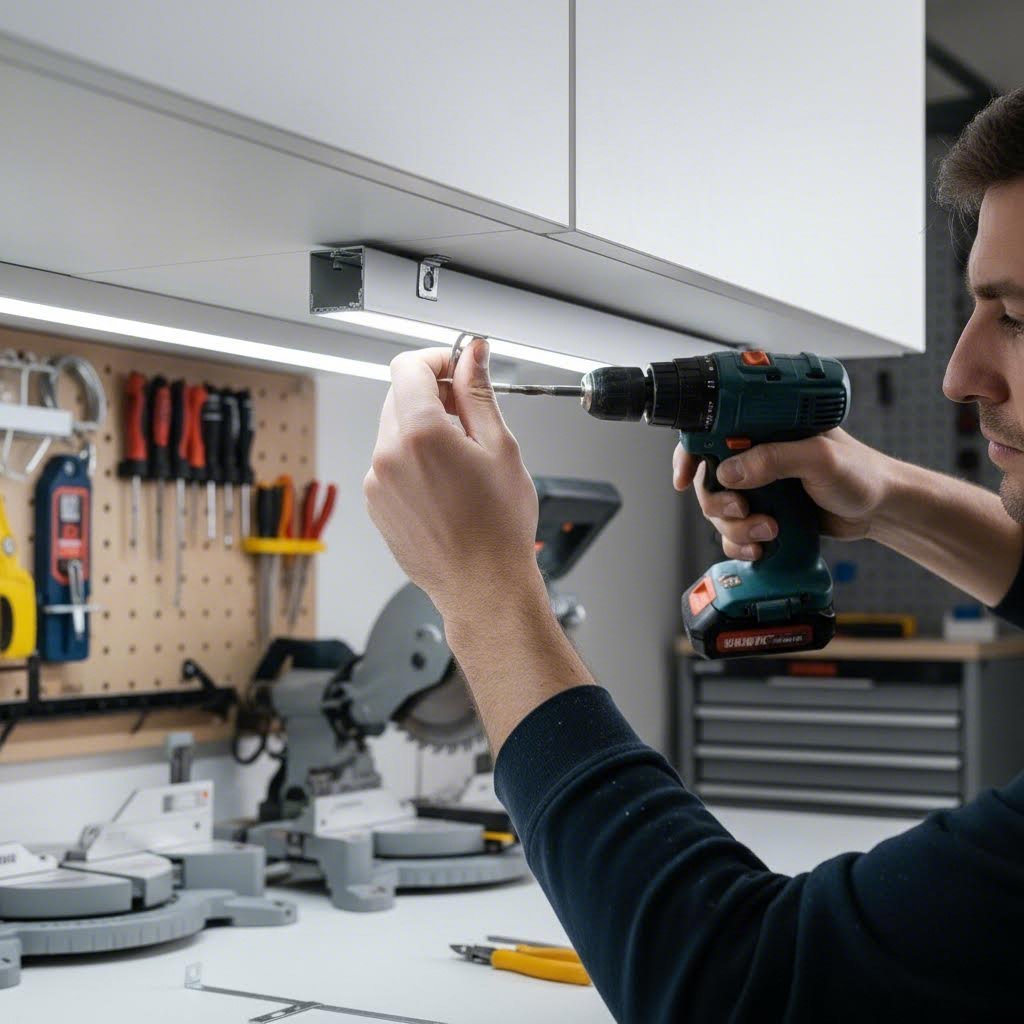
You've selected the perfect profile, chosen your diffuser, and your LED strips are ready—now comes the moment of truth. Installation is where careful planning either pays off brilliantly or falls apart completely. The difference between a professional-grade result and a frustrating failure often comes down to avoiding a handful of common mistakes that plague even experienced DIY installers.
Whether you're working with an aluminium led strip channel for a kitchen renovation or installing led extrusions throughout a commercial space, the fundamentals remain consistent. Let's walk through the complete installation process, highlighting the pitfalls that ruin projects and the techniques that guarantee success.
Measuring and Planning
Before touching a saw, accurate measurement determines everything. Experienced installers follow one golden rule: always order 10% extra length beyond your calculated requirements. This buffer accounts for cutting waste, measurement errors, and unexpected obstacles discovered during installation.
When measuring, mark cutting points clearly with a pencil or fine marker. Use a combination square to ensure perfectly straight lines across the profile—angled cuts create visible gaps at joints and allow light leakage that breaks clean aesthetics.
Cutting Techniques That Protect Your Investment
The cutting method you choose directly impacts both safety and final quality. Aluminum channel led profiles require fine-tooth metal blades designed specifically for non-ferrous metals. Using a wood blade or coarse-tooth saw creates rough, jagged edges that can damage LED strips during insertion.
For best results with your led extrusion channel:
After cutting, deburring is non-negotiable. Those tiny aluminum shards and sharp edges will scratch diffuser covers and damage LED strip PCBs during insertion. Run a deburring tool or fine file along all cut edges until smooth to the touch.
Joining Methods for Custom Lengths
Most projects require joining multiple profile sections to span longer distances. You have two primary options:
When joining sections, ensure LED strip connections align with profile joints. Professional installations use solder joints or quality locking connectors rather than cheap clip connectors that loosen over time and create flickering.
Proper LED Strip Insertion
With profiles cut and mounted, inserting LED strips requires attention to thermal contact. For high-power strips (12W/m and above), thermal paste between the strip's aluminum PCB backing and the profile channel floor significantly improves heat transfer.
Slide strips gently from one end to the other, ensuring even positioning throughout. Forcing strips or bending them sharply at corners risks damaging solder connections. For corner installations, use flexible LED strips specifically designed for tight radius bends.
Even with quality components and proper tools, these five errors consistently undermine installations. Recognizing them before they happen saves time, money, and frustration.
Mounting Considerations by Profile Type
Different mounting methods carry different complexity levels and permanence:
DIY vs. Professional Complexity Ratings
Be honest about your skill level before starting. Surface-mount installations with adhesive or clip systems suit confident DIYers. Recessed ceiling installations, plaster-in profiles, and multi-zone commercial projects typically justify professional installation to avoid costly mistakes.
With installation fundamentals mastered, the final consideration becomes system integration—ensuring your profiles, strips, drivers, and controls work together as a unified lighting solution.
Here's something that trips up even experienced buyers: purchasing the perfect aluminum LED extrusion profile means nothing if the rest of your system doesn't work together. Your profile light installation succeeds or fails based on how well every component—strips, drivers, controls, and hardware—functions as an integrated whole.
Think of profile lighting like building a computer. The best graphics card in the world won't help if your power supply can't handle it or your motherboard lacks the right slot. The same principle applies here. Let's explore how each element connects and what compatibility factors demand your attention.
A functional led light profile system consists of interdependent components that must be specified together. Understanding these relationships prevents the frustration of receiving parts that don't work with each other.
Each element constrains others. Choose a 12mm-wide LED strip, and you've eliminated 8mm and 10mm profile options. Specify a dimmable installation, and your driver must support the dimming protocol your controller uses. This interdependency is precisely why extrusion lighting projects require system-level thinking from the start.
Profile Width and Strip Compatibility
The most basic compatibility requirement involves physical fit. LED strips come in standard widths—8mm, 10mm, and 12mm being most common—and your profile's internal channel must accommodate your chosen strip.
Sounds simple, but here's where buyers stumble: a 10mm strip won't fit properly in an 8mm channel, and an 8mm strip in a 12mm channel may shift during installation, creating uneven lighting. Always verify internal channel dimensions against strip specifications before ordering. Quality aluminium profile led light manufacturers clearly state compatible strip widths in their product specifications.
Driver Sizing and Electrical Calculations
Undersized drivers represent one of the most common—and easily avoidable—installation failures. The calculation itself is straightforward, but the safety margin is where many projects go wrong.
Start by calculating total wattage: multiply strip wattage per meter by total installed length. A 10-meter installation using 14.4W/m strips requires 144W of power. But don't stop there. Professional specifications call for 20-30% headroom above calculated load. That 144W requirement actually demands a 180W minimum driver—preferably 200W for optimal reliability and longevity.
Why the buffer? Drivers operating at maximum capacity run hotter, age faster, and leave no margin for power fluctuations. According to industry guidelines, a driver sized with adequate headroom can last 50,000+ hours, while one constantly running at 90%+ capacity may fail in a fraction of that time.
Dimming Protocol Compatibility
If your aluminum lighting installation includes dimming—and most contemporary projects do—three components must speak the same language: the dimmer/controller, the driver, and potentially the LED strip itself.
Common dimming protocols include:
Mismatched protocols create flickering, buzzing, limited dimming range, or complete system failure. Before purchasing, confirm your driver explicitly supports your intended dimming method.
The regulatory landscape shifts dramatically between home installations and commercial projects. What works perfectly in your kitchen may violate codes in an office building or retail space.
Residential Applications
Home installations typically face fewer regulatory hurdles. Standard requirements include:
Most residential profile light projects fall under standard electrical permit processes. A licensed electrician familiar with low-voltage LED systems can typically navigate requirements without specialized lighting expertise.
Commercial Applications
Commercial installations introduce complexity that residential projects rarely encounter. According to commercial lighting guidelines, you must address:
Commercial projects benefit from early consultation with lighting designers or engineers who understand local code requirements. The cost of professional specification pales against the expense of reworking non-compliant installations.
The Project Lifecycle Approach
Successful LED lighting—whether residential or commercial—follows a predictable path from concept to completion. Rushing any phase typically creates problems that surface later:
This systematic approach prevents the common trap of treating profiles as isolated purchases rather than elements within integrated systems. When you think beyond just the profile itself, you create installations that perform reliably for years.
With system integration principles established, the final consideration becomes sourcing—finding suppliers whose product quality and service capabilities match your project requirements.
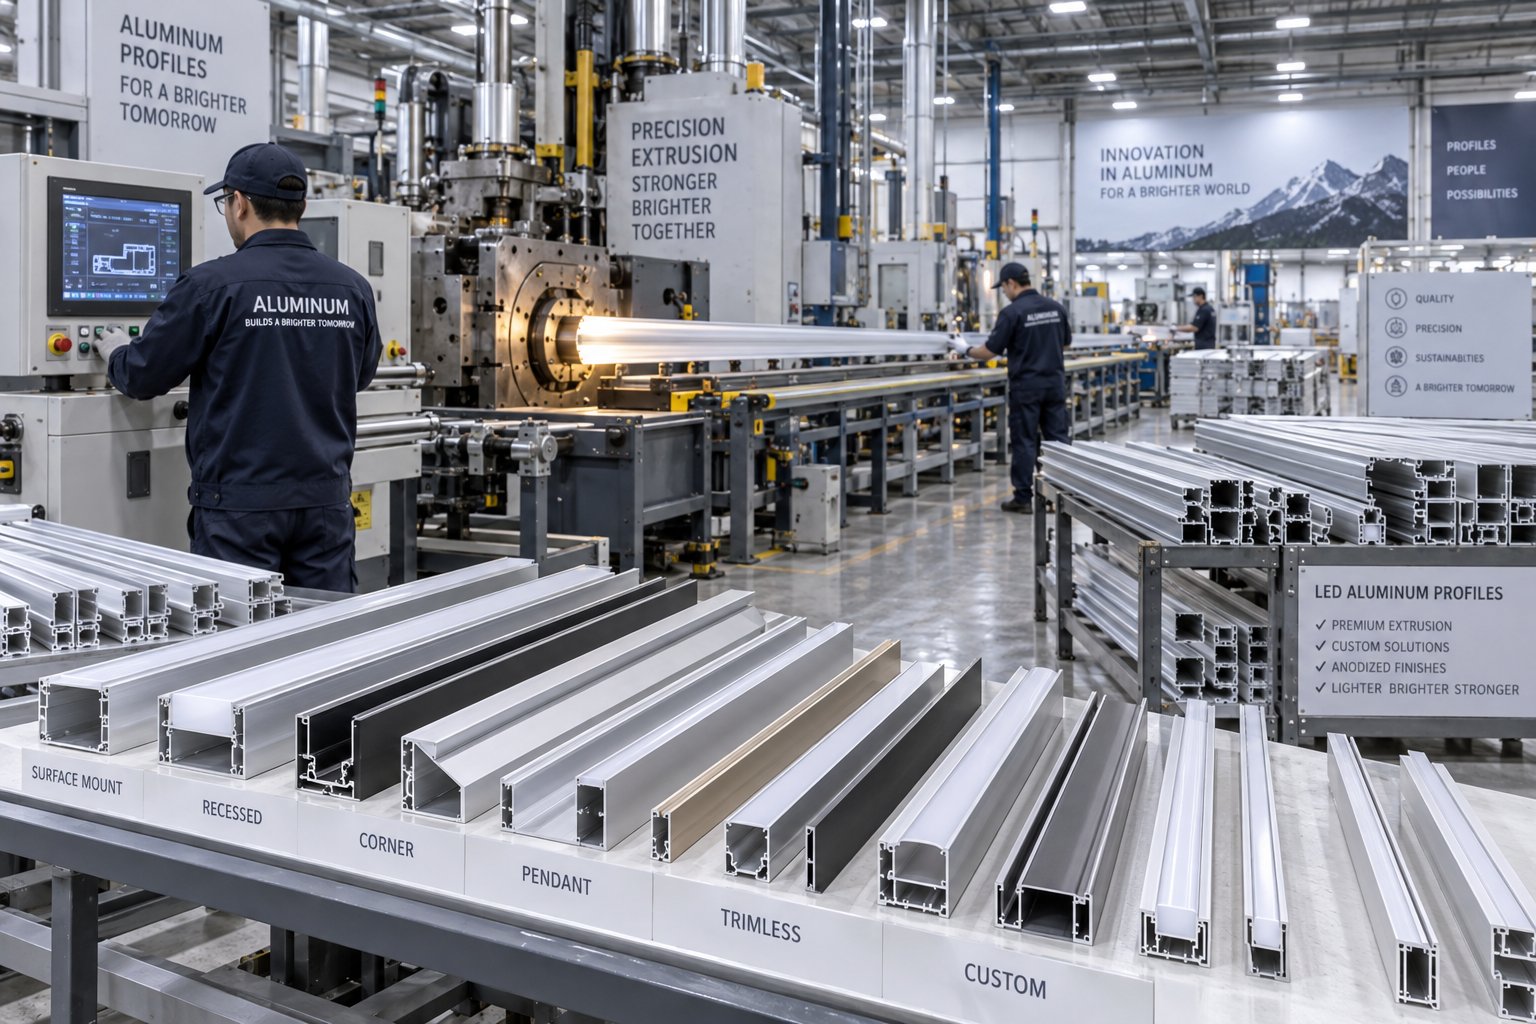
You've mastered profile types, diffuser selection, and installation techniques—but here's where many projects quietly fail before they even begin. The supplier you choose determines whether those carefully planned specifications arrive as premium components or disappointing compromises. Understanding what separates quality led aluminium profile manufacturers from budget alternatives protects your investment and ensures your lighting performs as intended.
The LED profile market spans everything from premium architectural-grade products to mass-produced budget alternatives. Both have their place, but knowing how to evaluate suppliers prevents the frustrating experience of receiving led aluminum extrusions that don't fit properly, diffusers that yellow within months, or accessories that never existed despite catalog listings.
When browsing aluminum extrusion for led strip lights options, price differences between suppliers often seem puzzling. Why does one led light extrusion cost three times more than an apparently identical alternative? The answer lies in details that photographs can't reveal.
Aluminum Alloy Quality and Consistency
Premium led alu profile manufacturers specify verified 6063-T5 aluminum alloy—the industry standard for thermal conductivity and extrudability. Budget suppliers may use recycled aluminum with inconsistent composition, reducing thermal performance by 15-25% compared to virgin alloy. This difference directly impacts LED lifespan, as we explored in earlier sections.
Wall thickness consistency matters equally. Quality extrusion maintains uniform thickness throughout the profile length, ensuring predictable thermal dissipation. Inconsistent walls—common in low-cost production—create hotspots where LEDs degrade faster than surrounding sections.
Diffuser Optical Clarity and UV Resistance
The diffuser determines your light quality for years to come. Premium PMMA or polycarbonate diffusers maintain optical clarity and resist yellowing from UV exposure. Budget alternatives may use lower-grade plastics that cloud or discolor within 12-18 months, especially in applications with sun exposure.
According to industry finishing experts, UV stability depends heavily on material chemistry. Request UV resistance specifications when evaluating suppliers—reputable manufacturers provide this data readily.
Extrusion Tolerance Precision
Your LED strips need to fit properly. Premium aluminum profiles for led strips maintain tight tolerances—typically ±0.1mm—ensuring strips slide in smoothly without gaps or forcing. Loose tolerances create strips that shift position or channels so tight they damage LED PCBs during insertion.
This precision extends to diffuser fit. A led strip lighting housing with sloppy tolerances produces diffusers that rattle, pop out unexpectedly, or leave visible gaps along their length. Quality profiles feature snap-fit or slide-in mechanisms that secure covers firmly while allowing tool-free removal for maintenance.
Complete Accessory Ecosystems
The profile itself is only part of the solution. Quality suppliers offer matching accessories that work together seamlessly:
Budget suppliers frequently list accessories that ship months late, don't match actual profile dimensions, or simply never arrive. Before committing to a led light aluminium profile supplier, verify accessory availability and compatibility through samples or verified customer reviews.
Supplier Evaluation Criteria Checklist
When comparing potential sources for your aluminum extrusion for led strip lights needs, systematically evaluate these factors:
According to industry analysis, validating supplier claims through pilot projects or sample orders helps confirm whether a vendor can meet your specific technical and logistical needs before large-scale commitments.
Standard profiles serve most residential and light commercial applications beautifully. But architectural projects, branded environments, and specialized industrial applications often demand dimensions, shapes, or finishes that catalog products simply don't offer.
Scenarios Favoring Custom Extrusion
Consider custom led aluminum extrusions when your project requires:
Custom extrusion requires die development—an upfront investment that only makes economic sense above certain volume thresholds. For projects requiring 500+ meters of profile, custom tooling costs typically amortize quickly against the benefits of purpose-designed solutions.
Manufacturing Capabilities That Enable Customization
Not every aluminum supplier can deliver custom LED profiles. True customization requires comprehensive manufacturing infrastructure—extrusion presses in various tonnages, die-making capabilities, CNC machining for secondary operations, and diverse surface treatment options.
Shengxin Aluminium exemplifies this comprehensive approach to custom led light extrusion manufacturing. With over 30 years of industry experience and 35 extrusion presses ranging from 600T to 5500T, they handle everything from delicate small-profile production to heavy industrial extrusions. Their CNC machining centers perform precise cutting, drilling, and bending operations that transform raw extrusions into installation-ready components.
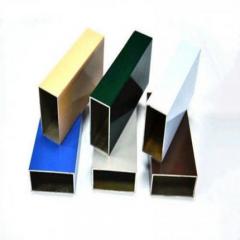
Surface treatment capabilities distinguish manufacturers capable of serving architectural and high-end commercial markets. Quality custom suppliers offer:
According to custom extrusion specialists, the typical timeline for custom profile development runs 8-15 days for die development and sample testing, by 20-25 days for mass production. This predictable process allows project scheduling with confidence.
The Value of End-to-End Manufacturing Support
When evaluating custom extrusion partners, look beyond basic manufacturing capability. The most valuable suppliers provide technical collaboration from initial concept through production. This includes:
Shengxin Aluminium's factory-direct model eliminates intermediary markups while providing this technical depth. Their in-house die development, extrusion, machining, and finishing capabilities create a single point of accountability for custom aluminum profiles for led strips—simplifying communication and accelerating project timelines compared to working with multiple specialized vendors.
Whether your project requires standard catalog profiles or fully custom solutions, supplier selection deserves the same careful attention you've given to profile type, diffuser choice, and installation planning. Quality sourcing transforms good specifications into great installations that perform reliably for years.
With sourcing considerations addressed, you're ready to consolidate everything you've learned into a practical action plan for your specific LED profile project.
You've traveled from confusion to clarity—understanding how aluminum light channels protect LEDs, why diffuser selection shapes light quality, and what separates quality installations from disappointing ones. Now it's time to transform that knowledge into action. Whether you're planning a simple under-cabinet upgrade or specifying led strip channels for a commercial renovation, the path forward is clearer than ever.
The journey through aluminum LED extrusion profiles reveals a consistent theme: success comes from systematic decision-making rather than random selection. Each choice—profile type, diffuser, mounting method, and system components—connects to the others. Get them right together, and you create lighting that performs beautifully for years. Miss critical connections, and even premium components underperform.
Heat management isn't optional—it's the foundation of LED longevity. A quality aluminum profile can extend LED lifespan by 30-40% compared to direct mounting, transforming a 2-year failure into 50,000+ hours of reliable service.
Before placing any orders, work through these critical decision points. Each builds on the knowledge you've gained throughout this guide.
Profile Type and Mounting
Diffuser and Light Quality
Thermal and Longevity Considerations
System Integration
Working through this checklist before purchasing prevents the costly mistakes that plague rushed installations. Take the time now, and you'll avoid frustration later.
For standard residential and light commercial projects, quality catalog aluminium profiles for led tape from reputable suppliers serve most needs beautifully. Match specifications carefully, order 10% extra length for cutting waste, and follow the installation best practices covered earlier.
But what about projects requiring something beyond standard options? Architectural installations demanding unique cross-sections, branded environments requiring specific color matches, or high-volume projects benefiting from purpose-designed led tape light extrusion solutions all call for custom manufacturing capabilities.
This is where partnering with a comprehensive manufacturer makes the difference. Shengxin Aluminium provides end-to-end support for custom led light strip housing projects—from initial die development through mass production. Their 35 extrusion presses (ranging from 600T to 5500T) handle everything from delicate architectural profiles to heavy industrial sections, while CNC machining centers perform precise cutting, drilling, and bending operations.
Surface treatment options include anodizing in custom colors, powder coating to any RAL specification, and PVDF finishes for demanding exterior applications. Their factory-direct pricing model eliminates intermediary markups, making custom extrusion surprisingly accessible for projects requiring 500+ meters of profile.
Your Action Plan
You started this guide uncertain about aluminum LED extrusion profiles—unsure what to buy, how to specify, or what truly matters for long-term performance. Now you understand the science behind thermal management, the practical differences between profile types, and the system-level thinking that creates successful installations.
That knowledge transforms you from a confused buyer into a confident installer. Whether you're tackling a weekend DIY project or specifying lighting for a commercial build-out, you now have the foundation to make decisions that deliver beautiful, reliable illumination for years to come.
Aluminum LED extrusion profiles serve as specialized housings that mount, protect, and enhance LED strip lighting. They provide critical thermal management by dissipating heat away from LED chips, which can extend LED lifespan by 30-40%. These profiles also improve light quality through diffuser covers that eliminate harsh hotspots, protect delicate LED strips from dust and physical damage, and create clean, professional aesthetics that integrate seamlessly into residential and commercial spaces.
LED aluminum profiles come in five main mounting configurations: surface-mount profiles for under-cabinet and display lighting; recessed profiles that integrate flush into ceilings and walls; corner/angled profiles (typically 45-degree) for cove lighting; suspended profiles for pendant-style commercial installations; and in-ground profiles with IP65+ ratings for outdoor pathways and landscaping. Each type addresses specific installation challenges and aesthetic requirements.
Diffuser selection balances brightness against visual comfort. Clear diffusers transmit 90-95% of light but leave LED dots visible—ideal for task lighting. Frosted diffusers offer 85-90% transmission with reduced dot visibility, suitable for under-cabinet applications. Milky/opal diffusers transmit 65-70% of light but create completely smooth illumination with no visible dots—preferred for hospitality and high-end residential settings. When choosing milky diffusers, specify LED strips with 30-40% higher output to compensate for transmission loss.
Aluminum dramatically outperforms plastic in thermal management—a critical factor for LED longevity. With thermal conductivity of approximately 201 W/(m·K), 6063-T5 aluminum transfers heat over 1,000 times more efficiently than plastic (0.1-0.3 W/(m·K)). Plastic channels trap heat against LED strips, potentially reducing lifespan by up to 50%. While aluminum has higher upfront costs, it delivers superior long-term value through fewer replacements and consistent performance over 50,000+ hours.
Calculate total wattage by multiplying your LED strip's wattage per meter by total installed length, then add 20-30% headroom. For example, a 10-meter installation using 14.4W/m strips requires 144W, meaning you should specify a 180-200W driver minimum. Drivers operating at maximum capacity run hotter and fail faster. Also verify your driver matches your LED strip voltage (typically 12V or 24V) and supports your intended dimming protocol (0-10V, DALI, or phase-cut) if dimming is required.



 Servicio en línea
 0086 136 3563 2360
 sales@sxalu.com
 +86 136 3563 2360
 español
 English
 français
 Deutsch
 русский
 português
 العربية
 ไทย
ไทย Việt
Việt Українська