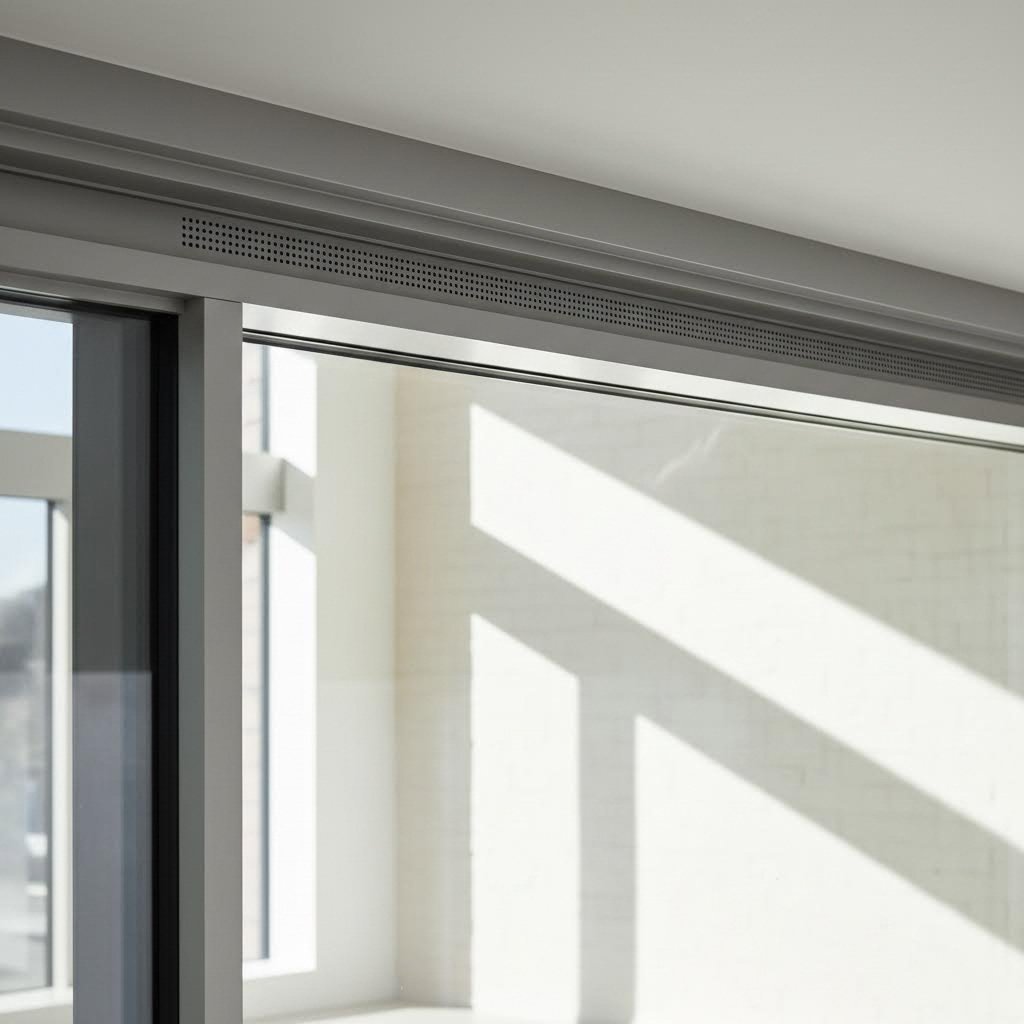
Ever noticed those small, slotted openings at the top of modern window frames? You might have wondered what they do or whether they serve any real purpose. These unassuming features are called trickle vents, and they play a surprisingly important role in keeping your home healthy, comfortable, and free from moisture problems.
So, what is a trickle vent exactly? A trickle vent is a small opening integrated into a window or door frame that allows fresh air to flow into your home while maintaining energy efficiency and security. According to GFD Homes, these vents provide continuous background ventilation, helping to improve air quality without needing to open your windows fully. Think of them as your home's breathing mechanism, working quietly in the background to keep indoor air fresh and balanced.
Window trickle vents serve three primary functions that directly impact your living environment:
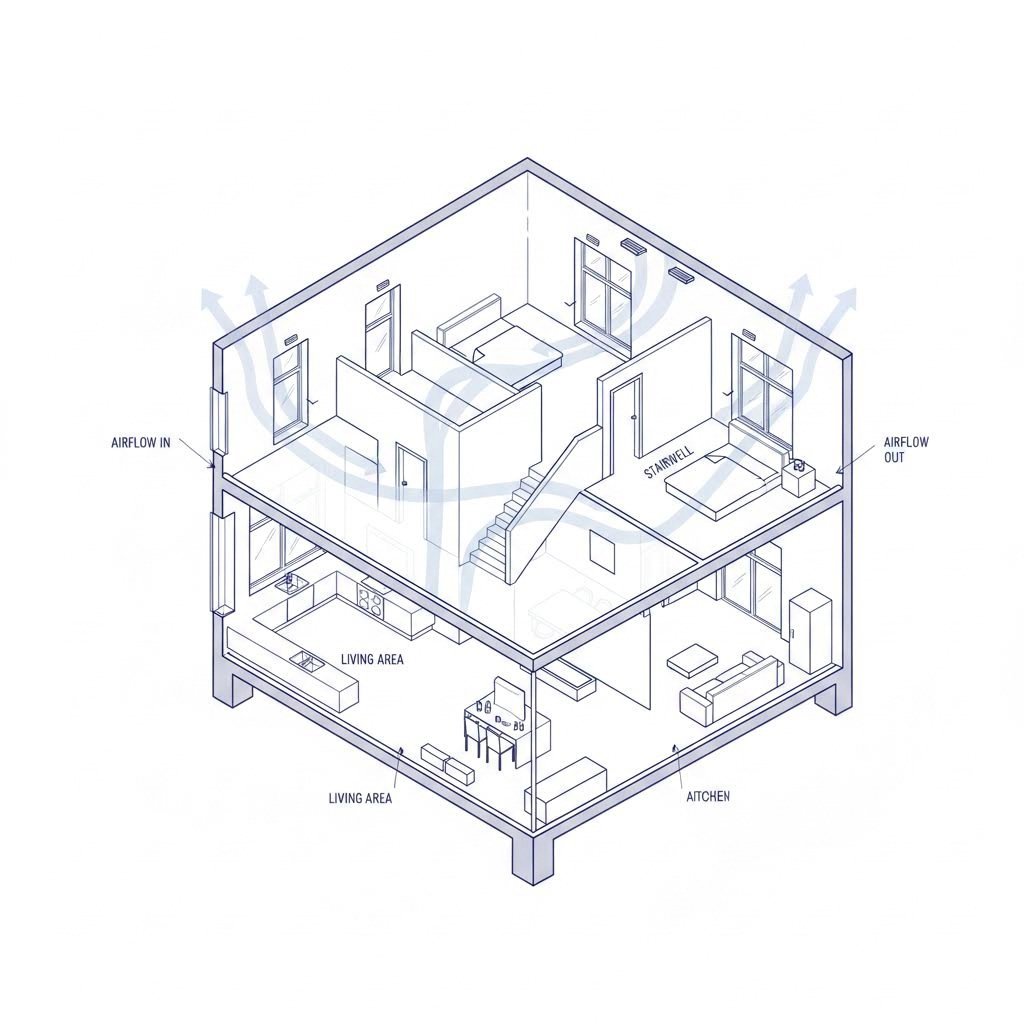
Imagine warm air behaving like smoke rising from a candle. This is essentially what happens inside your home. Warm, moisture-laden air naturally rises toward the ceiling and looks for an escape route. Trickle ventilation windows harness this basic principle of physics to create passive ventilation without any mechanical systems.
When the vent is open, it allows a small amount of air to "trickle" in, hence the name. This process relies on what scientists call the stack effect, where warm air inside a building rises and exits through vents at a higher level. As warm air escapes, it creates slight negative pressure that draws in cooler, fresh air from outside through lower-level openings.
The beauty of this system lies in its simplicity. There are no fans, filters, or electricity costs involved. The system works continuously in the background, helping to reduce condensation, improve air quality, and support a more comfortable, efficient home. Modern trickle vents are typically made from durable materials such as PVC or aluminium and often feature adjustable controls that let you manage the level of airflow based on your preferences or weather conditions.
You might be wondering why aluminium frames specifically benefit from trickle vents. The answer comes down to thermal conductivity, the rate at which a material transfers heat.
Aluminium conducts heat approximately 1,000 times faster than uPVC. While this makes aluminium incredibly strong and allows for sleeker frame profiles, it also means these frames can become cold spots during winter months. When warm, humid indoor air meets a cold aluminium surface, condensation forms almost immediately, just like water droplets appearing on a cold glass of water on a summer day.
Without proper ventilation, this condensation can lead to several problems:
Trickle vents address these challenges by ensuring a consistent exchange of stale indoor air with fresh outdoor air. This continuous airflow prevents moisture from accumulating on cold aluminium surfaces, protecting both your windows and your home's overall health. For households with children, elderly residents, or individuals with respiratory conditions, this ventilation becomes even more critical for maintaining a safe living environment.
Understanding the legal requirements for trickle vents in windows can feel overwhelming at first. However, getting this right is essential whether you're building a new home, renovating an existing property, or simply replacing old windows. Let's break down what the UK Building Regulations actually require and what it means for your project.
In June 2022, the UK government updated Approved Document F of the Building Regulations, which specifically addresses ventilation in dwellings. The fundamental requirement is straightforward: "There shall be adequate means of ventilation provided for people in the building."
But what does "adequate" actually mean? According to the regulations, your home's ventilation system must achieve several key objectives:
The driving force behind these requirements is health protection. As stated in the approved document: "The aim of requirement F1(1) is to protect the health of occupants of the building by providing adequate ventilation. Without adequate ventilation, mould and internal air pollution might become hazardous to health."
For trickle vents in windows, this means they must provide sufficient background ventilation to maintain air quality throughout your home. The regulations specify that background ventilators should generally be left in the open position and placed at least 1700mm above floor level to reduce cold draughts while remaining accessible to occupants.
Here's where things get technical, but understanding this concept is crucial for compliance. Trickle air vents for windows aren't measured by their physical size. Instead, they're rated by their "equivalent area" (EA), measured in square millimetres.
Equivalent area represents the aerodynamic performance of a ventilator. According to the Building Regulations, it's defined as "the area of a sharp-edged circular orifice through which air would pass at the same volume flow rate, under an identical applied pressure difference, as through the opening under consideration."
In simpler terms, imagine a perfectly circular hole with no obstructions. The equivalent area tells you how much air can actually flow through your trickle vent compared to that ideal opening, accounting for any baffles, grilles, or design features that might restrict airflow.
The minimum equivalent area requirements vary depending on room type and building configuration:
| Room Type | Multi-Storey Dwellings (Minimum EA) | Single-Storey Dwellings (Minimum EA) |
|---|---|---|
| Habitable rooms (bedrooms, living rooms) | 8,000mm² | 10,000mm² |
| Kitchen | 8,000mm² | 10,000mm² |
| Bathroom | 4,000mm² | 4,000mm² |
| Utility room | No minimum | No minimum |
| Sanitary accommodation (toilet only) | No minimum | No minimum |
Additionally, the total number of trickle vents windows must have in habitable rooms and kitchens should be at least four for one-bedroom properties and five for properties with more than one bedroom. For open-plan kitchen and living areas, at least three ventilators should be provided within the combined space.
The compliance requirements differ significantly depending on whether you're working on a new construction or an existing property. Understanding these distinctions will help you plan your project correctly.
New Build Requirements
For new dwellings, the regulations are clear-cut. All habitable rooms must include trickle vents in windows meeting the minimum equivalent area requirements outlined above. There's no flexibility here; compliance is mandatory before occupancy certificates are issued.
New builds must also consider whether the property qualifies as "less airtight" or "highly airtight." Less airtight dwellings have a design air permeability higher than 5m³/(h·m²) at 50Pa and can rely on natural background ventilation through trickle vents. Highly airtight properties may require mechanical ventilation systems, though continuous mechanical extract ventilation still requires background ventilators in habitable rooms with a minimum equivalent area of 4,000mm² each.
Retrofit and Renovation Applications
When replacing windows in existing properties, the regulations take a different approach. According to Everest, "When replacing windows, any existing trickle vents must be replaced, and new windows must install trickle vents, or demonstrate that sufficient background ventilation is provided by other means."
The key principle for retrofit work is that ventilation should not become "less satisfactory than before the work was carried out." This means:
For properties undergoing energy efficiency improvements, the regulations become more complex. Installing measures like cavity wall insulation, loft insulation, or draught-proofing can significantly reduce natural air infiltration. The Building Regulations use a categorisation system to determine whether additional ventilation provisions are needed based on how many "major" and "minor" energy efficiency measures have been implemented.
Important: Building Regulations are subject to change. Always seek approval from your local building control body before starting any building work to ensure your project meets current requirements.
With compliance requirements now clear, the next consideration is choosing the right type of trickle vent for your aluminium window frames, as different designs offer varying levels of performance and compatibility.
Choosing the right type of trickle vent for your aluminium windows isn't simply a matter of picking the first option you find. Different vent designs offer distinct advantages depending on your frame profile, acoustic requirements, and thermal performance goals. Understanding these differences will help you make an informed decision that balances ventilation needs with energy efficiency and noise control.
There are three primary categories of drip vents in windows suitable for aluminium frames: through-frame slot vents, over-frame canopy vents, and glazed-in vents. Each type integrates differently with aluminium profiles and performs uniquely across key criteria. Let's explore what makes each option work and when you should consider using them.
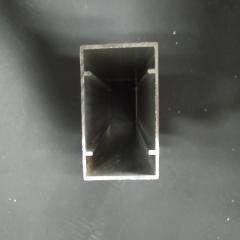
Through-frame slot vents, sometimes called tickle vents by those unfamiliar with the technical terminology, represent the most common and discreet ventilation solution for aluminium windows. These vents are integrated directly into the window frame during manufacturing, with slots cut into the top of the frame that allow air to flow directly into the room.
Why do slot vents work particularly well with aluminium? The answer lies in the material's strength-to-weight ratio. Unlike uPVC, which requires substantial wall thickness for structural integrity, aluminium frames can maintain their rigidity even with ventilation slots machined into them. This allows manufacturers to create sleek, low-profile vent designs that don't compromise the window's contemporary aesthetic.
The typical slot vent consists of two components:
Standard slot vents for aluminium frames typically provide equivalent areas ranging from 2,500mm² to 5,000mm² per unit. For rooms requiring 8,000mm² of background ventilation, you would need at least two vents working together. The slim profile of these vents, often measuring just 12-15mm in height, makes them virtually invisible when the window is viewed from outside.
One consideration with slot vents is their installation timing. Because they're integrated into the frame structure, they must be specified during the window ordering process. Retrofitting slot vents to existing aluminium windows requires professional machining of the frame, which can be costly and risks damaging the powder-coated finish.
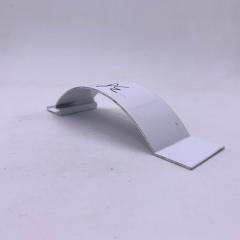
When integrating ventilation directly through the frame isn't feasible, over-frame vents offer a practical alternative. As the name suggests, these vents sit above or over the window frame rather than within it. This design makes them particularly valuable for retrofit applications where modifying the existing frame structure isn't practical.
Over-frame vents come in several configurations:
The primary advantage of over-frame solutions is installation flexibility. Because they don't require cutting into the aluminium profile, they can be added to existing windows without specialist equipment. This makes them ideal for homeowners upgrading ventilation in properties with older aluminium frames that lack factory-fitted vents.
However, visibility is the trade-off. Over-frame vents are inherently more noticeable than integrated slot designs. For properties where aesthetics are paramount, such as listed buildings or contemporary architectural projects, this increased visibility may influence your choice. Many manufacturers now offer over-frame vents in colours matched to popular aluminium RAL finishes, helping to minimize visual impact.
Glazed-in vents represent the third option, incorporating ventilation directly into the sealed glass unit rather than the frame. According to Durajoin, these vents are positioned within the upper section of the glazing unit and are especially beneficial for windows with limited frame space or unique architectural features. However, glazed-in options require specialized installation and are less commonly specified for residential aluminium windows due to their complexity and cost.
Here's something most guides overlook entirely: not all trickle vents are created equal when it comes to noise. If your property is near a busy road, flight path, or entertainment district, standard vents could undermine any acoustic glazing you've invested in. This is where acoustic trickle vents become essential.
According to Titon, acoustic trickle vents look and work like standard versions but feature more complex internal designs that attenuate noise more effectively. These specialized vents incorporate several noise-reducing features:
Acoustic performance is measured using the Dn,e,w rating, which indicates the sound reduction capability across various frequencies. Higher values mean better noise attenuation. A standard trickle vent might offer around 30-35 dB reduction, while premium acoustic models can achieve 44 dB or more. For context, the World Health Organization defines noise levels above 65 dB as noise pollution, and BS 8233:2014 recommends that noise levels in habitable rooms should not exceed 35 dB for comfortable living.
When selecting acoustic vents for aluminium frames, consider that the frame material itself doesn't dampen sound as effectively as timber. This makes the vent's acoustic rating even more critical. Premium Velfac trickle vent systems and similar high-performance options are specifically engineered to address this challenge, though they come at a higher price point.
To help you evaluate which vent type best suits your aluminium window project, the following comparison breaks down key performance criteria:
| Criteria | Slot Vents (Through-Frame) | Over-Frame/Canopy Vents | Glazed-In Vents |
|---|---|---|---|
| Airflow Capacity (Typical EA) | 2,500 - 5,000mm² per unit | 4,000 - 8,000mm² per unit | 2,000 - 4,000mm² per unit |
| Noise Reduction (Standard) | 30-35 dB (up to 44 dB acoustic models) | 28-32 dB (up to 42 dB acoustic models) | 25-30 dB |
| Thermal Efficiency | Excellent - minimal thermal bridging | Good - some thermal bridging possible | Good - depends on glass unit design |
| Aluminium Compatibility | Excellent - designed for slim profiles | Good - works with all frame types | Moderate - limited frame clearance needed |
| Retrofit Suitability | Poor - requires frame modification | Excellent - no frame changes needed | Poor - requires glass unit replacement |
| Visual Impact | Minimal - integrated design | Moderate - visible external housing | Minimal - within glazing |
| Typical Cost | £15-40 per unit | £25-60 per unit | £40-80 per unit |
For new aluminium window installations, slot vents typically offer the best balance of performance, aesthetics, and value. Their integrated design maintains the clean lines that make aluminium frames appealing while providing reliable background ventilation. If noise is a significant concern, specify acoustic-rated slot vents from the outset.
For retrofit projects, over-frame canopy vents provide the most practical solution. They can be installed without modifying your existing aluminium frames and offer generous airflow capacities that help meet Building Regulations requirements. Just be prepared for a slightly more visible installation.
With the right vent type selected, the next step is understanding what's involved in retrofitting these systems to your existing aluminium windows, including the specific challenges that this material presents compared to uPVC or timber alternatives.

So you've decided your existing aluminium windows need better ventilation. Perhaps you've noticed persistent condensation, or maybe a building inspector has flagged the issue during a property assessment. Whatever the reason, retrofitting a trickle vent window solution to aluminium frames requires a different approach than working with uPVC or timber. The good news? With proper preparation and the right techniques, it's entirely achievable.
Unlike uPVC frames, which can be drilled and cut with relative ease, aluminium presents unique challenges that demand careful planning. The material is harder, conducts heat differently, and often features complex internal profiles that can complicate installation. Understanding these factors before you begin will save you time, money, and potential frustration.
Before purchasing any trickle vent components, you need to determine whether your existing aluminium frames can accommodate them. Not all windows are suitable for retrofitting, and accurate measurements are essential for a successful installation.
Here's the systematic approach to measuring your aluminium window frames:
Once you've gathered these measurements, compare them against the specifications of your chosen vent system. If your frame dimensions fall outside the recommended parameters, you may need to consider over-frame solutions rather than through-frame installations.
Working with aluminium frames presents several technical challenges that don't exist with softer materials like uPVC or timber. Understanding these before you start will help you prepare appropriately.
Material Hardness and Cutting Requirements
Aluminium alloys used in window frames are significantly harder than uPVC. Standard wood or plastic drill bits will quickly dull or break when applied to aluminium. You'll need high-speed steel (HSS) or cobalt drill bits specifically rated for non-ferrous metals. For cutting slots, a jigsaw with fine-toothed metal-cutting blades or an oscillating multi-tool with appropriate attachments works best.
The cutting process also generates heat, which can damage the powder-coated finish around the cut area. Working slowly and using cutting lubricant helps prevent discolouration and maintains the frame's appearance.
Powder Coating and Finish Protection
Most aluminium window frames feature factory-applied powder coating for corrosion resistance and aesthetics. This finish is durable but can chip, scratch, or flake if handled roughly during installation. Before cutting or drilling:
Thermal Break Considerations
Modern thermally broken aluminium frames contain polyamide or polyurethane barriers that separate the internal and external aluminium sections. These thermal breaks improve insulation but create installation complications. Cutting through a thermal break compromises its effectiveness and can create pathways for condensation and heat transfer.
When retrofitting vents, position your cuts to avoid bisecting thermal break materials wherever possible. If cutting through the break is unavoidable, use thermal break-compatible sealants during installation to restore some of the lost insulation value.
Swarf Management
Aluminium cutting produces fine metal shavings called swarf. Unlike plastic debris, these sharp particles can scratch surfaces, contaminate drainage channels, and potentially cause injury. Vacuum the work area frequently during cutting, and thoroughly clean all frame cavities before installing vent components. Any swarf left inside the frame can eventually work its way into drainage slots and cause blockages.
Every aluminium window system has its own profile geometry, which directly affects retrofitting options. Understanding your frame's configuration helps you select compatible components and avoid installation mistakes.
Identifying Your Profile System
Major aluminium window system manufacturers include Schuco, Reynaers, Senior, Smart Systems, and Kawneer. Each uses proprietary profile designs with different cavity dimensions, wall thicknesses, and gasket positions. If you know your window manufacturer, contact them directly for retrofit vent recommendations. Many offer purpose-designed vent solutions that integrate seamlessly with their existing profiles.
If the manufacturer is unknown, compare your frame's cross-section measurements against published profile catalogues. A window specialist or the original installer may be able to identify the system from photographs.
When Trickle Vent Blanking Plates Become Necessary
Here's a scenario many homeowners encounter: you've removed old, damaged vents or discovered unused vent openings in your frames. Rather than leaving these gaps exposed, a trickle vent blanking plate provides a clean, weatherproof seal.
Blanking plates are purpose-made covers that fit standard vent slot dimensions. They're useful in several situations:
When selecting blanking plates for aluminium frames, ensure they're made from compatible materials. Aluminium or rigid PVC plates work best, as they won't expand or contract differently from the frame material. Avoid steel plates, which can cause galvanic corrosion when in contact with aluminium in wet conditions.
Addressing Non-Standard Situations
Older aluminium windows or custom-manufactured frames may not match standard vent dimensions. In these cases, you have several options:
If your aluminium frames prove incompatible with retrofit trickle vents despite best efforts, consider whether the cost of modification exceeds the value of window replacement. Modern aluminium window systems come with factory-integrated ventilation solutions that eliminate retrofitting complications entirely.
With your frames measured, challenges understood, and profile considerations addressed, you're ready to move forward with the actual installation process. The next section provides detailed step-by-step guidance for fitting trickle vents to aluminium windows, including clear direction on when DIY makes sense and when professional installation is the smarter choice.
You've measured your frames, selected the right vent type, and gathered your materials. Now comes the moment of truth: actually fitting trickle vents to your aluminium windows. But here's the question that stops many homeowners in their tracks—should you tackle this yourself, or is it time to call in a professional?
The answer isn't one-size-fits-all. Your decision depends on the type of installation required, your comfort level with power tools, and the specific challenges your aluminium frames present. Let's break down exactly what's involved so you can make an informed choice.
Installing a window trickle vent yourself can be a satisfying weekend project that saves you money on labour costs. However, DIY installation is only appropriate in certain circumstances. Consider taking on the project yourself if:
DIY installation typically works well for over-frame canopy vents that mount externally without requiring frame modification. These systems attach using screws into the wall or frame face, avoiding the need to cut slots through the aluminium profile itself.
However, if your project involves cutting slots into the aluminium frame for through-frame vents, the stakes increase considerably. One misaligned cut or slip of the drill can permanently damage your window, potentially requiring expensive replacement rather than simple repair.
Ready to proceed with fitting trickle vents aluminium windows yourself? Follow this detailed process for the best results. These instructions apply primarily to surface-mounted over-frame vents, which represent the most accessible DIY option for existing aluminium windows.
Required Tools and Materials
Before starting, gather everything you'll need. Having all tools at hand prevents mid-project interruptions that can lead to mistakes:
Safety Warning: Always wear safety glasses when drilling into aluminium. Metal swarf can cause serious eye injuries. Work gloves protect against sharp edges on cut aluminium and the vent components themselves.
Installation Steps
With your tools assembled and safety gear on, follow these steps to install your trickle vents for windows:
Important: If you encounter unexpected resistance when drilling, stop immediately. You may have hit internal reinforcement, a thermal break, or glazing hardware. Reassess the position before continuing to avoid costly damage.
For through-frame slot vent installations that require cutting actual ventilation slots into the aluminium profile, the process is significantly more complex. You'll need a jigsaw or oscillating multi-tool with metal-cutting blades, and the margin for error is minimal. Unless you have demonstrable metalworking experience, this type of installation is best left to professionals.
Sometimes the smartest DIY decision is recognising when not to DIY. Professional installation becomes the sensible choice in several scenarios:
Complex Frame Modifications Required
If your installation requires cutting slots through the aluminium profile rather than surface mounting, professional help is strongly recommended. Glazing specialists have the precision tools and experience to make clean cuts without damaging thermal breaks, weatherseals, or the surrounding powder coating. They can also ensure cuts align perfectly with both internal and external vent components.
High-Level or Difficult Access
Windows above ground floor level or in awkward locations require appropriate access equipment and safety measures. Professionals carry insurance, use proper scaffolding or tower systems, and understand working-at-height regulations. The cost of hiring help is far less than potential medical bills or property damage from a ladder accident.
Warranty Preservation
As mentioned earlier, DIY installation typically voids manufacturer warranties on your windows. If your aluminium windows are relatively new or came with substantial guarantees, the warranty value may exceed any savings from self-installation. Contact your window supplier to discuss approved installers who can complete the work while maintaining coverage.
Building Regulations Compliance
For new builds, extensions, or significant renovations requiring building control sign-off, professional installation provides documentation of compliance. Inspectors may question DIY work without appropriate certification, potentially delaying project completion.
Multiple Windows or Large Projects
Installing vents across an entire property quickly becomes time-consuming. Professionals work efficiently due to repetition and can often complete whole-house installations in a single day. When you factor in your time value and the reduced risk of errors, professional installation frequently represents better overall value for larger projects.
Acoustic or Specialist Vents
High-performance acoustic trickle vents require precise installation to achieve their rated sound reduction. Incorrect fitting, gaps in sealing, or misaligned components can significantly compromise performance. If you've invested in premium acoustic ventilation, professional installation protects that investment.
What to Expect from Professional Installation
When hiring a professional for how to install trickle vents properly, expect the following:
Professional installation costs vary depending on location, access requirements, and the number of vents being fitted. Expect to pay between £40-80 per vent for surface-mounted installations, rising to £80-150 or more for through-frame installations requiring slot cutting. While this adds to your project cost, the peace of mind and quality assurance often justify the expense.
With your trickle vents successfully installed, whether through your own efforts or professional help, you'll immediately begin experiencing the benefits of improved ventilation. The next section explores exactly how these small additions protect your indoor air quality and contribute to a healthier living environment.
Now that your trickle vents are installed and operational, what tangible improvements can you expect? The benefits extend far beyond simply meeting Building Regulations requirements. Properly functioning window ventilation benefits your health, protects your property, and can even reduce your energy bills when managed correctly.
Imagine walking into a room that feels fresh and comfortable, with no musty odours or damp patches on the walls. That's the difference effective background ventilation makes. Let's explore exactly how these modest openings deliver such significant results.
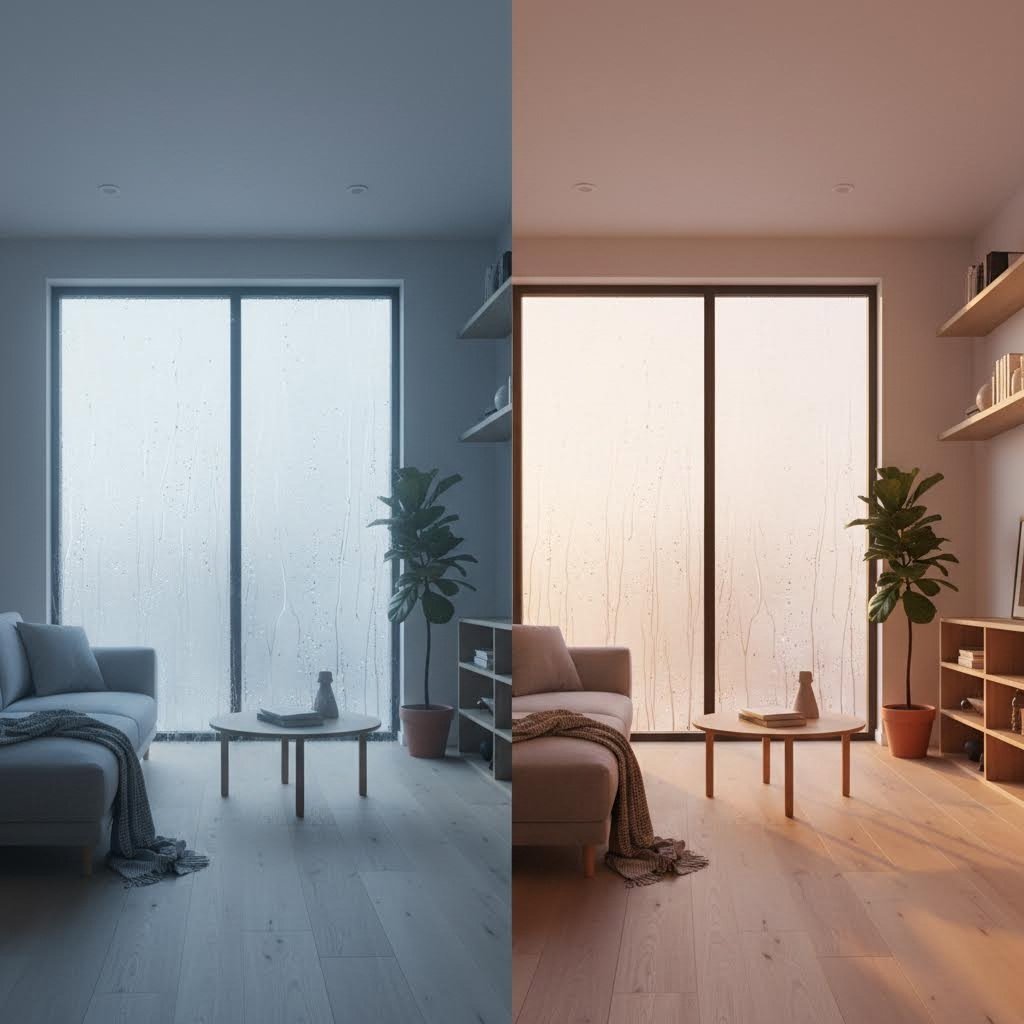
Have you ever woken up to find water streaming down your bedroom windows? This trickle vents condensation problem is more than just an inconvenience. It's a warning sign that your home's ventilation isn't keeping pace with the moisture your household generates.
According to SEH BAC, "The best treatment for condensation is heating and ventilation to allow moisture-bearing air to escape outside." Trickle vents address this directly by creating a continuous pathway for humid indoor air to exit while fresh, drier air enters.
The science is straightforward. When warm, moisture-laden air contacts a cold surface like an aluminium window frame, it cools rapidly. Cold air cannot hold as much moisture as warm air, so the excess water vapour condenses into liquid droplets on the frame and glass. Without intervention, this daily cycle creates the perfect environment for mold spores to thrive.
Trickle vents prevent mold with trickle vents by disrupting this cycle in two ways:
The health implications of poor ventilation are significant. Dekko Windows emphasises that "without adequate ventilation, mould and internal air pollution might become hazardous to health." For households with children, elderly residents, or anyone with asthma or allergies, proper ventilation becomes even more critical.
To illustrate the difference trickle vents make, consider these condensation risk factors:
| Condensation Risk Factor | Without Trickle Vents | With Trickle Vents |
|---|---|---|
| Indoor humidity during cooking | Can exceed 80%, persisting for hours | Maintained below 65% with continuous air exchange |
| Morning window condensation | Heavy buildup requiring daily wiping | Light or no visible moisture |
| Mold appearance risk | High, especially around frames and seals | Significantly reduced with proper airflow |
| Air quality after showering | Moisture spreads to adjacent rooms | Contained and gradually dispersed |
| Cold bridge effect on aluminium | Severe condensation on frame surfaces | Minimised through consistent ventilation |
| Paint and plaster deterioration | Common around window reveals | Rare when vents operate correctly |
Here's the concern that makes many homeowners hesitate: "Won't trickle vents just let all my expensive heating escape?" It's a reasonable question, especially given rising energy costs. The answer requires understanding how modern trickle vents energy efficiency actually works.
Yes, trickle vents do allow some heat transfer between indoors and outdoors. Any opening in your building envelope will have this effect. However, the energy impact is far smaller than many people assume, and the benefits frequently outweigh the costs.
Modern trickle vent designs incorporate several features that minimise heat loss:
Consider this perspective: the moisture damage caused by inadequate ventilation often costs far more to repair than any heating energy saved by sealing your home completely. Mold remediation, repainting damaged walls, and replacing rotted window components quickly exceed years of marginal heating savings.
Furthermore, excessive indoor humidity actually makes your home feel colder. Damp air conducts heat away from your body more efficiently than dry air. By maintaining lower humidity levels through proper ventilation, you may find you need less heating to feel comfortable, partially offsetting the energy cost of the ventilation itself.
For optimal trickle vents energy efficiency, adopt a seasonal approach. During mild weather, leave vents fully open to maximise air quality benefits. In cold periods, reduce openings to the minimum position while still maintaining some airflow. Never seal vents completely for extended periods, as this rapidly degrades indoor air quality and accelerates moisture problems.
Another common worry centres on security: "Doesn't any opening in my window create a vulnerability?" This concern is understandable, but modern trickle vent designs address it comprehensively.
Unlike an open window, trickle vents provide ventilation without creating an accessible entry point. The narrow slot dimensions, typically just 12-15mm in height, physically prevent intrusion. Even the most determined intruder cannot reach through, manipulate locks, or enlarge the opening without substantial noise and effort that would attract attention.
Quality trickle vents incorporate additional security considerations:
Insurance companies generally do not consider trickle vents a security concern when assessing property risk. They are standard components in modern fenestration and do not affect premiums or policy terms. If you have specific concerns, check with your insurer, but expect reassurance rather than problems.
The real security benefit of trickle vents lies in what they prevent. By enabling secure background ventilation, you no longer need to leave windows slightly open for air circulation, a practice that genuinely does create security vulnerabilities. Trickle vents provide the airflow you need while keeping your windows fully closed and locked.
With condensation controlled, energy efficiency balanced, and security maintained, your trickle vents will deliver years of reliable performance. However, like any building component, they require occasional attention to keep working at their best. The following section covers practical maintenance routines and troubleshooting tips to ensure your ventilation system continues performing optimally.
Your trickle vents are installed and working beautifully. But here's something many homeowners overlook: these small ventilation components need occasional attention to keep performing at their best. The good news? Trickle vent maintenance requires minimal effort and no specialist skills. A few minutes of care each season will ensure your vents continue delivering fresh air and preventing condensation for years to come.
Think of it like maintaining any other part of your home. You wouldn't ignore your gutters or heating system, and your ventilation deserves the same consideration. Let's explore exactly what's involved in keeping your aluminium window vents in peak condition.
Dust, pollen, and airborne particles inevitably accumulate within your trickle vents over time. According to Titon's maintenance guidance, regular cleaning trickle vents prevents blockages that reduce airflow effectiveness. The process is straightforward and requires no specialist equipment.
Here's your essential maintenance checklist:
After each cleaning session, ensure your vent is returned to the fully open position for proper ventilation. Many homeowners accidentally leave vents closed after cleaning, defeating the purpose entirely.
Your ventilation needs change throughout the year. What works perfectly in spring may prove inadequate during a humid summer or excessive during a cold winter snap. Understanding how to optimise your vent settings for different conditions maximises both comfort and efficiency.
Spring and Autumn
These transitional seasons typically offer ideal conditions for maximum ventilation. Leave vents fully open to take advantage of moderate temperatures and natural air movement. This is also the perfect time for thorough cleaning, preparing your vents for the more demanding seasons ahead.
Summer Months
During warm, humid periods, your vents work hardest to manage moisture levels. Keep them fully open, especially in kitchens and bathrooms where humidity spikes during cooking and bathing. If you notice increased condensation despite open vents, inspect for blockages that may have developed.
Winter Period
Cold weather creates the greatest temptation to close vents entirely. Resist this urge. While you can reduce the opening to minimise cold drafts, maintaining some airflow remains essential. According to Air Box, winter sees increased mold growth and damp problems precisely because homeowners prioritise warmth over ventilation. A partially open vent provides the balance you need.
Consider your heating schedule when adjusting winter vent positions. During active heating periods, slightly increased ventilation helps manage the moisture released as cold surfaces warm up. Overnight, when heating drops, reducing vent openings minimises heat loss while maintaining minimum air quality standards.
Even well-maintained trickle vents occasionally develop problems. Recognising symptoms early prevents minor issues from becoming major headaches. Here are the most common trickle vent problems and their solutions:
Blocked Trickle Vent Fix
Symptoms include reduced airflow, persistent condensation despite vents appearing open, and visible debris within the slot. Start by removing loose material with a vacuum. For stubborn blockages, use a pipe cleaner or thin brush to dislodge compacted debris. If the blockage persists, the vent cover may need removal for deeper access. Check that curtains or blinds aren't covering the vent opening, which is a surprisingly common oversight.
Sticking or Jammed Sliders
If the opening mechanism moves reluctantly or not at all, paint contamination or debris in the track is usually responsible. Clean the slider channel thoroughly with a damp cloth, then apply silicone lubricant sparingly. Avoid forcing the mechanism, as this can crack plastic components or bend aluminium tracks.
Drafts When Closed
A properly closed vent should seal reasonably well. Noticeable drafts indicate worn gaskets, damaged seals, or misaligned components. Inspect the closing mechanism for complete engagement. If seals appear perished or compressed flat, replacement gaskets are available from most vent manufacturers.
Water Ingress
Water entering through your vent suggests failed external canopy sealing or blocked drainage channels. Check that the external cover sits flush against the frame without gaps. Ensure any drainage slots in the canopy remain clear of debris. Deteriorated silicone sealant should be carefully removed and replaced.
Rattling or Noise
Loose components or worn fixings typically cause rattling during windy conditions. Tighten all accessible screws and check that the internal and external covers remain firmly attached. If clashing with the frame prevents normal window operation, consult a professional for realignment.
When Replacement Becomes Necessary
Most quality trickle vents last 15-20 years with proper care. However, replacement is warranted when:
When sourcing replacements, match the equivalent area rating and physical dimensions of your existing vents to ensure Building Regulations compliance remains intact. With proper maintenance established, your attention can now turn to selecting the ideal vents for any future projects or replacements.

You've learned how trickle vents work, understood the regulations, explored different types, and discovered how to install and maintain them. Now comes the practical question: which vents should you actually buy for your aluminium windows? With dozens of options available across various sizes, finishes, and performance levels, making the right choice requires careful consideration of your specific requirements.
Think of selecting trickle vents like choosing the right tyres for your car. The best option depends entirely on your circumstances—what you're driving, where you're driving, and what conditions you'll encounter. The same principle applies here. Your ideal aluminium window vent options will differ based on room sizes, noise exposure, aesthetic preferences, and whether you're working on a new build or retrofit project.
Getting the size right isn't simply about what fits your frame. It's about ensuring adequate ventilation to meet both Building Regulations and your household's actual needs. As covered earlier, equivalent area (EA) ratings determine how much air can flow through a vent, and different rooms require different minimums.
When calculating trickle vent sizes for your project, consider these key factors:
According to Glazing Supplies Direct, common trickle vent sizes serve specific purposes: 200mm vents work well for compact sashes and smaller rooms like bathrooms; 300mm options suit standard domestic installations and living areas; while 400mm vents deliver higher airflow for large frame openings and open-plan spaces.
For a typical three-bedroom house with aluminium windows throughout, you might need:
| Room | Minimum EA Required | Suggested Vent Configuration |
|---|---|---|
| Master bedroom | 8,000mm² | 2 x 300mm vents or 1 x 400mm vent |
| Secondary bedrooms | 8,000mm² each | 2 x 300mm vents per room |
| Living room | 8,000mm² | 1 x 400mm vent or 2 x 300mm vents |
| Kitchen | 8,000mm² | 2 x 300mm vents |
| Bathroom | 4,000mm² | 1 x 200mm or 1 x 300mm vent |
Always verify specific EA ratings from your chosen manufacturer, as performance varies between products. A 300mm vent from one supplier might offer different airflow characteristics than the same length from another.
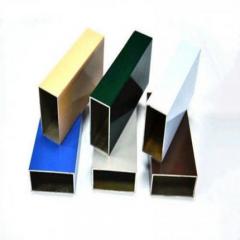
Here's where aesthetics meet practicality. Your trickle vents will be visible every time you look at your windows, so choosing finishes that complement your aluminium frames matters. Mismatched vents can undermine the sleek, contemporary appearance that makes aluminium windows so appealing.
Modern trickle vents are available in several finish categories:
Standard Colours
White remains the most popular choice, particularly for properties with white or light-coloured frames. Quality white vents use UV-stable materials like ASA plastic that resist yellowing and discolouration over time. For darker frames, black, brown, and anthracite grey options provide better visual integration.
RAL Colour Matching
Premium aluminium windows often feature powder-coated finishes in specific RAL colours. Some vent manufacturers offer RAL-matched options or can supply vents in custom colours for larger orders. While this adds cost, the seamless appearance may justify the investment for high-specification projects.
Metallic Finishes
According to Titon, metal vents are gaining popularity because they "blend more naturally with modern profiles" and offer "slimline designs that sit flush with the window frame, maintaining sleek visual continuity." Aluminium-bodied vents particularly complement aluminium window frames, creating a cohesive material palette.
When selecting finishes, also consider:
Not all trickle vents are created equal. Investing in quality products pays dividends through longer service life, better performance, and fewer maintenance headaches. But how do you distinguish quality from false economy?
When evaluating the best trickle vents aluminium windows can accommodate, prioritise these selection criteria:
The material construction particularly matters for longevity. As Titon notes, plastic vents "can degrade over time" with "UV exposure causing discolouration" and vents in exposed areas potentially cracking or becoming brittle. Metal alternatives offer "greater robustness" and "maintain structural integrity over time, reducing the need for replacements."
Budget Considerations
Trickle vent pricing varies considerably based on size, material, and performance level. Expect to pay:
While budget constraints are real, avoid false economy. Cheap vents that fail after a few years cost more to replace than quality products that last decades. Factor in the labour cost of repeat installations when comparing options.
Where to Buy Trickle Vents Online
When you're ready to buy trickle vents online, several options exist. Specialist glazing suppliers offer trade-quality products with technical support. General building merchants stock popular sizes and finishes. Manufacturer direct sales, such as those available through Shengxin Aluminium's ventilation products range, provide access to purpose-designed solutions with consistent quality control.
Before purchasing, confirm:
With the right trickle vents selected and installed, your aluminium windows will deliver years of effective, controlled ventilation. You'll enjoy fresher air, reduced condensation, and the peace of mind that comes from knowing your home meets modern ventilation standards. Whether you're completing a new build, upgrading existing windows, or simply replacing worn-out vents, the investment in quality ventilation products protects both your property and your family's health for the long term.
Yes, you can add trickle vents to existing aluminium windows through retrofitting. Modern trickle vents are designed to be practically undetectable and can be colour-matched to your aluminium frame finish. For retrofit applications, over-frame canopy vents offer the most practical solution as they mount externally without requiring frame modification. Surface-mounted options attach using screws into the wall or frame face, avoiding the need to cut slots through the aluminium profile. If through-frame installation is required, professional help is recommended due to aluminium's hardness and the risk of damaging thermal breaks or powder coating.
While trickle vents offer significant benefits, there are potential disadvantages to consider. Improper installation can allow vehicle exhaust or outdoor pollutants to enter if vents are positioned incorrectly. Standard vents provide minimal security compared to closed windows, though modern designs feature fixed external grilles and internal-only controls to address this. Some heat loss occurs through any opening in your building envelope, though this is typically far less than the cost of repairing moisture damage caused by inadequate ventilation. Additionally, vents require regular maintenance to prevent blockages from dust, pollen, and debris accumulation.
Preventing condensation on aluminium windows requires a combination of heating and ventilation strategies. Trickle vents are highly effective as they create continuous background ventilation, allowing humid indoor air to escape while fresh, drier air enters. This maintains indoor humidity within the healthy 40-60% range. Keep your home at a consistent temperature to reduce temperature differentials between warm indoor air and cold aluminium surfaces. Ensure vents remain in the open position, especially during cooking and bathing when humidity spikes. Regular maintenance of your trickle vents ensures they remain unblocked and functioning optimally.
Several alternatives to traditional trickle vents exist for achieving adequate ventilation. Extractor fans provide mechanical extraction in high-moisture areas like kitchens and bathrooms. Passive stack ventilation uses natural air movement through vertical ducts. Open windows offer purge ventilation but compromise security and energy efficiency. Mechanical ventilation with heat recovery (MVHR) systems provide whole-house ventilation while recovering heat from extracted air. Some manufacturers now offer windows and doors designed with less visible integrated ventilation. However, for Building Regulations compliance in most residential applications, background ventilators like trickle vents remain the most cost-effective and practical solution.
Trickle vent pricing varies based on size, material, and performance level. Basic plastic vents typically cost £8-15 per unit, while mid-range options with UV-stable materials range from £15-30. Premium acoustic or metal vents cost between £30-60, with specialist high-performance systems reaching £60-100 or more per unit. Professional installation adds £40-80 per vent for surface-mounted options, rising to £80-150 for through-frame installations requiring slot cutting. For quality and longevity, Shengxin Aluminium offers durable window trickle vents suitable for uPVC, aluminium, and timber windows at competitive prices.


 Servicio en línea
 0086 136 3563 2360
 sales@sxalu.com
 +86 136 3563 2360
 español
 English
 français
 Deutsch
 русский
 português
 العربية
 ไทย
ไทย Việt
Việt Українська